3D Map QGIS
QGIS 3D is the three-dimensional visualization tool built into QGIS, a popular open-source GIS software. It allows users to view and interact with terrain, buildings, and other spatial features in a 3D environment, similar to ArcScene or ArcGIS Pro 3D Scene view.
Key Features of QGIS 3D View:
- 3D Map View
- Open a 3D View from any 2D map in QGIS.
- Real-time 3D navigation using pan, zoom, tilt, and rotate tools.
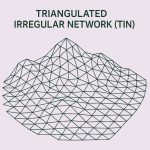
- Digital Elevation Model (DEM) Support
- Add elevation (Z-values) to your data using a DEM.
- You can drape vector or raster layers over terrain.
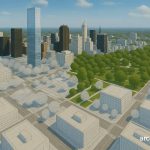
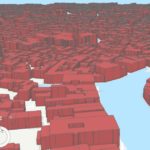
- Building Extrusion
- Extrude vector layers (e.g., buildings) using attributes like height.
- Visualize 3D city models from footprints and elevation data.
- Materials and Lighting
- Control lighting direction and intensity.
- Add textures and adjust material colors (glass, metal, etc.).
- CRS and Z-axis Settings
- Supports coordinate reference systems with elevation (e.g., EPSG:4979).
- Customize vertical exaggeration and terrain scale.
- Animation & Export
- Fly-through camera animations (via plugins like TimeManager).
- Export 3D scenes as images, video, or 3D models (GLTF/OBJ).
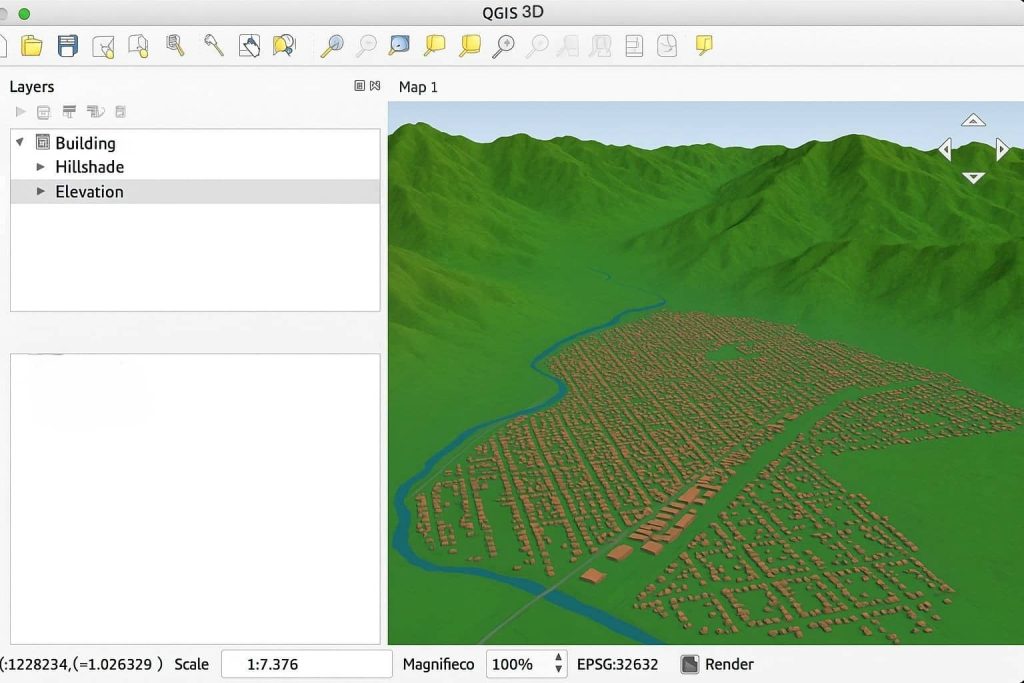
Create a 3D Scene
In QGIS you can create a 3D model in a few simple steps:
1. Add a Data layer that contains 3D data, like a DEM
2. Open a new 3D Map View, go to View menu > New 3D Map View (shortcut- Ctrl+Alt+M)

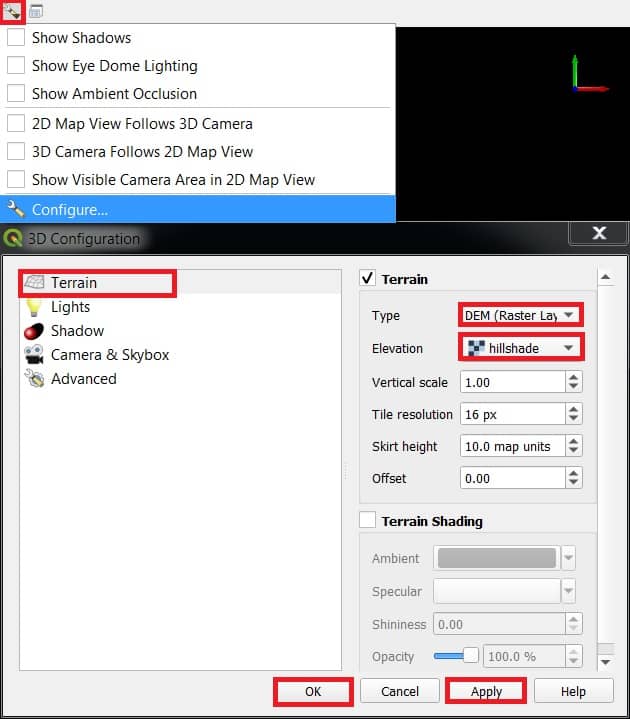
3. 3D Map View window appear, open the configuration options.
4. Select Terrain, set ‘Type’ to ‘DEM (Raster Layer)’ and select your data layer from the drop-down.
5. Adjust the view angle to show the 3D attributes.
6. Finally click Apply, then Ok button.
3D Map View Toolbars
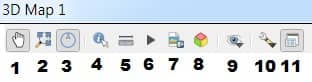
- Camera Control
- Zoom Full
- Toggle On-Screen Nagigation
- Identity
- Measurement Line
- Animations
- Save as Image
- Export 3D Scene
- Set View Theme
- Options
- Dock 3D Map View
Add 3D View to a Map Layout
- Create a new map layout
- On the Project manu, select New Print Layout.
- Create Print Layout window appear, write the layout name.
- Select Add 3D map from the toolbox or from the Add Item drop-down on the main menu
- Click and drag to specify the location of the 3D map
- Select your 3D Map View from the Copy Settings from 3D View drop-down
- Select your 3D Map View from the Set From a 3D View drop-down
- Now your 3D view will appear in the map layout.