ArcGIS Urban
What is ArcGIS Urban?
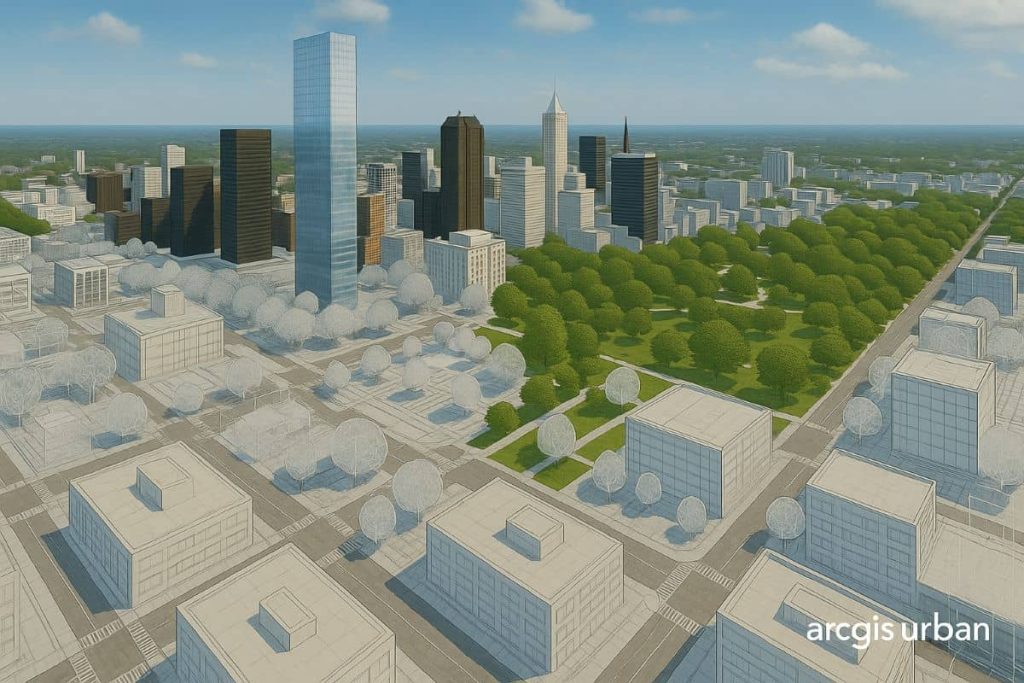
ArcGIS Urban makes creating, editing, and managing land-use and zoning plans simple with an interactive 3D environment built with planners in mind. It also enables the creation of on-the-fly scenarios to help visualize the areas that would be affected by proposed urban developments.
It enables the digital transformation of the city, regional planning and web-based 3D application to encourage collaboration with community stakeholders and help all groups work toward a more sustainable future.
Features:
- Smart City Planning
- Design 3D scenarios
- Land-use changes to meet future demand
- Land-use and zoning plans
ArcGIS Urban Tutorial
Before using ArcGIS Urban, Sign Up/ Sign In to the ArcGIS Online portal.
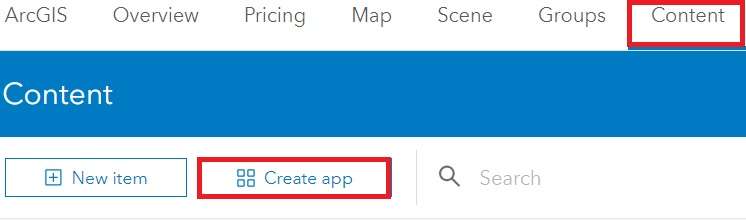
1. Click Content, then Click Create app and select Urban.
2. Click New, and for Template, choose USA Default. Write name such as ‘New York Town’, then click Set up Urban.
Add Basemaps
1. In the search bar, search New York Town, and select it.
2. Press the X in the search bar to remove the location point.
3. On the top right of the toolbar, click the Manage![]() button.
button.
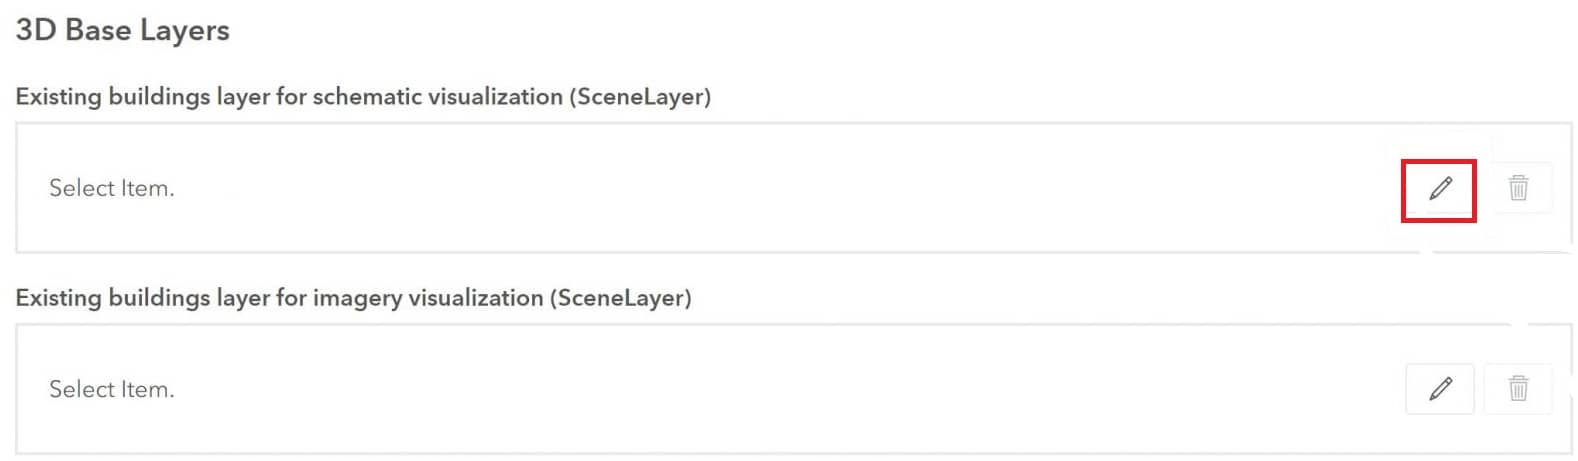
4. Under 3D Base Layers, for Existing buildings layer for schematic visualization (SceneLayer), click the Select Item button.
5. From the dropdown, select ArcGIS Online.
6. Search for New York Town, and select any Buildings, then Click OK.
7. Under 3D Base Layers, for Existing buildings layer for imagery visualization (SceneLayer), click the Select Item button, and follow the same process.
8. Scroll down on the main settings page to the Initial Visualization setting, and choose Imagery.

Add Parcels
1. On the data manager toolbar, click Layers and select Parcels. On the parcels page, click Add.
2. Search and select your parcels data, then click OK.
3. On the top left of the toolbar, click the back arrow button to return to the overview.

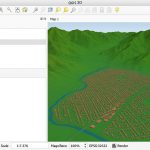
3D buildings are added for the city of New York. You can navigate around the scene, use the following keyboard and mouse actions in ArcGIS Urban:
| Action | Description |
|---|---|
| Left-click | Pan |
| Right-click | Rotate |
| Double-click | Zoom in a pointer |
| Mouse scroll | Zoom in and out |
| Press- N | Set the view to north orientation |
| Press- P | Set the view perpendicular to the ground |
| Press- J | Move down, closer to the view |
| Press- U | Move up, away from the view |
| Press arrow keys | Move the view left, right, up, or down |
Draw the Planning Area
1. On the top right of the overview toolbar, click the Add button and select the Zoning Plan.
2. Draw your plan area by clicking points around the map. Double click to finish drawing.
3. You will then have the option to name your plan and provide a general address, then click OK.
4. Once the plan has been created, click the Open button.
5. After opening the plan, select Scenario 1.
6. With the parcel selected, click Modify, then Apply Building Type.
7. Choose Low-Rise Office to apply the building to the parcel.
8. Next, we will sketch a new building, Choose the Draw New Building Space.
9. Continue drawing your new building until you come to the parcel edge. Double-click to finish drawing.
Add a New Zone
1. On the toolbar, click Zoning![]() , now zoning workflow toolbar appears.
, now zoning workflow toolbar appears.
2. On the vertical toolbar, click Edit Geometry![]() then click Add
then click Add![]()
3. Draw your new zone polygon, to finish it just Double-click outside of the area.
(You can also adjust your polygon by moving the individual nodes or by clicking on the smaller mid-point nodes).


Pretty! This was a really wonderful post. Thank you for your provided information.