Summary: –
Erdas Imagine is a Remote Sensing and geospatial analysis software extensively utilized for processing and analyzing geospatial data, including satellite imagery, aerial photographs, and GIS data. It typically covers: Erdas Imagine Workspace, Viewer, Layer Stacking, Image Enhancement, Image Classification, Change Detection, Raster Analysis.
ERDAS IMAGINE Software in Remote Sensing
ERDAS IMAGINE Software powered by Hexagon Geospatial.
The ERDAS IMAGINE incorporates Geo-spatial Image processing and analysis, Remote Sensing, and GIS into a single powerful, convenient package.
Erdas Imagine Software Offer:
It offers many solutions in one, incorporating the following standards, enterprise capabilities and products:
- Image analysis, Remote Sensing and GIS
- User-friendly, customizable ribbon interface
- Panchromatic, Multispectral and Hyperspectral imagery, Radar and LiDAR data supported
- Spatial modeling with Raster, Vector and point cloud operators
- High-performance terrain preparation and Mosaicking
- Image classification and feature extraction using Machine Learning (ML) and Deep Learning (DL) tools
- Ability to convert more than 200 image formats into all major file formats
- Share spatial models between Erdas Imagine and GeoMedia
Erdas Imagine Download
ERDAS IMAGINE Released Version: 16.7.0.1145 (October 21, 2021).
Erdas Imagine GUI
- Contents Panel
- 2D View
- Map View
- File button
- Tab
- Tab group
- Quick Access Toolbar
- Help button
- Dock or Undock Views
- Hide/Show Panel
- Status Bar
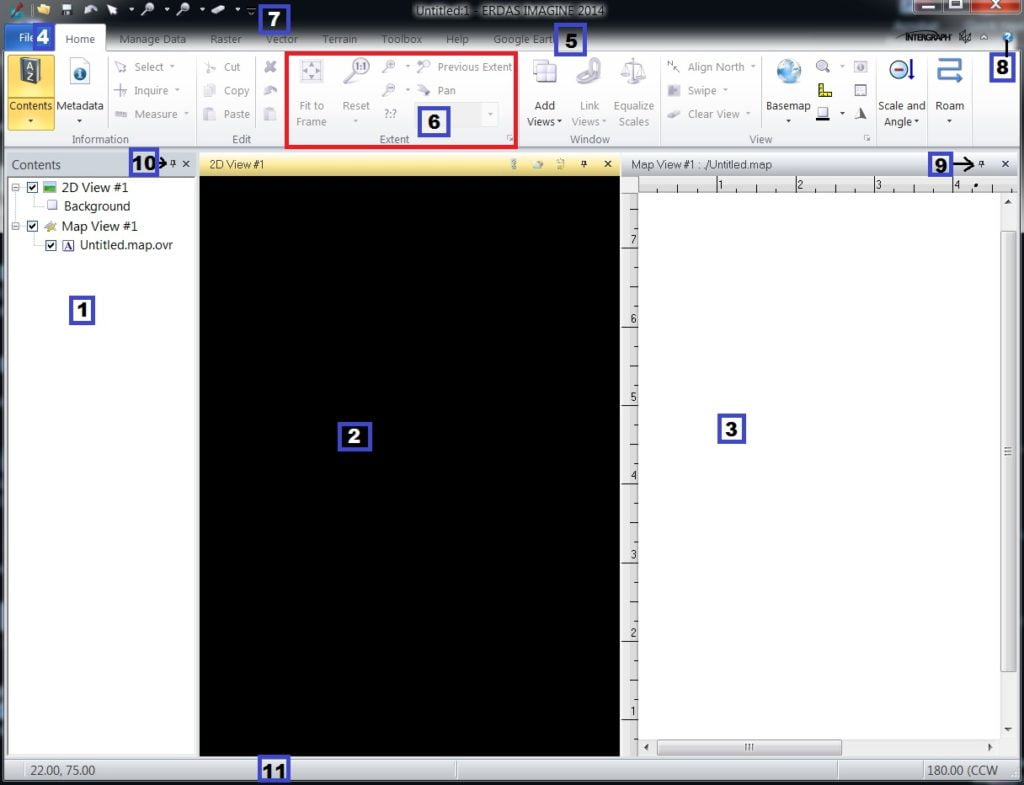
The components of the Imagine ribbon Workspace are:
- Views
- Menu bar with tabs containing menus, modules, tools
- Contents Panel of Workspace Views
- Retriever Panel of working data
- Title Bar
- File button
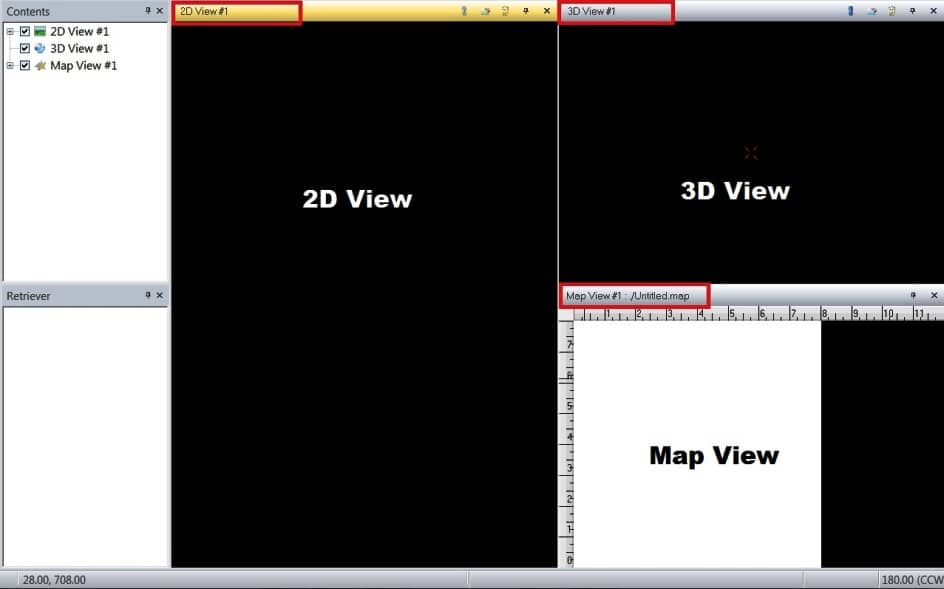
Views in Erdas Imagine
There are three types of Views for displaying and processing Data;
- 2D View-Displays Raster, Vector, and annotation data in a 2-dimensional view window
- 3D View-Renders 3-dimensional DEMs, raster overlays, and vector and annotation feature layers
- Map View-A View window designed for creating cartographic-quality maps and presentation graphics, usual output to a hard-copy device.
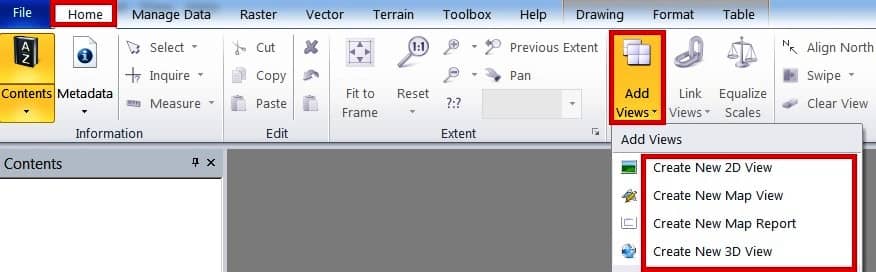
Open/ Add Views
You can open Views in two way:
(i) Click File button > New > 2D View/ 3D View/ Map View, or

(ii) In the Home Tab, Window group, Click Add Views, Select Create New 2D View/ 3D View/ Map View.
Set Preferences
Use the Preference Editor to customize IMAGINE for your use.
Click File button > Preferences. Preferences pane appears, expend IMAGINE Preferences, then expand User Interface, select User Interface & Session.
Now Reset Data Directory and Output Directory, click Save and close.

Add Layer in Erdas Imagine
In the File menu > Open and select Layer (i) or Data (Raster or Vector).
You can also use the shortcut process to Add layer (ii). Right-click in map view and select Layer.
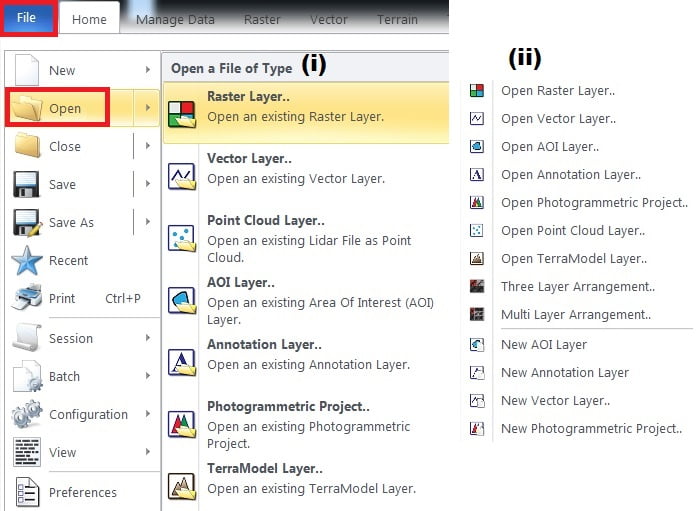
Add Raster Layer
Select Open Raster Layer, Layer to Add window is appears, choose File. Then you set Raster options, click Raster options Tab, choose Display type- True Color-(RGB). Check into Fit to Frame check Box and click OK.

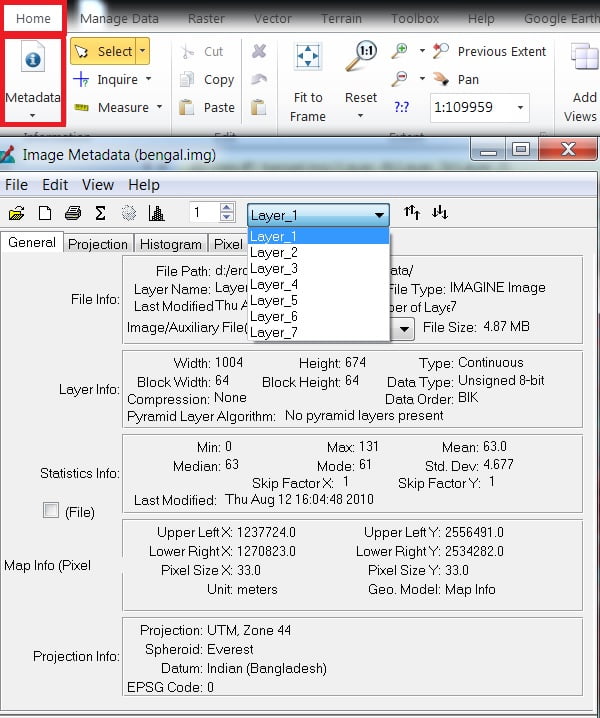
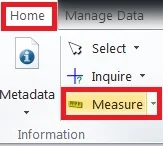
Metadata
View all the Information of Raster Layer. In Home Tab, to the Information group, click Metadata and select View/Edit Image Metadata. Now you can see Image Information.
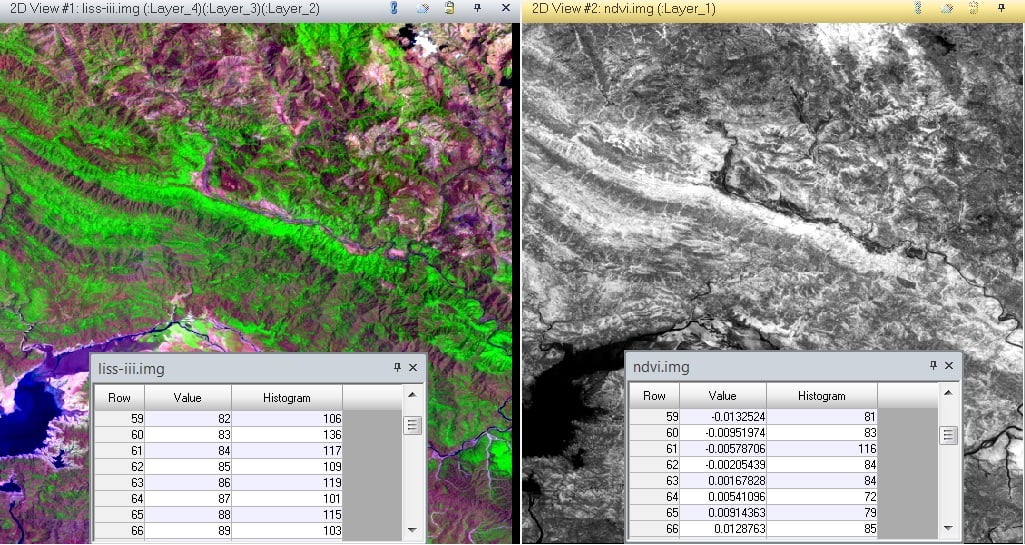
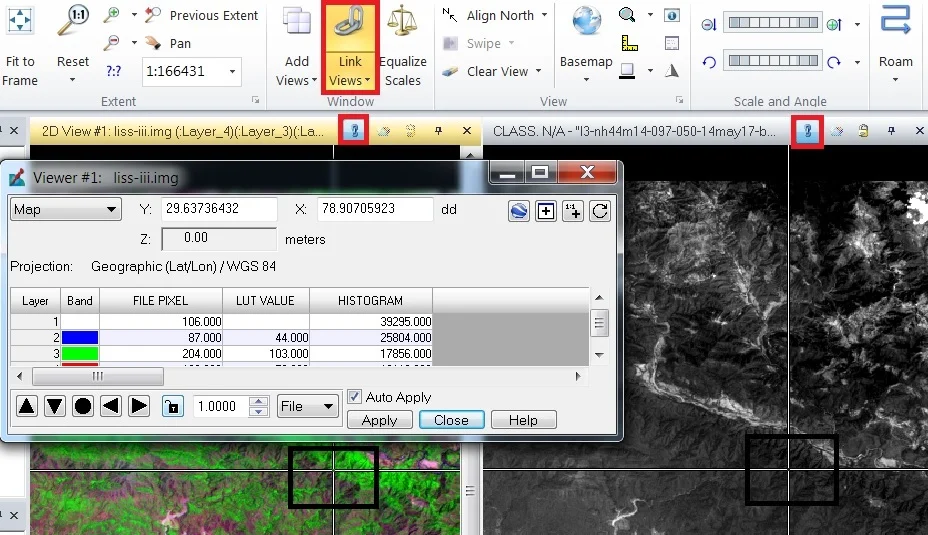
Inquiry
The Inquire Cursor provides detailed Geographic Information as well as a pixel, lookup table, and histogram values for individual pixels within an image. The Inquire a cursor displayed as a crossline to single-pixel value information.
1. On the Home tab, click Inquire Cursor. Open an Inquire Cursor in the active View (The Inquire Cursor dialog also opens. Keyboard shortcut: press Ctrl + I).
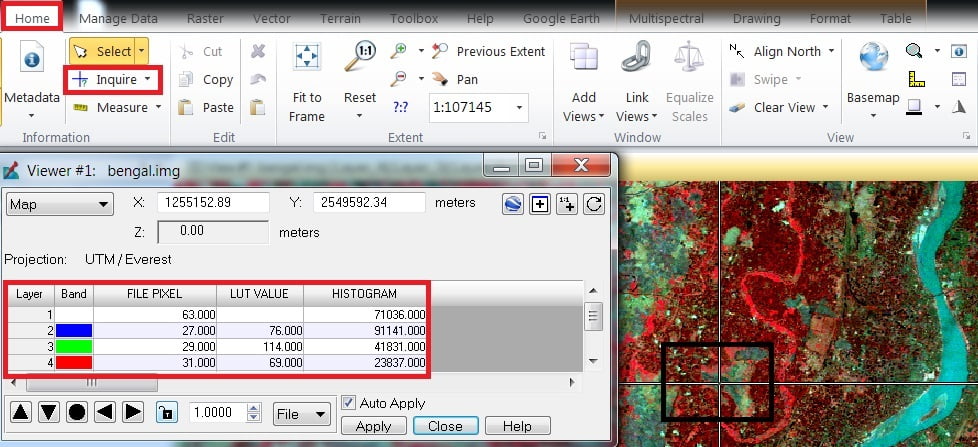
2. Click cross-line press mouse left click and drag in the image. You can see the change in all the values.
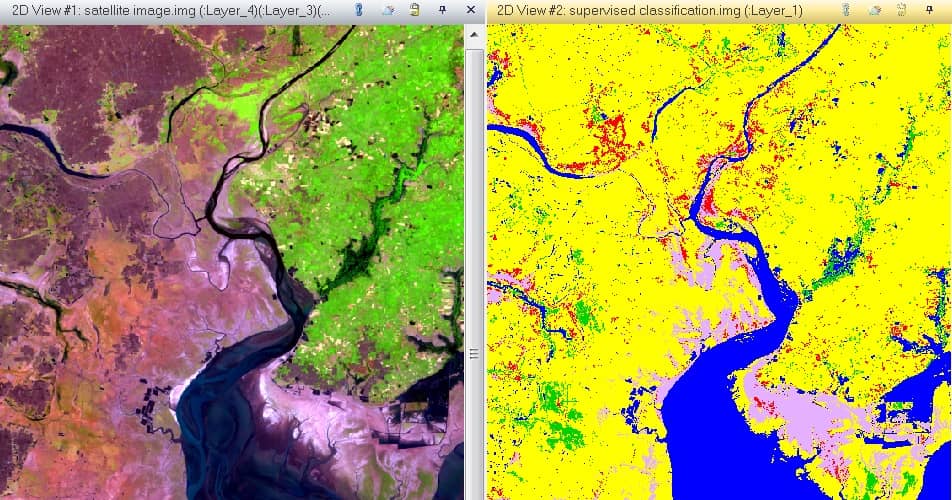
Linking Views
You can link any Views that cover the same Geographic area and reference to the same map units. The Link icons are Located in the upper right area of individual View.
1. On the Home tab, click Link Views in the Windows group, Link views window is open.
Measure
Measure the Length, Direction, area, etc, and optionally save the measurements to an annotation layer.
1. The Home tab, click Measure in the Information group, click it, and open all Measurement tools and Measurement view box.
2. On the Left side, Measurement Description Panel is here (point, line, polygon, etc). You can also change measurement units.
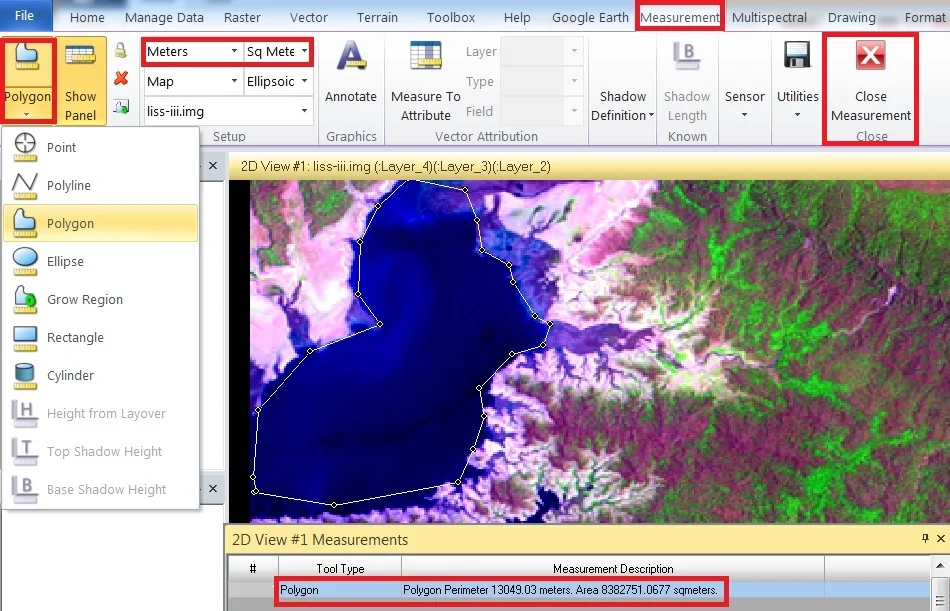
3. Complete Measurement area, click Close Measurement.
Brightness and Contrast
Open a multi-spectral image, manually adjust Radiometry, Brightness, and Contrast.
1. Multi-spectral image is already open, on the Multispectral tab, Select Adjust Radiometry.
Click Brightness/Contrast, Brightness, and Contrast window is appears now adjust Brightness and Contrast.
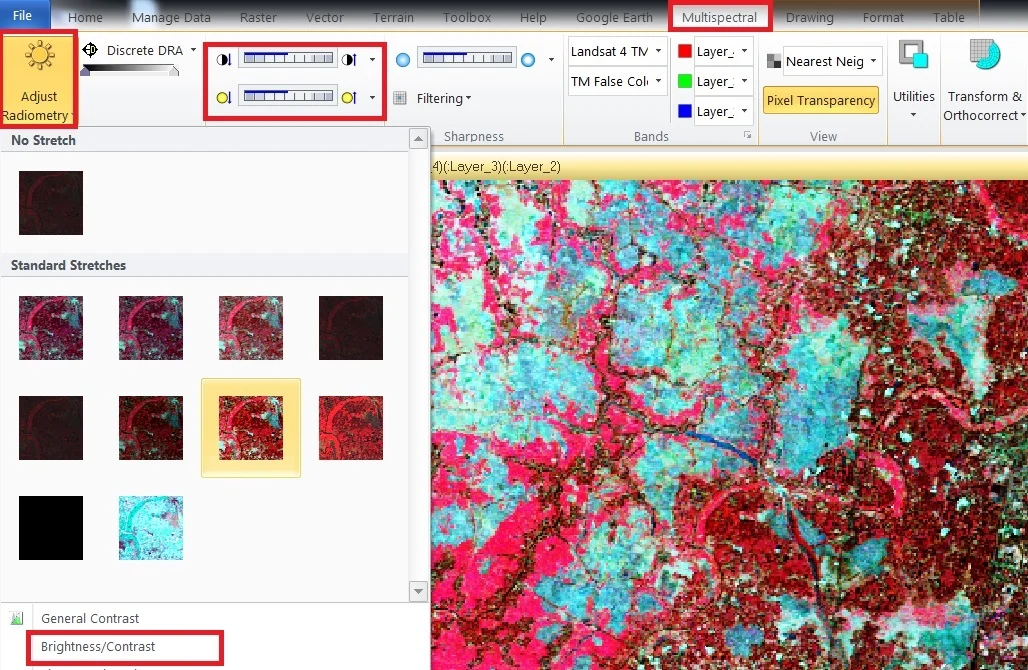
2. You can also perform different types of standard stretches.
Utilities
Utilities describe the Surface, Spectral and Spatial profile of any Geographic areas.
Example- Surface profile: open Multispectral or Panchromatic image. On the Multispectral tab, Click Utilities and select the Surface profile.
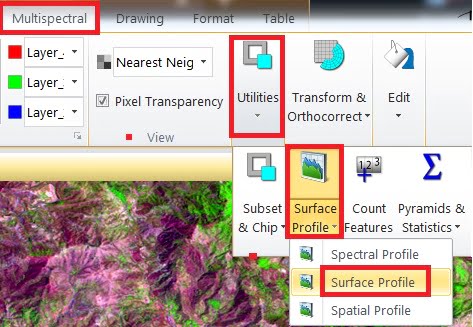
1. Surface profile pane appears, select a Box, and create a box in the map viewer. You can see in the surface profile window shows the surface.
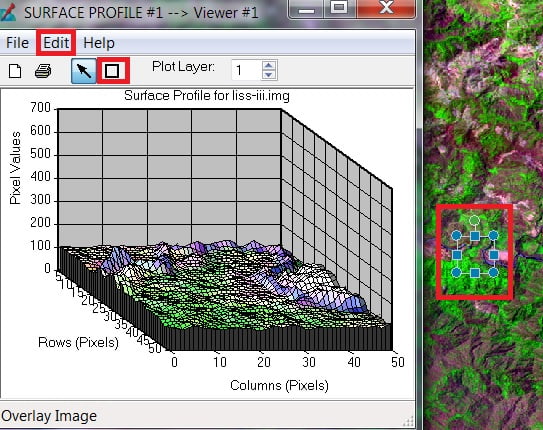
2. You’ll customize the surface area. Click Edit and set your surface properties.
Learn more Erdas Imagine Tutorials