USGS National Map Viewer Tutorial
What is National Map Viewer?
The National Map Viewer (TNM Viewer) is the one-stop destination for visualizing all the latest National Map data. It uses easy to navigate foundational base maps and makes it simple to interact with all the USGS themes to create your own map.
TNM is a collaborative effort among the USGS and other Federal, State, and local partners to improve and deliver topographic information for the Nation. It has many uses ranging from recreation to scientific analysis to emergency response.
TNM Download Application
The TNM Download application allows users to explore and access the USGS staged products available for download. This application is a user-friendly version of the USGS staged-product application programming interface, and it is available on most platforms.
In this lesson we will discuss a brief introduction on how to use TNM Download application.
Application Interface
See the TNM application interface.
Application Toolbar
Let’s start with the toolbar at the top of the screen.

Map interface
Navigating the application interface and the map. The help narrow interfaces focus on specific themes, such as elevation. imagery or maps.
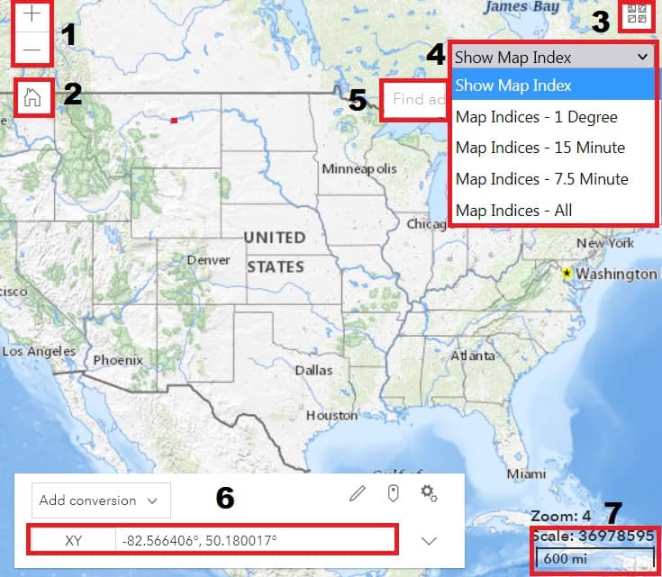
- Zoom In/Out
- Default Map view
- Basemaps
- Show Map Index
- Find address or place
- Map Coordinates
- Map Scale
Selecting an Area of Interest
TNM application basically a two stage process. First you will define a Area Of Interest (AOI) using a variety of map tools. The Second stage is to select the products are you interested in.
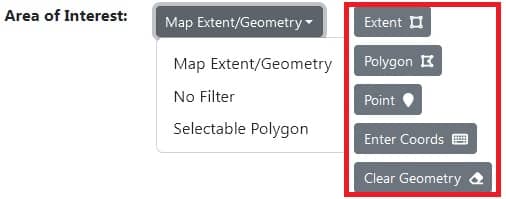
There are several ways to use the map to define an area of interest. By default the map extent geometry options are selected, indicating whatever area is visible on the map.
A point or rectangle can be drawn on the map to identify your area of interest, using the extent point, polygon, or coordinates options.
Upload a Shapefile
You can upload Shapefile or KML file for the Selecting Area on the Data section.

Download Data & Maps from The National Map
Selecting Maps
To begin define your Area Of Interest and select the map or data set you would like to download. Use the default “Map Extent/Geometry” on the Area Of Interest option.
You can select one or more map types or data sets on the left side screen. We recommend selecting a single map or data set at a time and repeating for others.
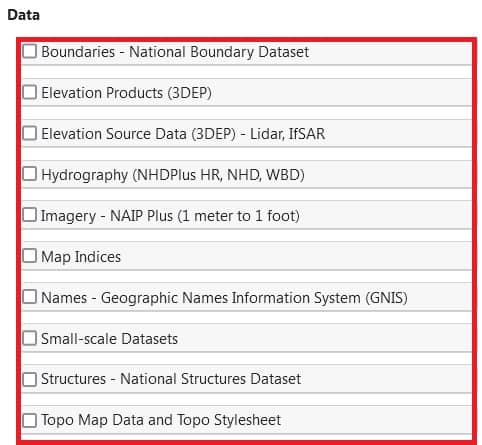
There are two sections; i) Maps, ii) Data.
Viewing Maps Search Results
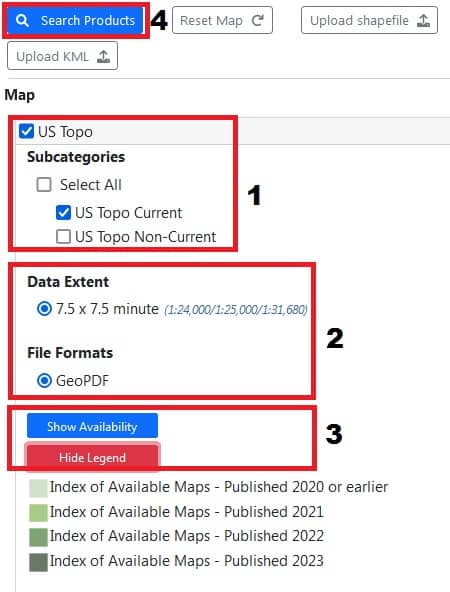
Clicking the checkbox next to the map category opens up additional information.
1. For instance clicking the “US Topo” checkbox. Shows a number of sub-categories that can be selected as desired.
2. Under this map, the default Data Extent format are 7.5 x 7.5 minute, and File Formats- “GeoPDF“.
3. To see the product availability by selecting the “Show Availability“. Also you can see the Legend click “Show Legend” button.
4. Having define the AOI select the desire Maps, Sub-categories Extend and Format, click the “Search Products” button. The result will be appear under the Products tab.
Product Options
Many options available to the product list, such as; Cart, Footprint, Metadata, Download, and more.
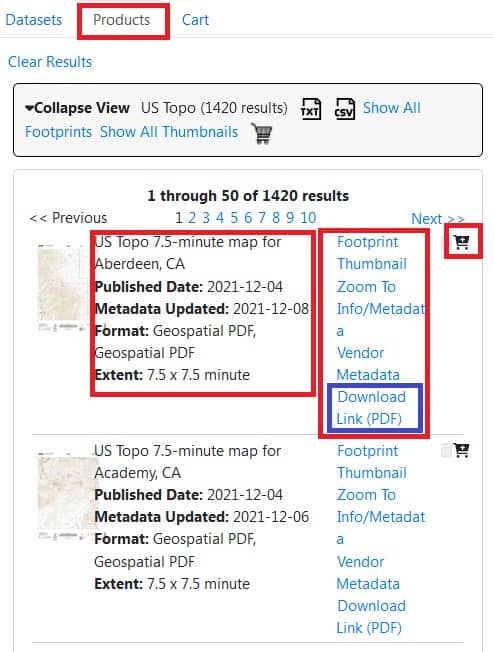
Each product result will include the Product Title, Published Date, last Metadata Updated data, along with the Format and Extent.
1. The ‘Cart‘ button can be used to add or remove specific products from the cart.
2. Click the ‘Footprint’ or ‘Thumbnail‘ to the cover the selected area.
3. Show the product Metadata, clicking on the ‘Info/Metadata‘ button.
4. You can also directly Download each product on the list in PDF format, by clicking on the ‘Download‘ button.
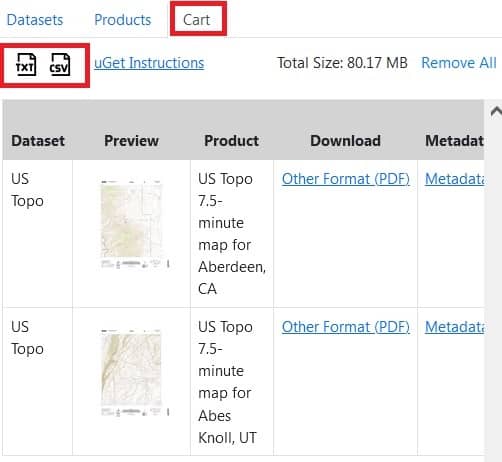
Exporting Results to CSV file
To save the contents of the Cart to a CSV file, click the the ‘TXT‘ or ‘CSV‘ buttons and save the file to your folder.
Selecting Datasets
Selecting Datasets for the data section works just like Map, but we can select more options.
You can access the Elevation product, Hydrograpgy, Map Indices and many more.
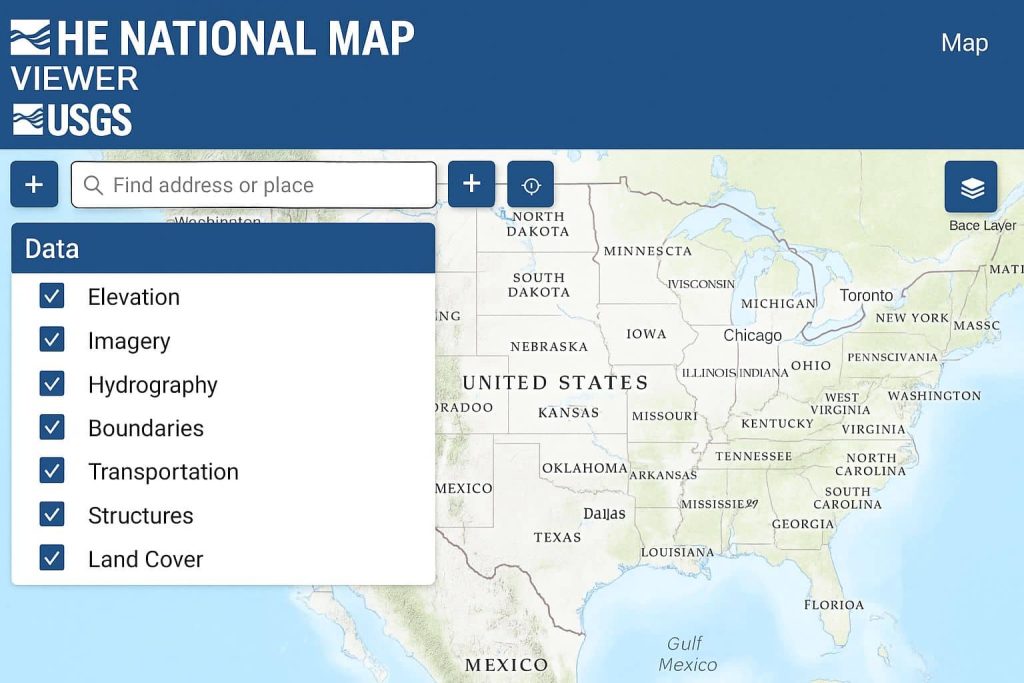
National Map Viewer Interface and Data Content
The National Map Viewer web application as a window into freely available base map data that is consistent on a national label, and provides resources to access the data through a variety of products and services.
Map Overview
To access the viewer, launch a web browser and navigate to the National Map Viewer launch page.
 Zoom—Use the plus minus button to Zoom current map view in or out.
 Home—Returns to default map view.
- My Location—Centers the Advanced Viewer on current physical location.
 Scale—Displays the current map scale.
 Coordinates—Displays coordinates for the cursor.
 Zoom—Use the plus minus button to Zoom current map view in or out.
 My Location—Centers the Advanced Viewer on current physical location.
Tools

- Notification—Show the notification to tab Notification icon.
- Base Map Gallery—Select a base map from a presented gallery.
- Layer List—Displays a list of operational layers in the app.
- Legend—Displays a legend for the visible layers in the map.
- Add Data—Search for layers or enter URLs to add data on the map.
- Share—Share the app via social media, email, or embedded link.
- Query—Query information from operational layers by executing a predefined query.
- Measurement—Measure the area of a polygon, length of a line, or find the coordinates of a point.
- Elevation Profile—Display the elevation profile for a selected feature or a measured line along with a web map.
- Spot Elevation—Returns an elevation in international feet or meters for a specific latitude/longitude (NAD 1983) point from the USGS 3DEP 1/3 arc-second layer. If unable to find data at the requested point, this tool returns -1000000.
- Range Ring—Click ‘Activate’ button and click on the map to establish the range ring centroid.
- Print—Advanced or basic printing of the current map.
- Draw—Draws basic graphics and text on the map.
- Select—Enables interactive selection of features on the map and take the actions on the selected features.
Using The National Map Web Services in ArcMap
Open the ArcMap application.
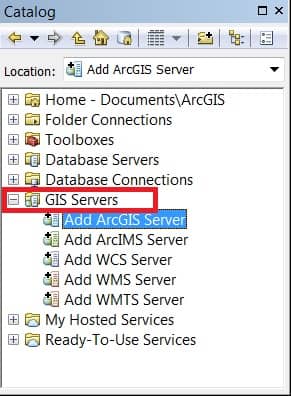
In the Catalog pane click the GIS Servers plus sign, and select Add ArcGIS Server then double click it.
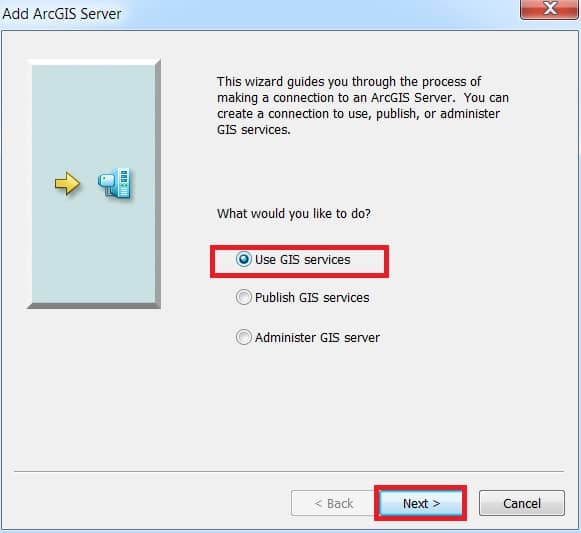
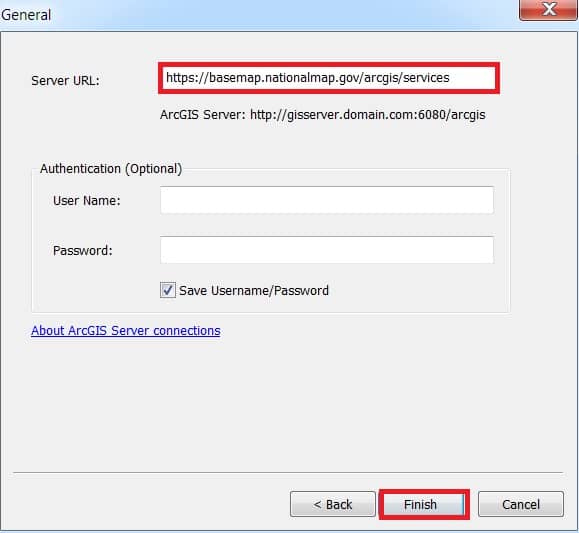
The ArcGIS Server pop-up window appear, select Use GIS services, click Next button, then enter the Server URL (), from The National Map Services. Click Finish button.
You can see a new entry has been added in the Catalog for the GIS Servers section.
Now you can open the services in ArcGIS, just double click it.