Digitization Process in ArcGIS Pro
Digitize Feature and Customize
1. Feature class creates is done, drag it and add to Contents pane. Now select the Edit tab, choose to Create ribbon, create a feature window appears and start Digitizing process in ArcGIS Pro.
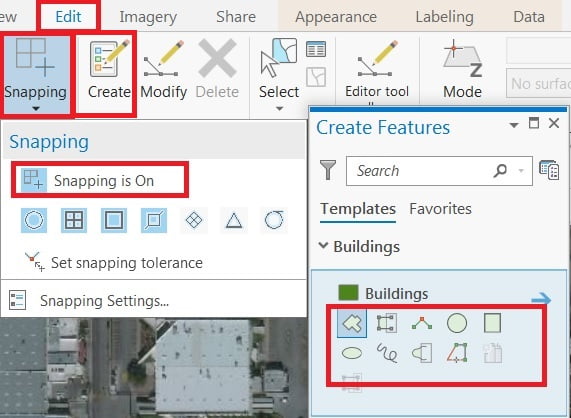
2. Remember one thing, setting Snapping option (snapping is on, ‘XY’ tolerance 10 pixels).
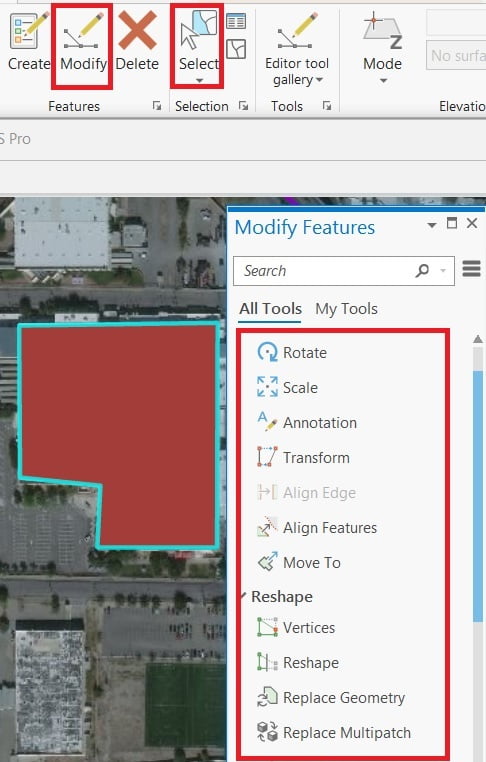
Perform digitize then you can edit any features, use the Modify toolbar.
Select a particular feature, Modify features window is open, and many options are available to edit features.
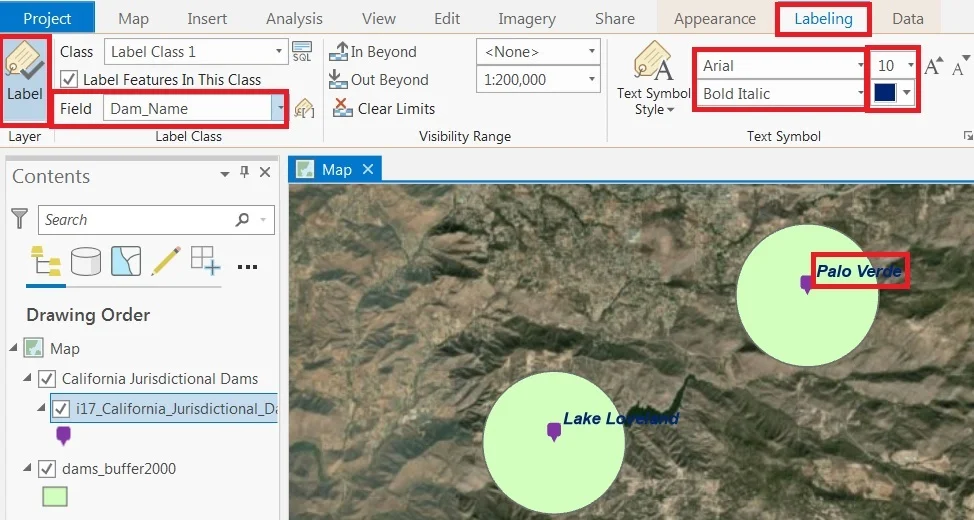
Label Features
In the Contents pane, click the layer to select it. On the ribbon, click the Labeling tab. Inside the Layer group, click the Label button.
Label Class group, for Field, choose field name and customize other options.