Convert Raster to Vector
Convert Raster to Vector (Interactive R2V Conversion) Using ArcScan
This Tutorial Learn How to Convert Raster to Vector in ArcGIS, and it‘s called Interactive R2V Conversion or Interactive Tracing.
Prepare Map
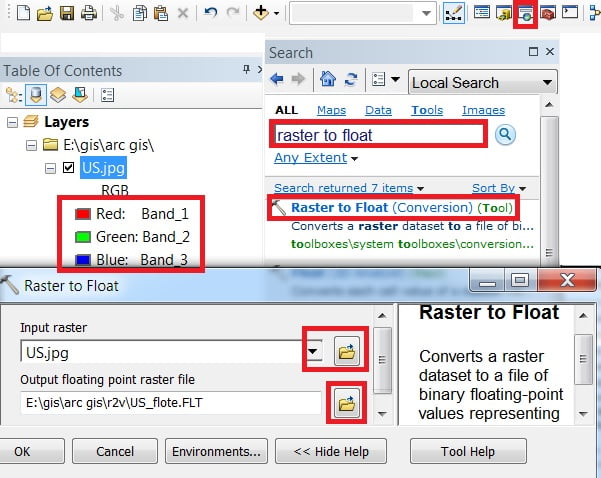
Add an Image (US.jpg) on ArcMap your Raster image is RGB Format. At first, convert to float, otherwise, you don’t perform this task.
Raster to Float
1. Open a Search pane, in the search box search Raster to float. Now select Raster to float in the search result.
2. Raster to a floating window appears, select Input Raster(US.jpg) and browse output location, then click OK.
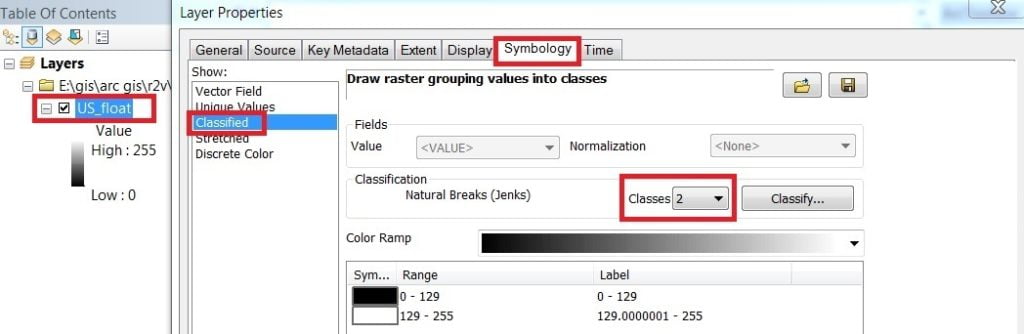
Ready to your Raster RGB image is a Float file format, now Classify float image. Right-click us_float select symbology, and click classified. Choose 2 classes, then click the OK button.
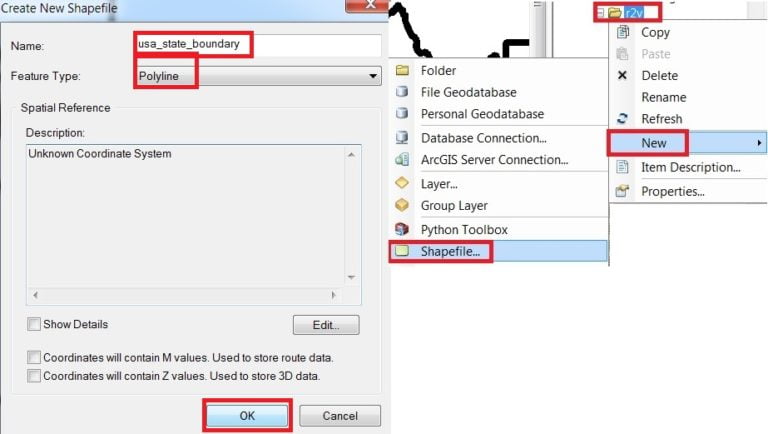
At first, create a new Shapefile.
Snapping
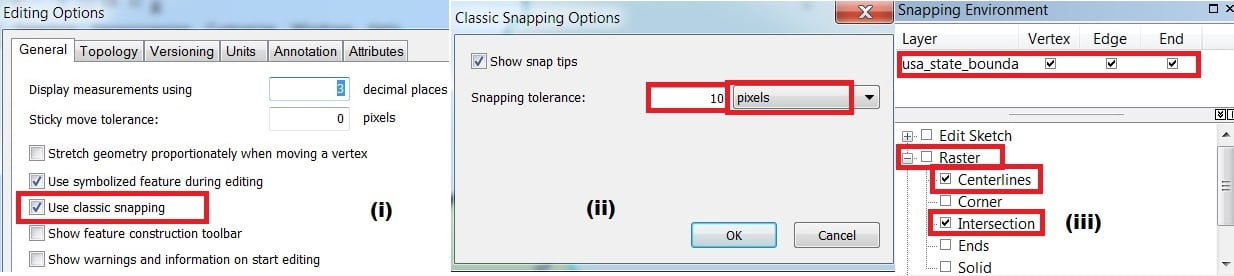
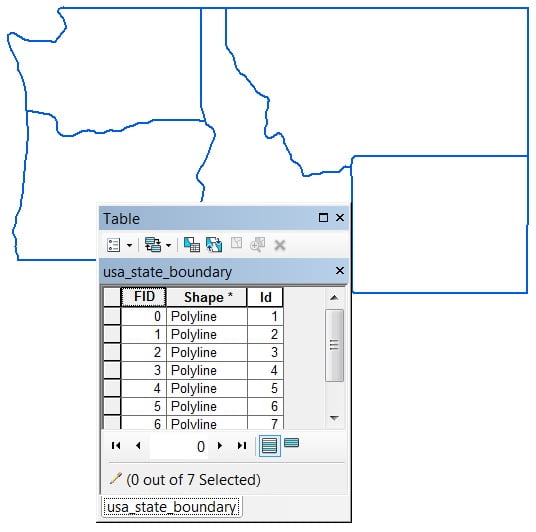
Shapefile is already created (usa_state boundary), now the next step is the Snapping setting.
1. Open the Editor Toolbar if not already opened. Click the Editor button and choose to start Editing to begin the edit session.
2. Click the Editor button on the Editor toolbar and choose Options. In the Editing Options window, check the Use classic snapping checkbox and click Apply and Ok button to close the window.
3. Click the Editor Button on the Editor Toolbar and choose Snapping then select Options. Set snapping tolerance 10 pixels from the Classic snapping Options window, and click the Ok button.
4. From the Snapping Environment window, check the Vertex, Edge, and End Snapping checkboxes. In the bottom section of the Snapping Environment window, check the Raster snapping checkbox. Just check only two (i) Centerlines & (ii) Intersection.
Interactive Tracing
1. Open ArcSean Toolbar, choose to customize> Toolbar selects ArcScan.
2. Create Features window is not already opened then click Editor > Editing Windows > Create Features. From the Create Features window select the vector layer feature (usa_state_boundary).

3. Now click the Vectorization Trace tool present in the ArcScan toolbar. You simply click the cursor above the raster and point the cursor in the direction you wish to Digitize and click. With each click, features will be generated at the centerline of the raster cells.
4. After completion of raster tracing, save and stop the edit session.

Convert Polyline feature to Polygon feature
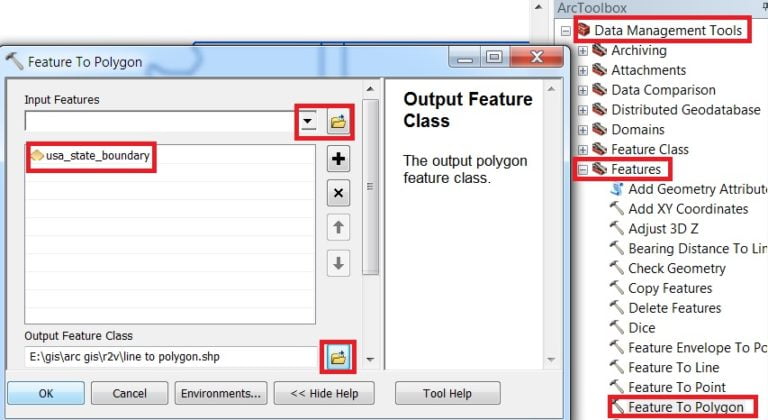
1. Open Arc Toolbox, Go to Data Management Tools > Features > Feature to Polygon, and Double click it.
2. In the Feature To Polygon window, choose Input Features (usa_state_boundary) and browse Output location, click OK.
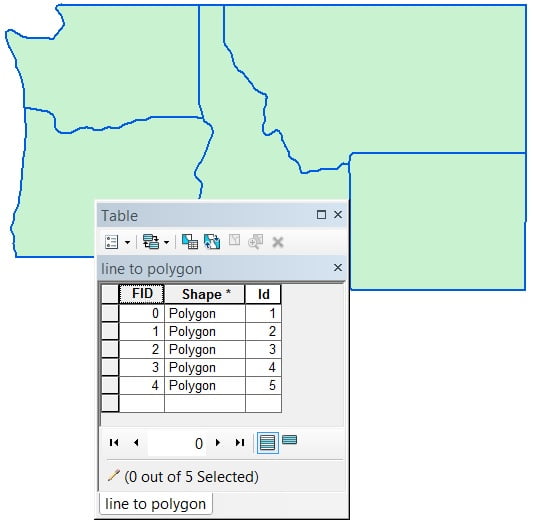
Now Ready to polyline feature convert to polygon feature.

Thank you so much, for such an amazing blog. I enjoyed every single part of it. I was looking for Raster to Vector conversion services and then suddenly I saw Digit-it.com. Literally, I was amazed by their Raster to Vector conversion services and I also prefer everyone to at least give them a try once.
Thank you so much
This is an excellent platform, I enjoy every bit of information and manual guide,this is so precise now I can explore a lot about Raster-vector interrelationship… Thank you so much. I will recommend anyone who seek to understand how Raster-vector conversion works better with GIS to resort to this blog.
Thanks, for your Amazing Comment
Very Helpful article for me. Thanks for sharing your thoughts. Now i know how to convert raster to vector in arcgis. We are clipping path service provider team but now we can serve raster to vector in arcgis.