Snapping in ArcGIS
What is Snapping in GIS
Snapping allows you to create features that connect to each other, and your edits are more accurate. The Snapping is a most important feature in GIS, because it’s help to join double line into single line.
When snapping is turned on, your pointer will jump, or snap to, edges, vertices, and other geometric elements when your pointer is near them and within a certain tolerance.
Snapping in ArcGIS
In ArcGIS Snapping toolbar is the central location where you manage the snapping settings. This tool to perform point, end, vertex, or edge snapping.
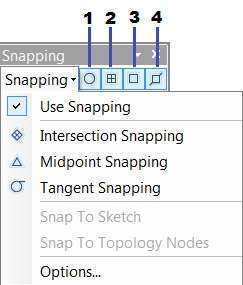
- Point Snapping
- End Snapping
- Vertex Snapping
- Edge Snapping
How to Enabling Snapping in ArcMap
This process complete in 3 steps:
1. By clicking Editor > Select options> Editor options window appears> click use Classic Snapping, then apply and Ok.

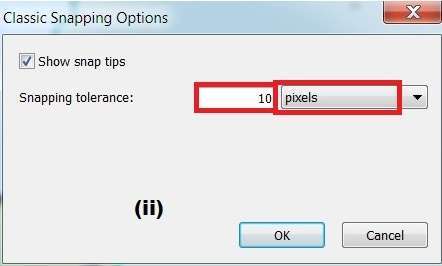
2. Go to Editor> Snapping> Options. In the Snapping Options, the window set the snapping tolerance value 10 pixels (general between 7 to 10 pixels).
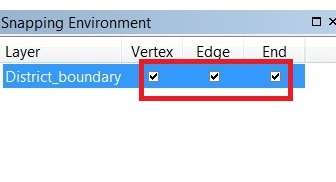
3. Ones again click dropdown Editor > Snapping > and select Snapping window. snapping environment window is open click on 3 boxes, Vertex, Edge, and End.
Enabling Snapping for Raster, Sketch and Topology
To the enabling snapping to edit Sketch and Topology elements,
From the Snapping Environment window, check the Vertex, Edge, and End Snapping checkboxes.
Check the boxes at the bottom panel of the window to enable snapping to edit Raster, Sketch or Topology elements.