Advanced Digitizing Toolbar QGIS
In the tutorial perform Advanced Digitization in QGIS, using Digitizing tool and Advanced Digitizing toolbar.
Activated Advance Digitizing Tool
Enable Advanced Digitizing toolbar, in the Toolbar menu, click on View, hover Toolbars, and click Advanced Digitizing toolbar checkbox.
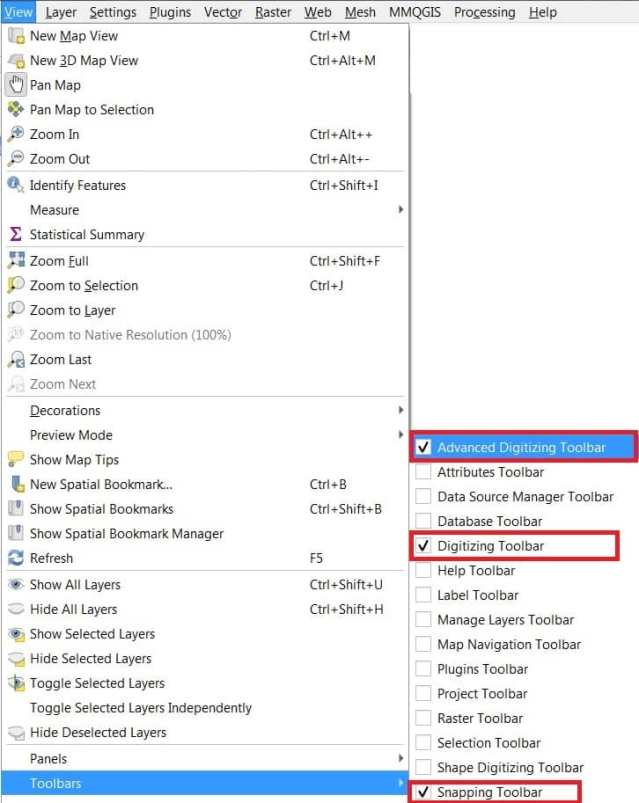
If not activated Digitizing Toolbar and Snapping Toolbar, also click in this two toolbar checkbox.
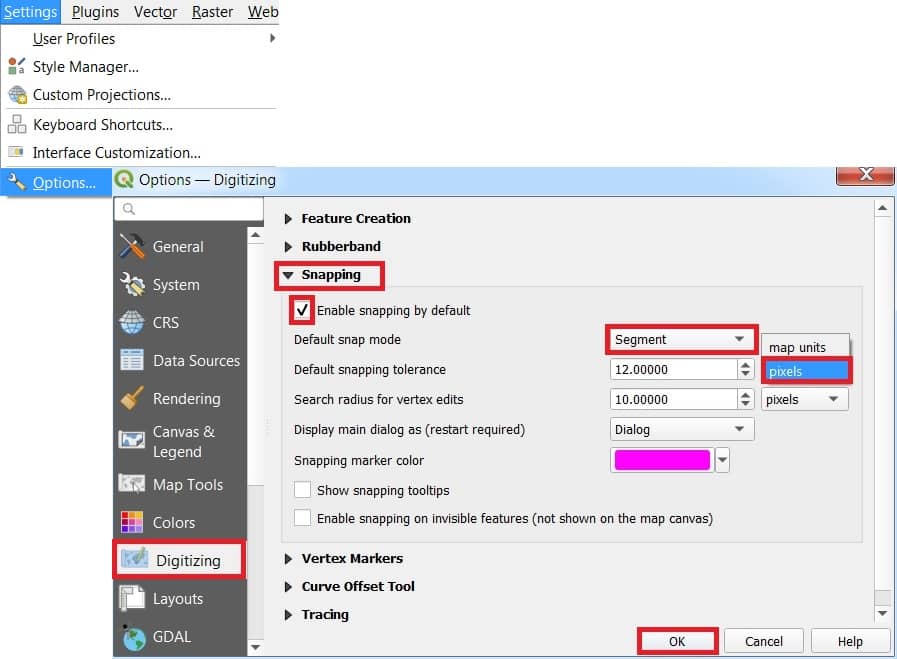
Set Snapping Tool
Set the snapping parameters. From the QGIS main menu, go to Settings > Options. The Options window is to appear, select Digitizing tab, and click Snapping.
You can select between ‘vertex’, ‘segment’ or ‘Centrod’ as Default snap mode.
You can also define a Default snapping tolerance, and Search radius for vertex edits values. The tolerance can be set in pixels.
Enabling/Disabling Snapping Tool
Enable editing for your line or polygon layer. activated snapping tool, at the Snapping toolbar, you’ll notice an icon.
The tool can be enabled/disabled by clicking this icon ![]() .
.
Using the Snapping Digitizing tool
To use the tool, simply enable Trace Digitizing and click on / snap to a vertex or segment of an existing feature you wish to trace along.
Advanced Digitizing in QGIS
Add Layer/ Shapefile
Now add layers for drawing. Click Layer in the menu bar, select Create layer and select new spapefile layer.
Also, you can open your existing layer to perform this task.
Exploring Advanced Digitizing Tools

Use this tools for advance editing layer or shapefile.
Follow the video, help you how to use Advanced Digitizing Tools in QGIS.
