Calculate Drainage Density in ArcGIS
In this Tutorial learn, how to calculate Drainage Density in ArcGIS Software.
Drainage Density is the total length of all the streams and Rivers in a Drainage basin divided by the total area of the drainage basin.
The first Step you are following, Stream Ordering Tutorial. Then jump to the Next Step, because this the first stage to the beginning of Drainage Density.
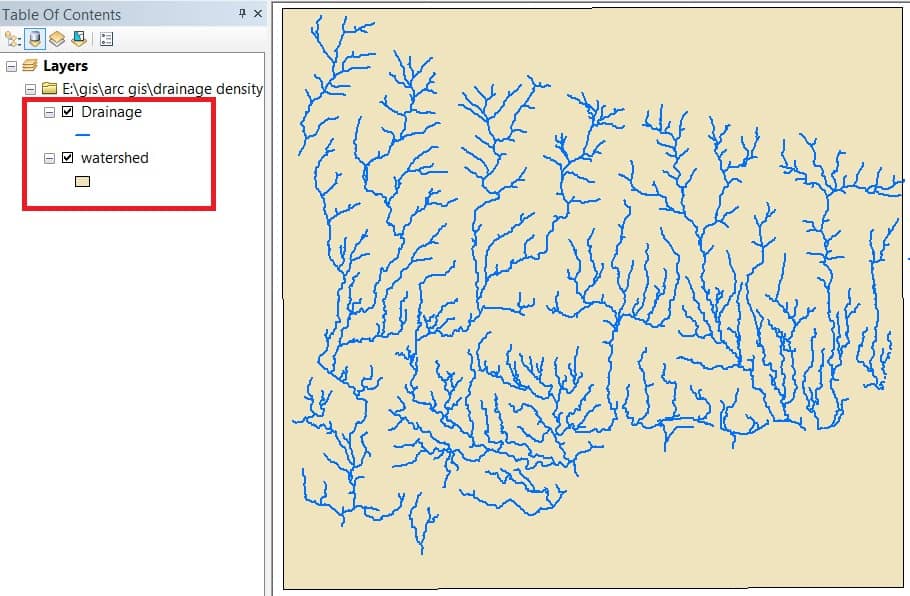
Now open stream order data map, and also create a watershed data (watershed data is a Drainage covered area).
Create a Grid Index. It’s optional, but Grid Index helps you to properly Interpret the Drainage Density map.
Before Create a Grid Index, set the Environments setting.
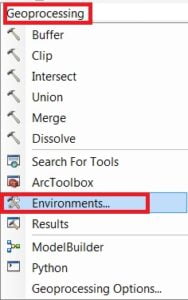
Click Geoprocessing > select Environments.
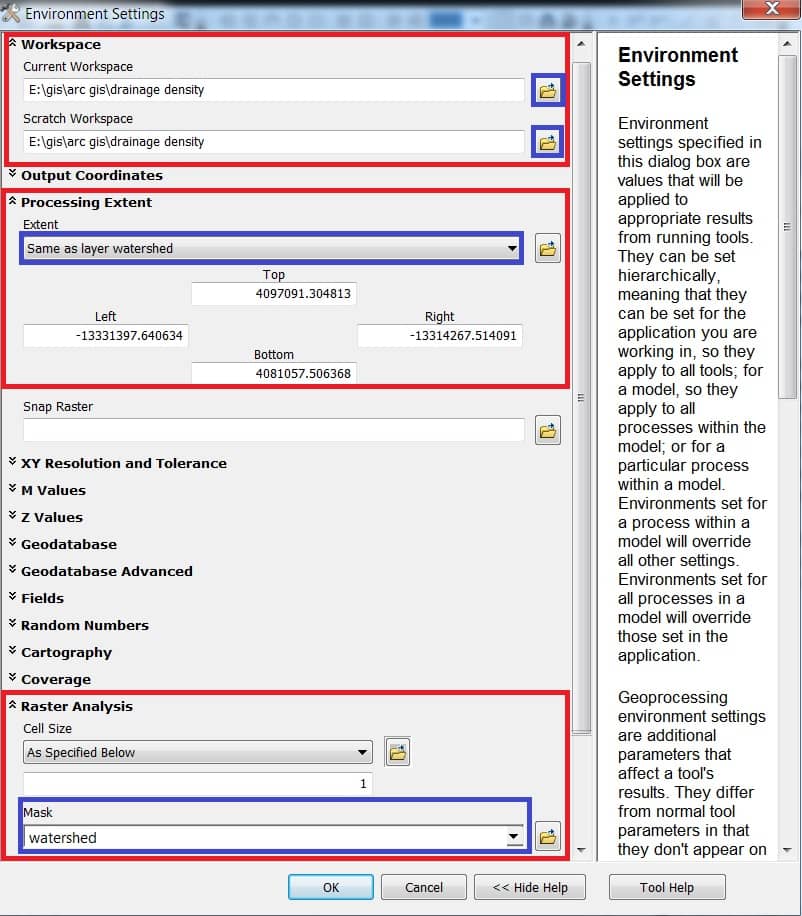
Environments window is open, Setting 3 options.
- Click Workspace and select current Workspace and scratch Workspace.
- Then click Processing Extend, select Extend same as layer watershed.
- Last is select Raster Analysis, choose Musk, and select watershed.
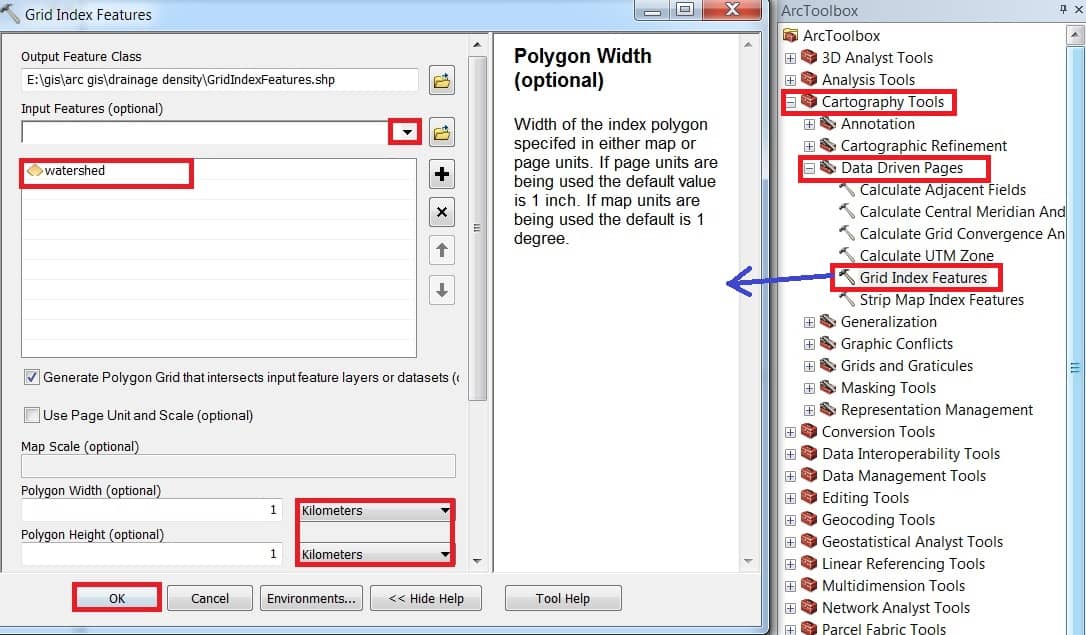
Now finally create a Grid Index. Open the Arc Toolbox, Arc toolbox window appears to expand Cartography Tools, then expend the Data Driven Pages subgroup, Select Grid Index Features, and double click it.
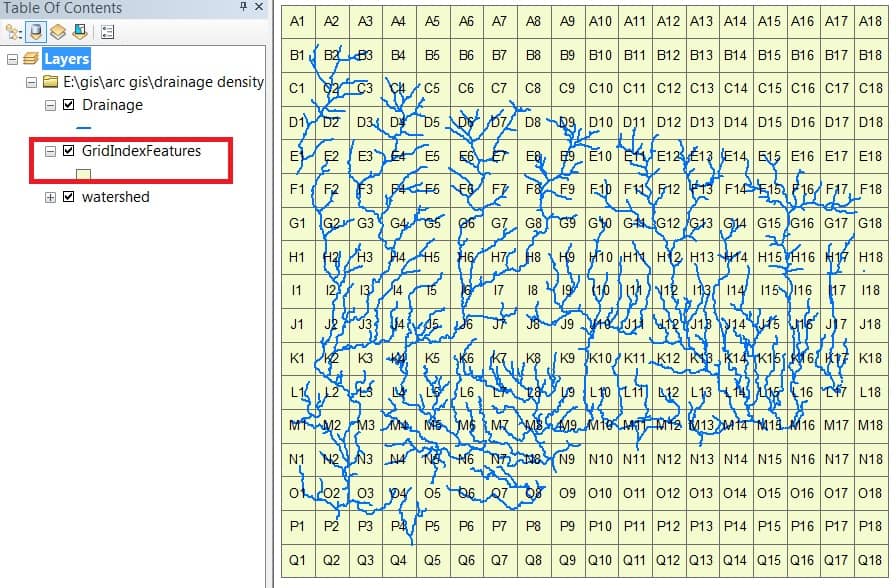
Grid Index Features window appears, write Output feature name, then click Input features select watershed. Polygon Height and Width unit, select Kilometers (you can also choose any other units). Finally click OK button.
Now show your Grid Index Result.
Jump to the final step, calculate Drainage Density in ArcGIS. Open the Arc Toolbox, Arc toolbox window appears to expand Spatial Analyst Tools, then expend the Density subgroup, Select Line Density, and double click it.

Line Density window appears, select Input Polyline Features (Drainage). Population Field selects Grid_code, then choose Area units are SQ KM.
The next step is the Environments setting. Click Environments button.
Environments window appears drop-down Processing Extend and select same as layer Drainage. Next drop-down Raster Analysis, click Mask and choose watershed. Finally click OK button.

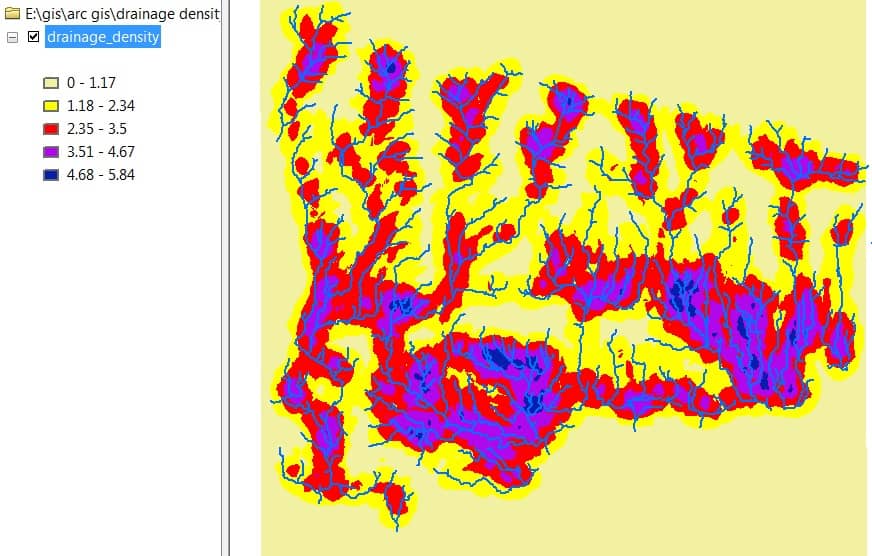
Now Line Density window, click OK and show your Density Result.

You can also Customize the Drainage Density. Right-click Drainage Density and click Properties.
Properties window appears, select Symbology, and choose Classified.
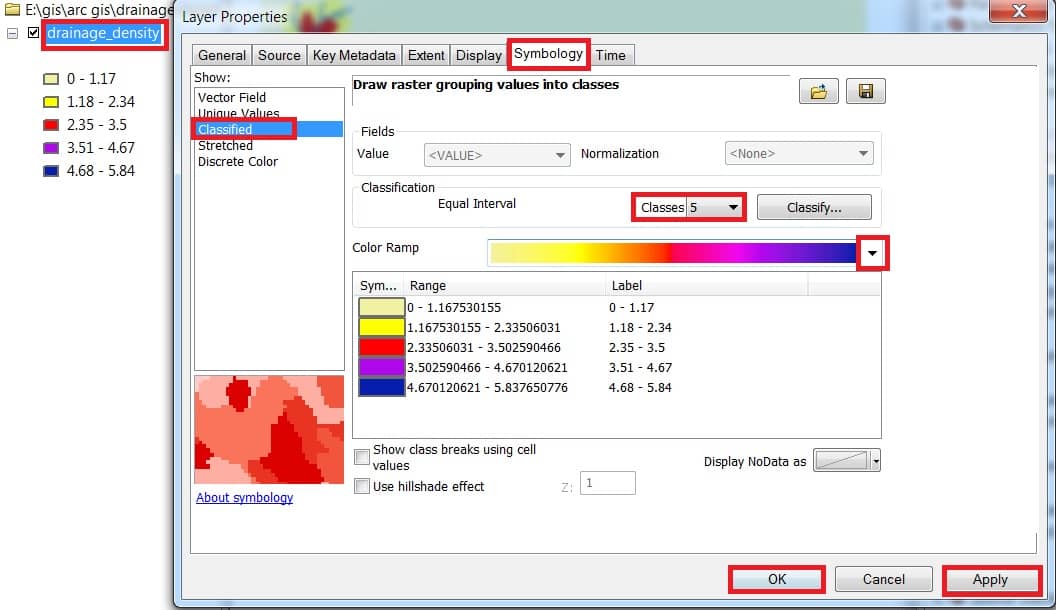
Now finally ready the Drainage Density map.


very interesting procedure