Add Data from ArcGIS Online to ArcGIS Pro
In this tutorial, we’ll add data from ArcGIS Online, ArcGIS Living Atlas, and Geodatabase in ArcGIS Pro.
Tutorial requirements:
- ArcGIS Pro Basic
- ArcGIS Online or ArcGIS Enterprise portal connection
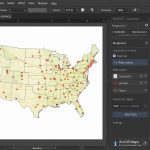
1. Start ArcGIS Pro.
2. Click Open another project.
3. On the Open Project dialog box, under Portal  , click ArcGIS Online
  .
.
4. At the top of the dialog box, in the Search box, type Add data to a project and press the Enter key.
5. In the list of search results, click Add data to a project to select the project package.
6. Click OK button.
Add Data from ArcGIS Online
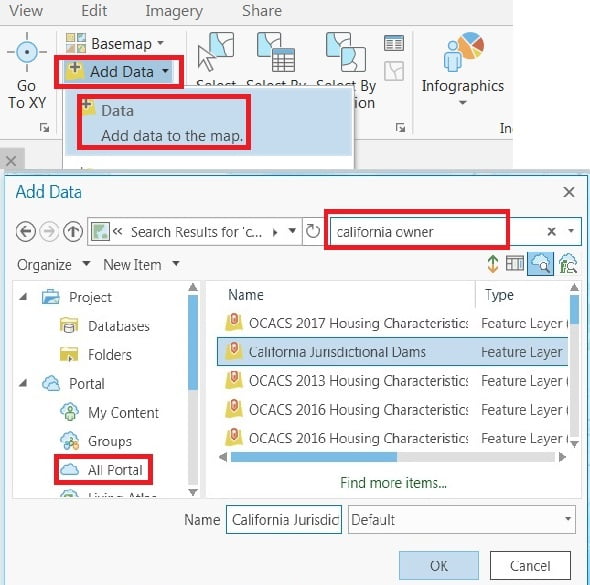
1. On the Map tab, in the Layer group, click Add Data  and click Data .
2. Add Data window open, under Portal, click All Portal. In the Search Portal box, type your required data (ex. California owner). All the has listed, select (California Jurisdictional Dams) and OK.
Add Data from ArcGIS Living Atlas
Access to the ArcGIS Living Atlas content you have a ArcGIS Online account.
1. On the Ribbon, click the View tab, in the Windows group, click Reset Panes  and click Reset Panes for Mapping.
2. In the Catalog pane, click the Portal tab.
3. Under the Portal tab are six tabs you can use to add portal items.
4. You choose Living Atlas, Click the Living Atlas tab  .
.
5. Next to the search box, click Filter  .
.
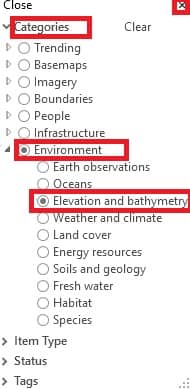
6. Expand Categories, choose Environment, then click Elevation and bathymetry.
7. Click Close, to close this tab.
8. In the search box, type Terrain: Elevation Tinted Hillshade and press the Enter key.
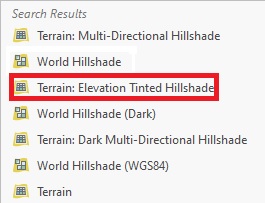
8. Right click the Terrain: Elevation Tinted Hillshade layer and click Add To Current Map  .
.
Add Data from Geodatabase
Add data from a default geodatabase(.gdb) in ArcGIS Pro.
1. In the Catalog pane, click the Project tab, browse to Databases > Add_data_to_a_project.gdb.
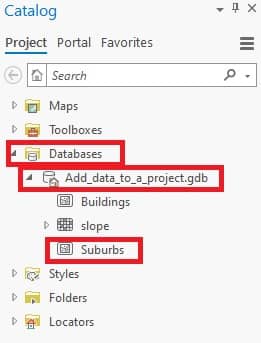
2. Right click Suburbs and click Add To Current Map .
3. In the Contents pane, drag the Suburbs layer under the Reference layer.
4. Right click the Suburbs layer and click Zoom To Layer  .
.
5. Click Symbology  , in the Symbology pane, click the symbol for the layer.
6. In the Symbology pane, under Format Polygon Symbol, click the Properties tab.
7. On the Symbol tab  , under Appearance, click the Color drop-down arrow and choose Color.
Add Data from Local Folder
Follow these steps to add a data from your local folder:
1. On the Map tab, in the Layer group, click Add Data and click Data .
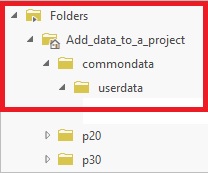
2.Another option is to add the data. In the Catalog pane, browse to Folders > Add_data_to_a_project > commondata > userdata, and choose your data.
3. On the Add Data dialog box appears, browse to a your local folder, and select your project data.
4. Click OK to add data.