Georeferencing in ArcGIS Pro
There are four steps to Georeference your data in ArcGIS Pro:
- Add the raster dataset that you want to align with your projected data.
- Use the Georeference tab to create control points, to connect your raster to known positions in the map
- Review the control points and the errors
- Save the georeferencing result, when you are satisfied of your project.
Georeferencing Tools
The Georeference tab contains all the tools you need to georeference your raster datasets.
- In the Contents pane, select the layer you want to georeference.
- On the Imagery tab, click Georeference
 to open the Georeference tab.
 to open the Georeference tab.
Georeferencing Options
To access all the Georeferencing options, click the Options button, next to Alignment on the Imagery tab.
| Options | Description |
|---|---|
| From Symbol | Edit the symbol used to display the From point. |
| From Color | Edit the color used to symbolize the From point. |
| To Symbol | Edit the symbol used to display the To point. |
| To Color | Edit the color used to symbolize the To point. |
| Reset | Reset the symbol and color back to the system defaults. |
| Forward residual | The forward residual error for each control point is displayed in the Control Point Table. |
| Inverse residual | The inverse residual error for each control point is displayed in the Control Point Table. |
| Inverse forward residual | The inverse forward residual error for each control point is displayed in the Control Point Table. |
| Auto Complete | The system attempts to find the corresponding To point. If the To point cannot be automatically found, you can manually specify it. |
| Auto Apply | Sets the default behavior for the Auto Apply button  . By default, Auto Apply is checked on. . By default, Auto Apply is checked on. |
The Georeference modal tab has the following five groups:
- Prepare
- Adjust
- Review
- Save
- Close
ArcGIS Pro Georeferencing Tutorial
In this lesson learn how to Georeferencing an image in ArcGIS Pro.
Add Data/Image
1. On the Ribbon, click the View tab, and in the Windows group, click Catalog Pane.
2. In the Catalog pane, expand the arrows Folders, and choose data. Right-click your project data, and select Add To Current Map.
3. If the prompt appears as shown below, accept all the defaults and click OK.
4. Right-click your data, and choose Zoom To Layer, on the Contents pane.
Unreferenced images are added at the origin of the map coordinate system.
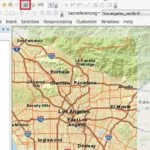
Add Basemap
On the Map manu, in the Layer group, click Basemap drowdown arrow, and choose basemap.
Create Control Points
Once you have add the unreference image, make sure showing latitude (Y) and longitude (X) values in your map.
1. On the Ribbon, under the Imagery tab, click Georeference.
2. Under Georeference tab, providing all the tools to complete the georefercing.
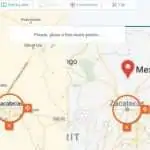
3. Select Add Control Points, zoom the map to intersection points.
4. Hover the cursor, and click the cross point of this unreferenced image to get a first point.
5. Click the right button of the mouse, Target Coordinates dialog box appears, enter the latitude and longitude values, degrees, munites, and seconds. Click Ok.
Minimum 4 points are require. You can also collect the maximum points to better accuracy.
6. Open the Control Points Table, to showing the all points information.
7. On the Transformation tab, there are different ways to represent data. With 3 or more control points you can use first-order polynomial.
Change Coordinate system
By default, in ArcGIS Pro, maps are assigned the WGS 1984 Web Mercator coordinate system.
1. In the Contents pane, click image.tif to active data.
2. On the Imagery tab, in the Alignment group, click Georeference.
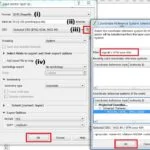
3. On the Georeference tab, in the Prepare group, click Set SRS(Spatial Reference System).
4. In the Coordinate Systems pane, in the search box, type NAD 1983 UTM Zone 18N and press Enter.
(You’ll change it to the coordinate system you selected for this project).
5. In the Coordinate Systems window, expand the arrows next to Projected Coordinate System > UTM > NAD 1983, select NAD 1983 UTM Zone 18N.
6. Click the General tab, in the Display units, choose Meters and click OK.