Georeferencing in QGIS
In this Tutorial, Learn Image to Image and Ground to Image Georeferencing in QGIS.
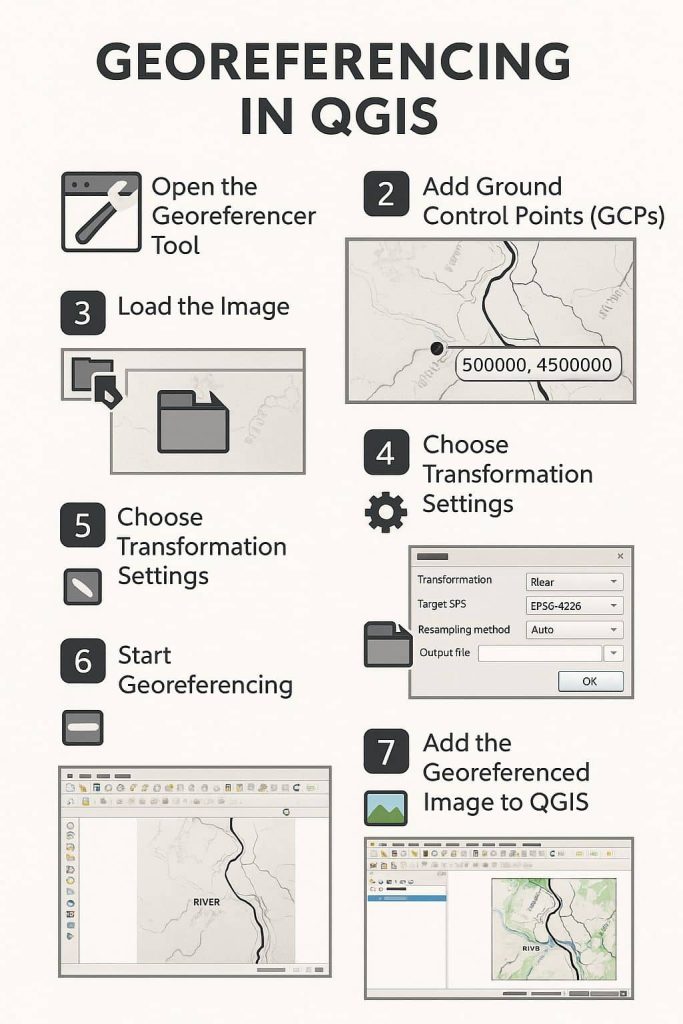
Quick Review:
Perform Image to Image Georeferencing
First, open two Raster images (a) Referenced image, and (b) Unreferenced image.
1. From the Layers panel, click Add Raster Layer tool. In the Raster Data Source window, go to your folder, select the Referenced image, and click the open button.
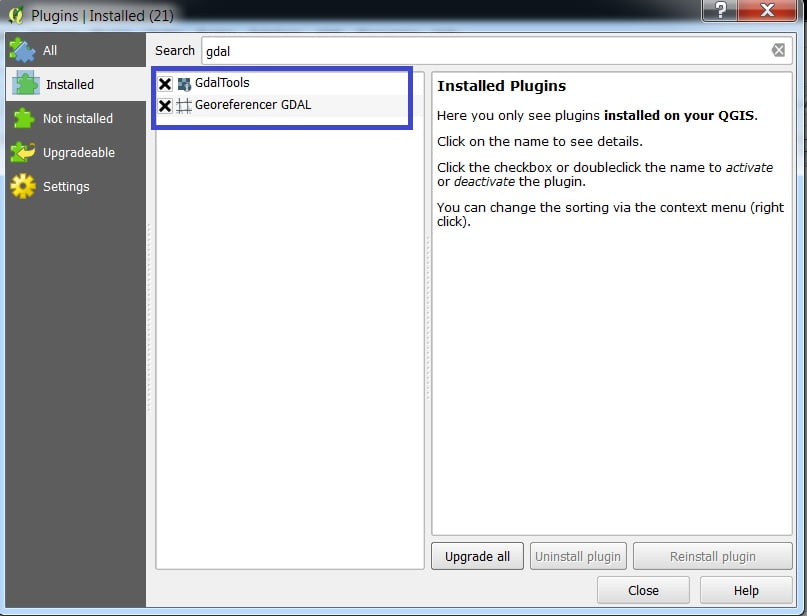
2. Georeferencing in QGIS is done via the ‘Geereferencer GDAL’ plugin. This is a core plugin- that means it is already part of your QGIS installation. You just need to enable it.
Go to Plugins > Manage and Install Plugins and enable the Georeferencer GDAL plugin in the installed tab.
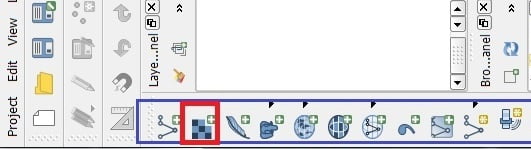
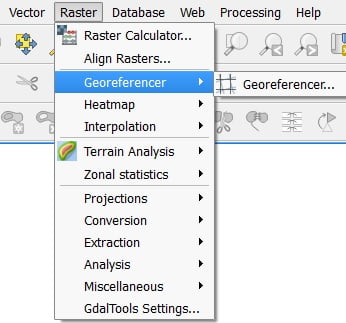
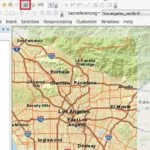
3. The plugin is installed in the Raster menu.
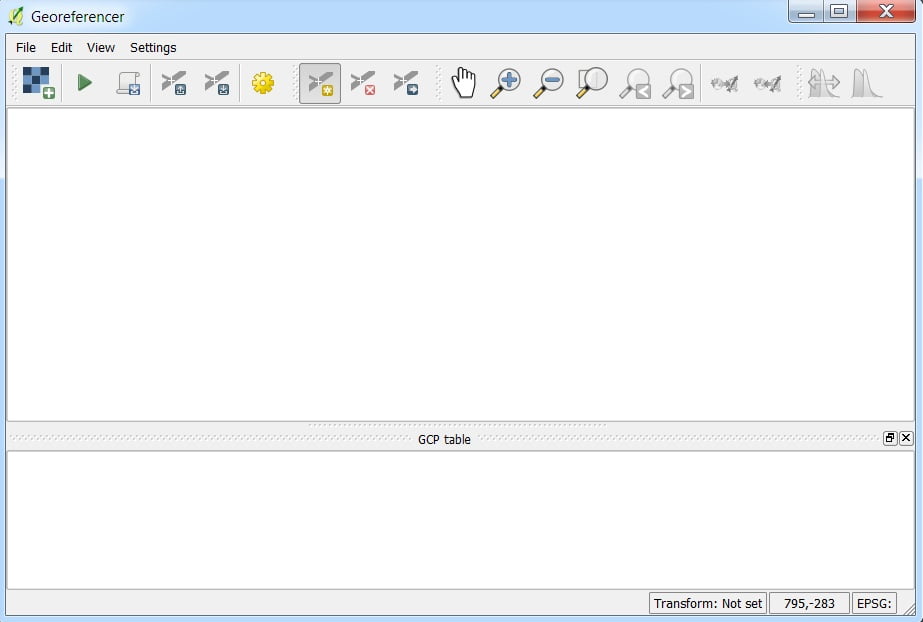
Click on Raster > Georeferencer > Georeferencer to open the plugin.
The plugin window is divided into 2 sections. The top section where the raster will be displayed and the bottom section where a table showing your GCP (Ground Control Point) values.
4. Now open the Unreferenced image in the georeferencer plugin window.
Go to File > Open Raster, browse to your folder, select an unreferenced image, and click open.
5. In the next screen, you will be asked to choose the raster’s coordinate reference system (CRS). This is to specify the projection and datum of your control points.
Since WGS 84 (EPSG: 4326) is the most accurate CRS. Select it and click the OK button.
6. The image is loaded on the top section of the georeferencer window. You can use the zoom/pan controls in the toolbar to learn more about the unreferenced image.
Now you need to assign a control point somewhere on the unreferenced image and also in the same location of the referenced image. Click on Add Point in the toolbar.
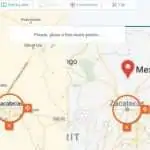
7. Using the Add Point Tool, click on this Point on the Unreferenced image, then from the Enter Map Coordinates window. Click From Map Canvas button and click the same point on the Referenced image.
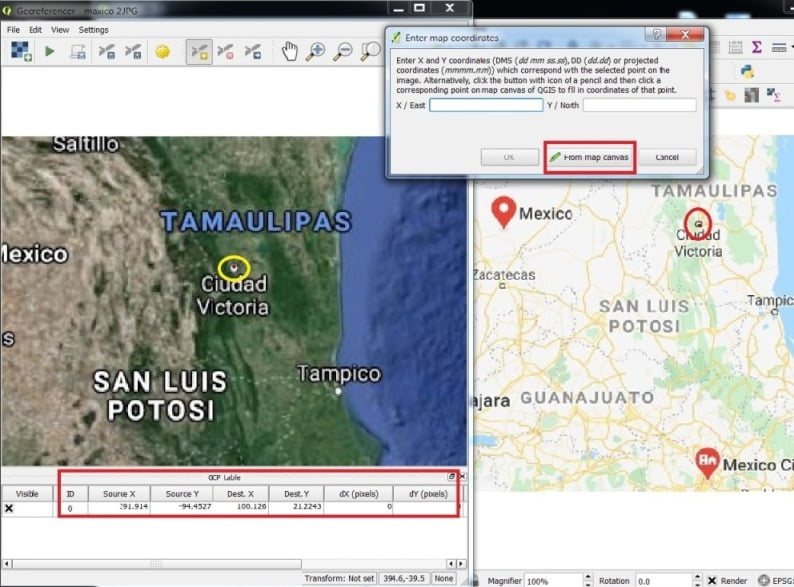
8. You notice the GCP table now has a row with details of your first GCP.
Similarly, add another 3 GCPs covering the entire image. The more points you have, the more accurate your image is registered to the target coordinates.
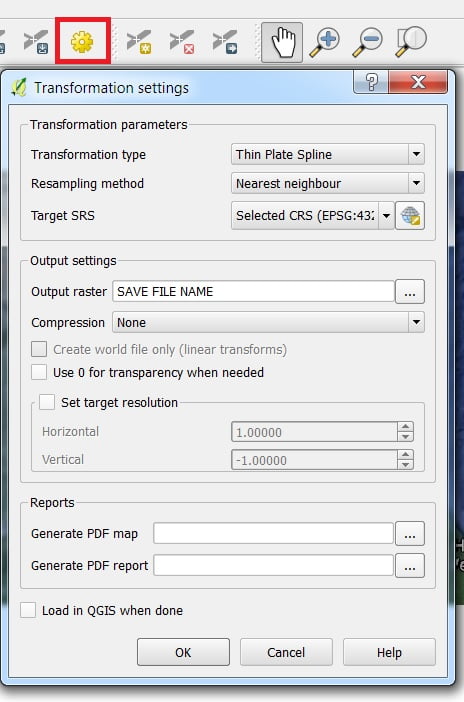
9. Once you have enough points, go to Settings > Transformation settings.
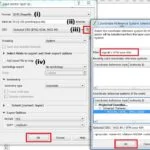
In the transformation settings dialog open, choose the Transformation type > Thin Plate Spline, Resampling method > Nearest Neighbor, Target SRS (Spatial Reference System) > choose WGS 84 EPSG:4326. So the resulting image is in a widely compatible datum, Name your output raster. Make sure the Load QGIS when the done option is checked. Click OK.
10. Click the Start Georeferencing tool to finish the Georeferencing process.
11. Close the georeference plugin window, this now asked you to save GCP points. Click the save button to save the GCP points.
12. In the QGIS primary interface, change the order of the layers in the Layers panel. An Unreferenced image should be placed on top of the Referenced image.
In the Layer Properties window, click the transparency menu and set global transparency 30%. Using zoom in and pan tool check how the referenced .tif image matches with the unreferenced image.
13. Save the project as georeferencing.assignment.
Perform Ground to Image Georeferencing
1. Open QGIS Software, if it was not already opened.
2. Click on Raster > Georeferencer > Georeferencer to open the plugin.
The plugin window is divided into 2 sections. The top section where the raster will be displayed and the bottom section where a table showing your GCP values.
3. Now open the Unreferenced image in Georeferencer window. Go to File > Open Raster, browse to your folder, select the Unreferenced image, and click open.
On the next screen, you will be asked to choose the raster coordinate reference system (CRS). This is to specify the projection and datum of your control points. If you are georeferencing a scanned map like this, you can obtain the- CRS information from the map itself.

Looking at our map image, the coordinates are in Lat/Long. There is no datum information given, so we have to assume an appropriate one. Since it is Asia and the map is quite odd, we can bet the Everest 1830 datum (1975 definition) would give us good results. In the Filter box, write down the word Everest: then all the CRSs related to Everest ellipsoid appear on the list. Select the unknown datum based upon the Everest 1830 (1975 Definition) ellipsoid (its EPGS code is 4045).
4. Now you need to assign coordinates to some points on this map.
Zoom to this area of the image shown in the two cross-line sections, Click add point > and click the cross two-line middle point > in the pop-up window, input the coordinates values. Remember that X=Longitude and Y=Latitude.
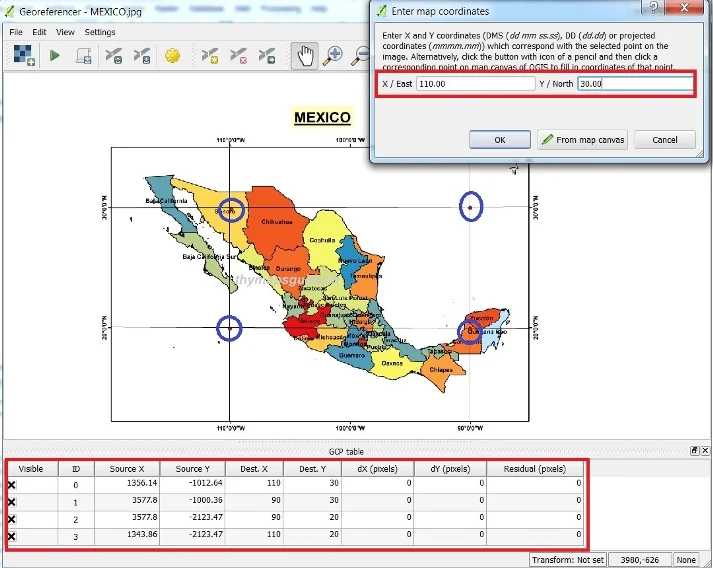
5. Similarly, at least 4 GCPs covering the entire image. The more points you have, the more accurate your image is registered to the target coordinates. You will notice the GCP table now has rows with details.
6. Once you have enough points, go to Settings Transformation settings.
In the transformation settings dialog, choose the Transformation type > Thin Plate Spline, Resampling method >Nearest Neighbour, Target SRS >choose WGS 84 EPSG:4326.
The resulting image is in a widely compatible datum. Name your output raster. Make sure the Load QGIS when a done option is checked, Click OK.
7. Back in the Georeferencer window: go to File > Start Georeferencing. This will start the process of warping the image using the GCPs and creating the target raster.
Once the process finishes, you will see the georeferenced raster layer loaded in QGIS.


You are a very capable individual!