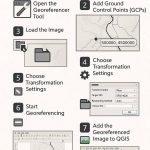
Georeferencing in ArcGIS
In this Tutorial Learn, Image to Image and Ground to Image Georeferencing in ArcGIS, how to georeference an image in ArcGIS
Perform Image to Image Georeferencing
Steps:
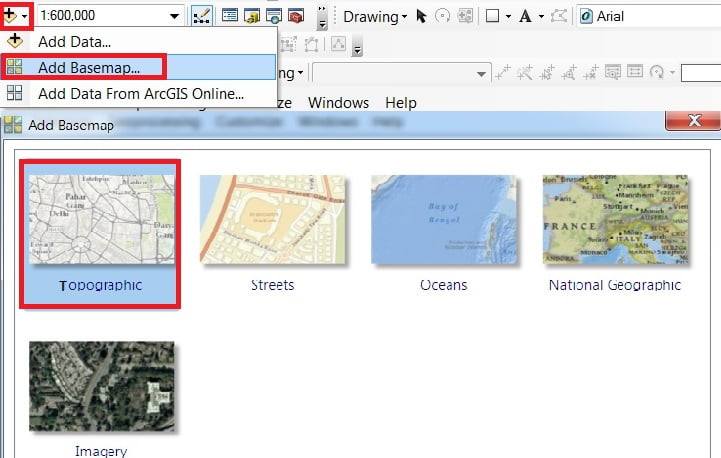
1. First add to Basemap in ArcMap from Standard toolbar. Drop-down ‘+‘ button and click Add Basemap…, and choose Topographic, or any others.
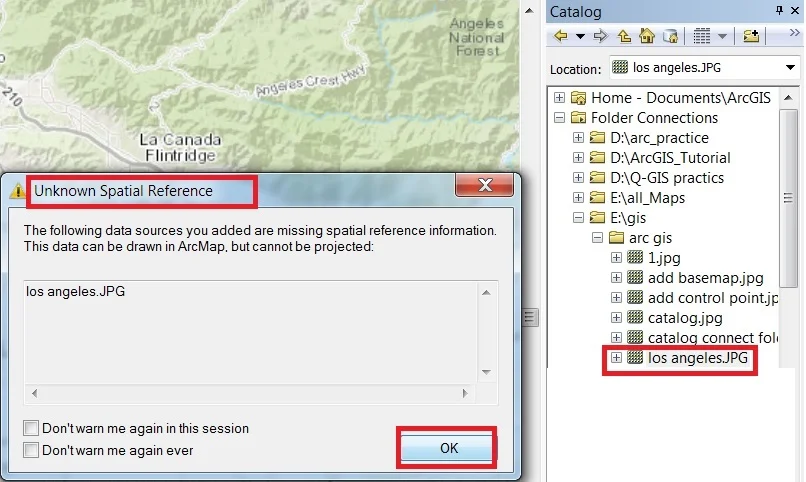
2. In the Catalog window expand the Folder (ex.- ArcGIS) that contains open unreferenced images, just drag it.
3. When you try to add any GIS data that missing spatial reference information in the ArcMap it will warn you. Click the OK button to close this warning message.
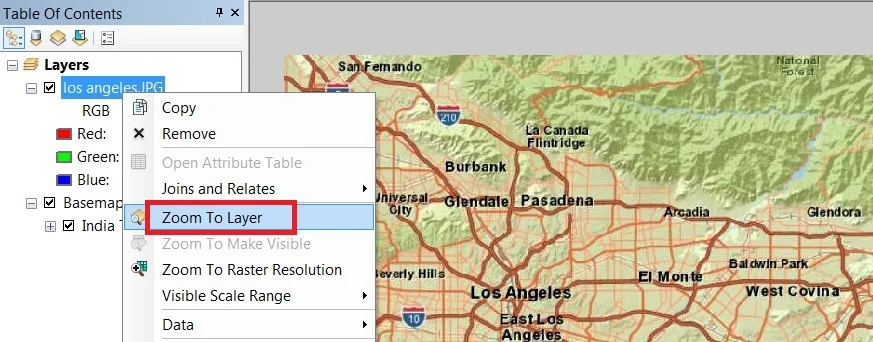
4. To display individual images on the map. Select any one image from the Table of Content (TOC) window, click the right-button of the mouse and choose Zoom To Layer option.
5. If do not display the Georeferencing toolbar, click the Customize menu and click Toolbars > Georefencing, from the Georeferencing toolbar.
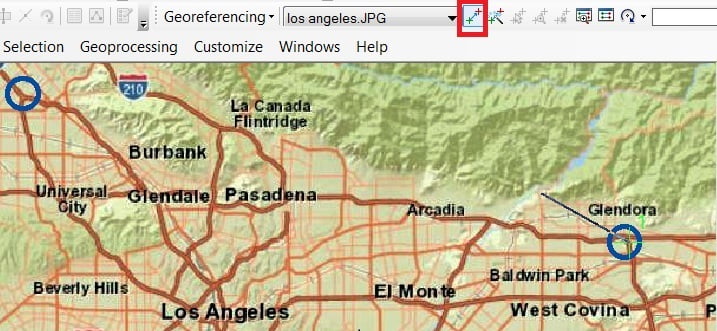
Click the Layer drop-down arrow and click the unreferenced raster layer that you want to georeference.
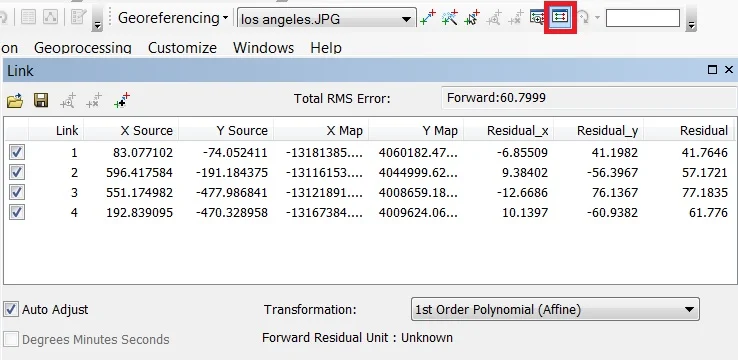
6. Minimum 4 points are required to complete this task. You can also collect maximum points to better accuracy for georeferencing.
Select Add point-click any place in an unrectified image (Los Angeles.jpg), then zoom to layer Basemap and zoom in its same place and click it.
7. The same process follows to complete 4 points or many. You will show an un-rectified image automatically adjust the same area in the Basemap.
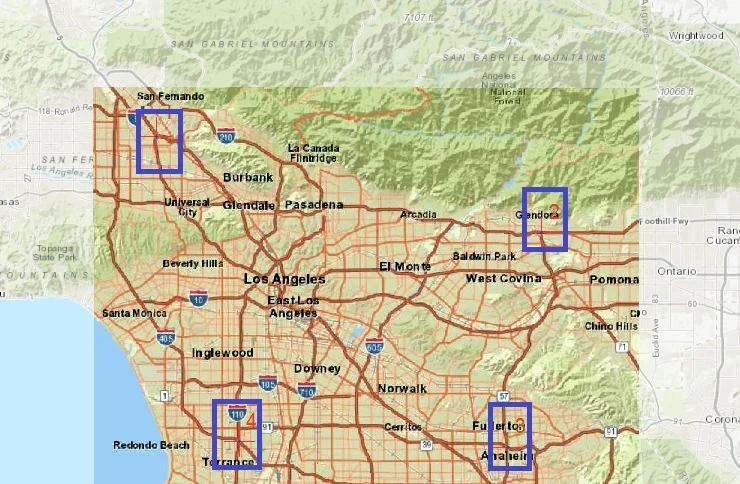
Just check it table to collect all points, open view link table, and show all the information.
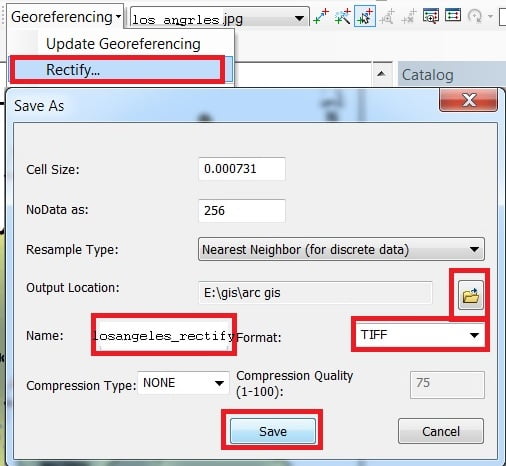
Now finally rectify the unrectified image.
8. Drop-down arrow Georeferencing button, select Rectify. Now rectify window is open, select output lacation, you can change the name and file format, then click the Save button.
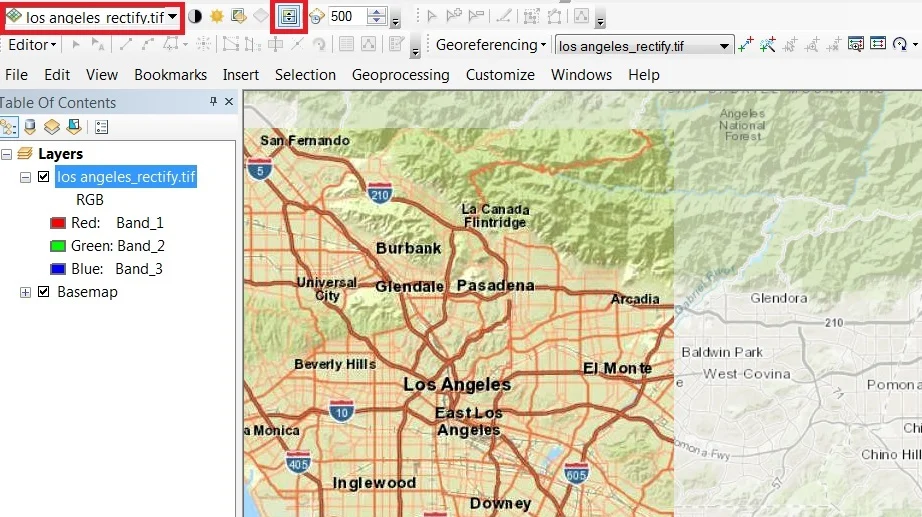
Discard the unrectified image.
9. Already open a Basemap, now open Rectified image, you can swipe (available effects layer) and check its accuracy label of this georeferenced image.
Perform Ground to Image Georeferencing
Steps:
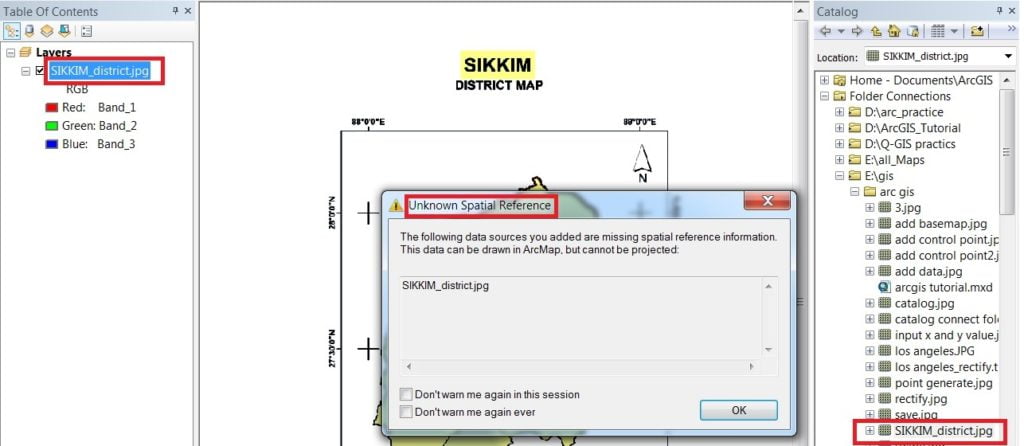
1. From the right side Catalog window, drag the unrectified image (sikkim_disrict.jpg) to the map.
When you add this image, ArcMap generates a warning window, because ArcMap does not find any spatial referencing information for this image.
You just click the OK button and close this warning window.
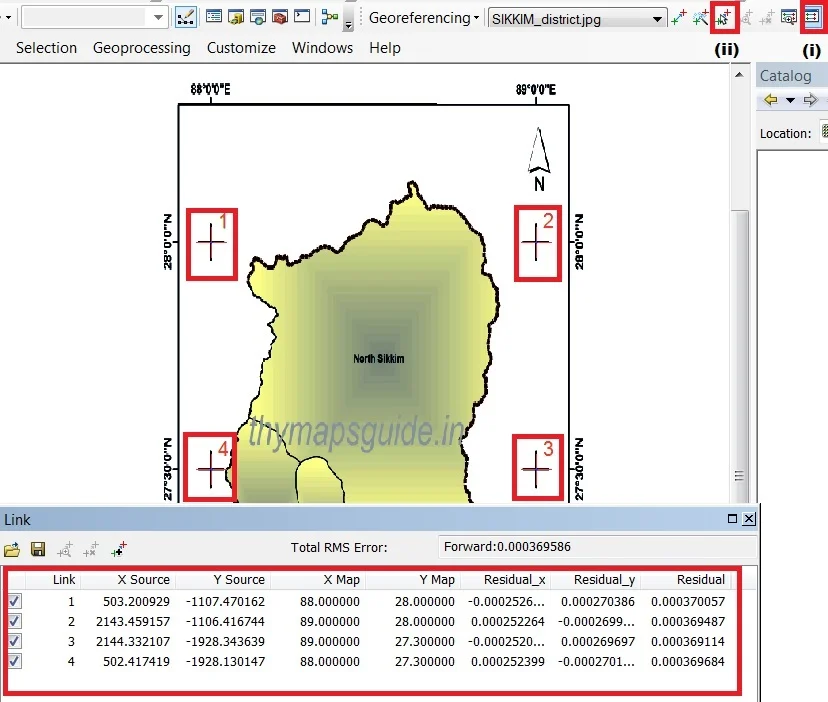
2. Click the Add Control Points tool, click anyone cross point of this unreferenced image to add the source coordinate of the 1st link.
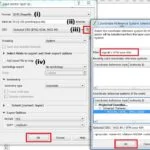
3. Click the right button of the mouse and select Input X and Y option from the pop-up window. Coordinates dialog box appears, enter the longitude (X) and latitude (Y) value.
4. Click OK, follow the same technique and add additional three links for the other three cross points (you can also generate more points to better accuracy).

5. Click the View Link Table (i) to evaluate the transformation. Input any wrong point or value, choose select link (ii), select a point, and then press the delete button on your keyboard.
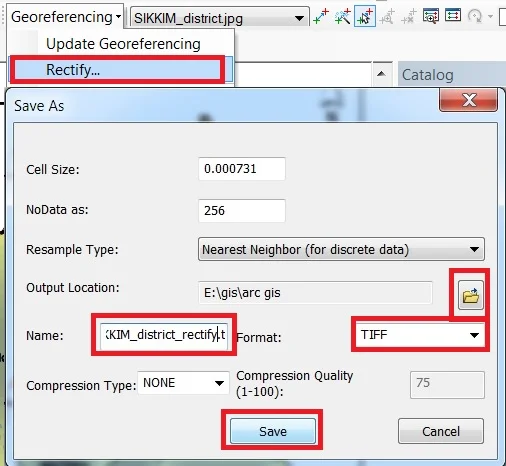
6. Select the Georeferencing drop-down menu, and click Rectify. Save as window is appears, change the output location and also change name and file format, and click save.
7. Select the unreferenced image (sikkim_district) from the TOC (Table of Content) window and remove it. Now Save changes to the existing map window are open, click No button. Because now you don’t need to save this map.
8. Before adding the rectified image in the catalog window, select rectified image (Sikkim_district_rectify), click the right button to choose Properties.
9. Scroll down the Raster Dataset Properties window, on the Spatial Reference Section, click Edit button.
In the Spatial Reference Properties window, expand the Geographic Coordinate Systems folder. Then expand the World sub-folder and choose WGS 1984 coordinate system and click OK button.