Supervised Classification Using QGIS Software
In this tutorial perform Supervised Classification in QGIS Software.
Before start the classification, Download a Satellite image.
Perform Supervised Image Classification
Install Semi-Automatic Classification Plugin
Now open QGIS and install Semi-Automatic Classification Plugin from the plugin option.
[Learn- how to install plugin in QGIS]
[Semi-Automatic Classification Plugin– The Semi-Automatic Classification Plugin (SCP) allows for the supervised classification of remote sensing images, providing tools for the download, the preprocessing and post-processing of images.]
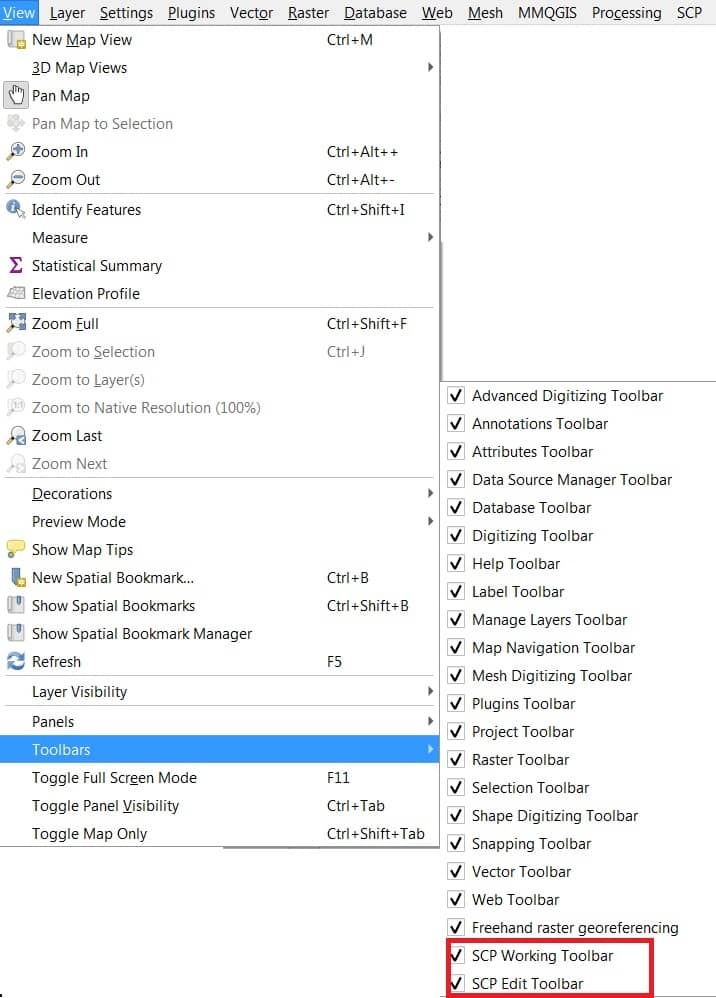
After installation of the plugin if SCP toolbox not showing on the screen, click View then click Panels, and Check SCP Dock panel.
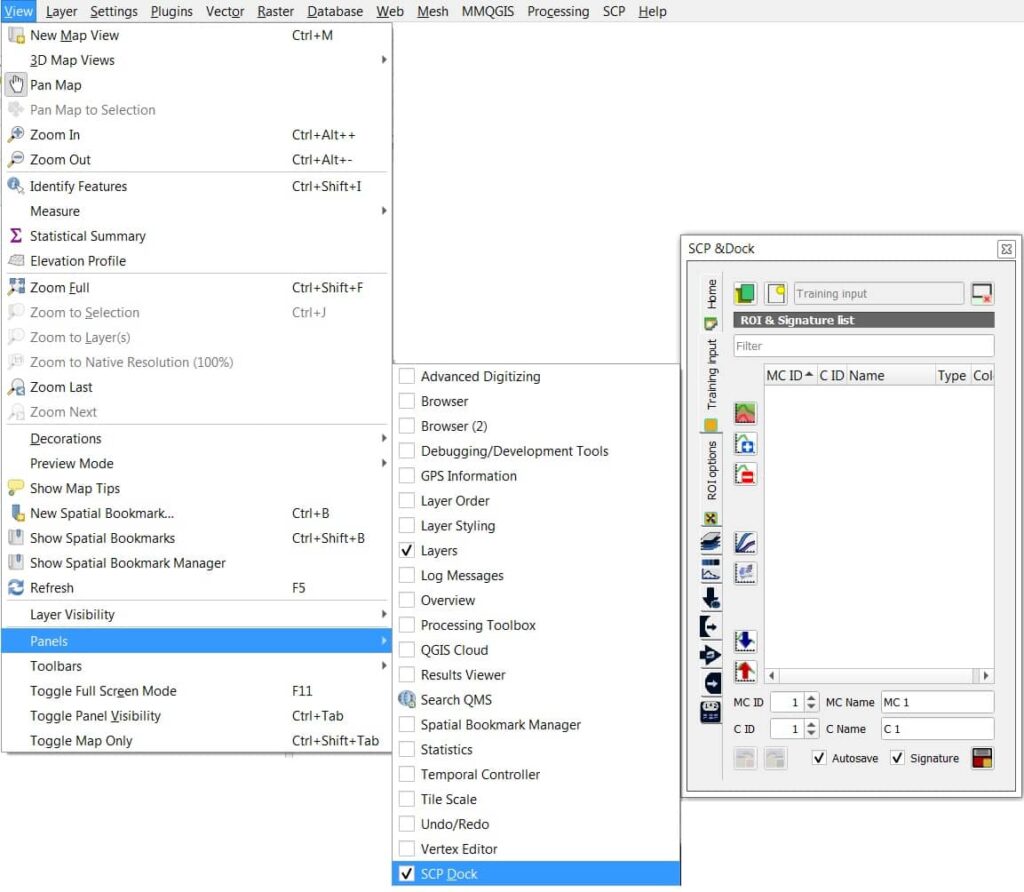
Also click Toolbar and activate SCP toolbars: (SCP Working Toolbar & SCP Edit toolbar).
Create a Band set
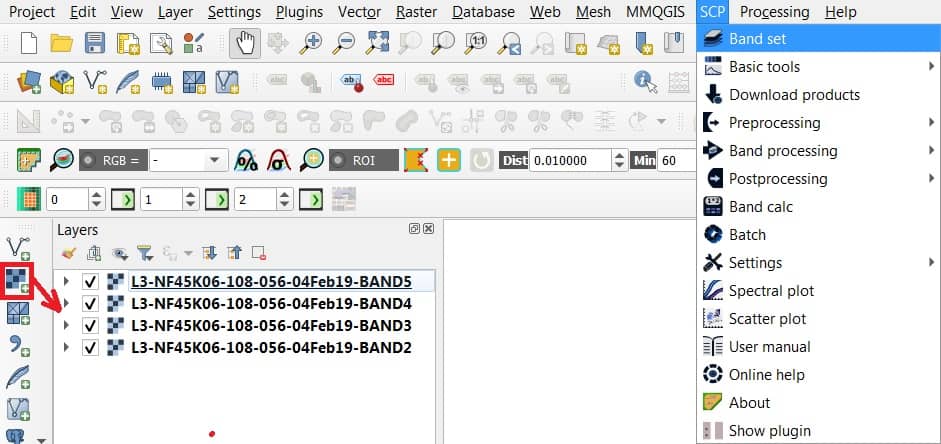
1. Add all the band images (LISS-3) into the QGIS interface.
2. Now Open the SCP Band Set window with SCP > Band Set from the Main Menu.
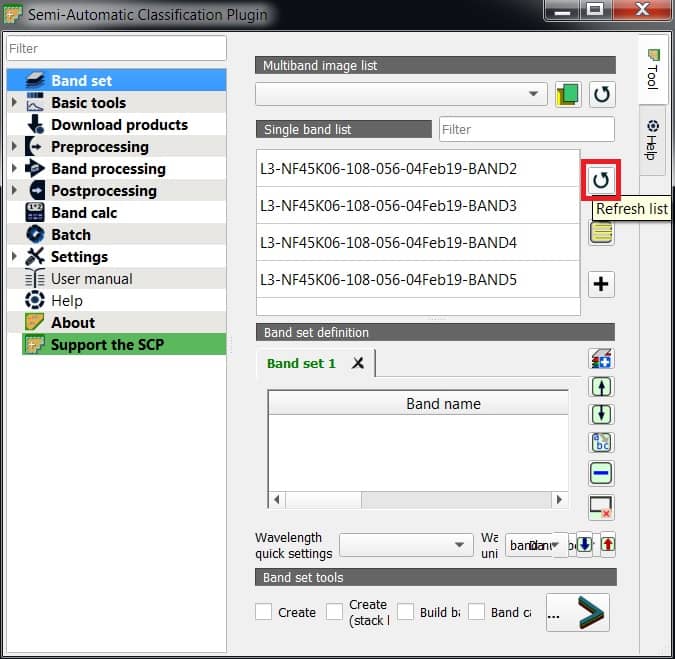
3. Click the Refresh list button to bring in the bands you just loaded into SCP Band Set window.
4. Select all the bands and click the Add band to band set button to add the bands to the band set section.
(Make sure the bands are in the right order and ascending.)
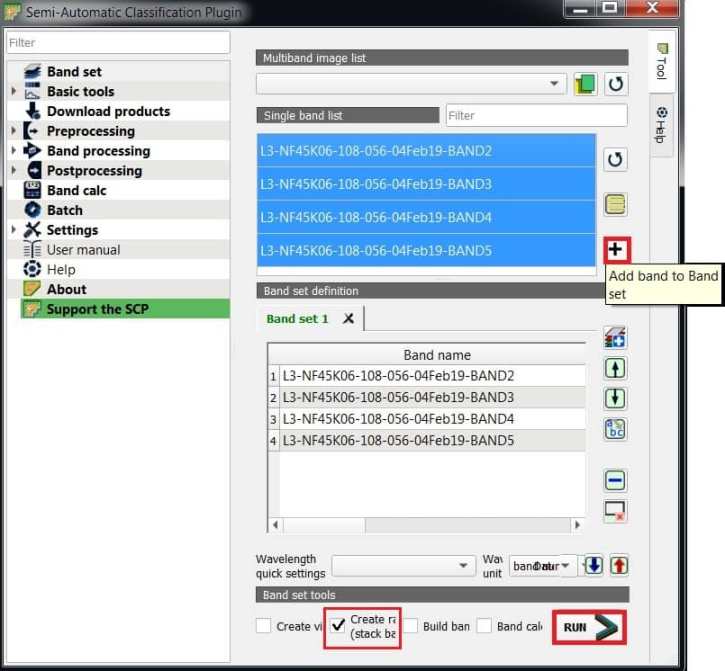
5. In the Band set tool section, click Create raster of (stack bands) check box, and click Run.
6. Select your destination folder to Save the data.
Set Region of Interests (ROI)
1. First, you must create a file where the ROI can be saved. Click Create a training input button in Training input tap on the SCP & Dock panel.
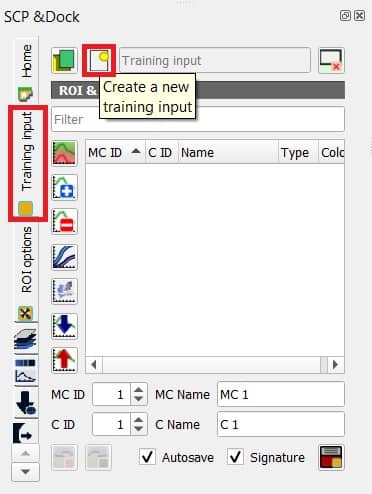
Choose a location for save your file and give it a name (ex.- training_signature).
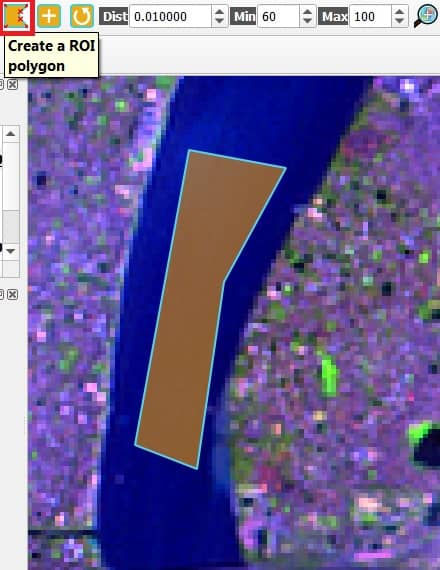
2. Now click the Create a ROI Polygon button to create the ROI. You can define the area, create polygon, to complete it, mouse right click.
3. Enter MC ID and Name (Macroclass name) and C ID & Name (Class name). Then click Save temporary ROI to training input.
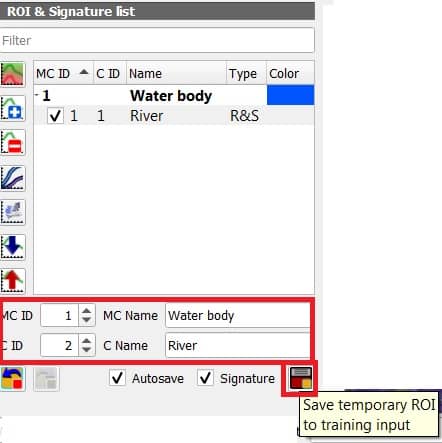
4. See the ROI is added to the signature list. Save this signature list in the same folder, and create new ROI’s for different classes, and Save all the ROI.
5. The next step merge the same class. Select the classes and click Marge highlighted spectral signatures obtaining the average signature.
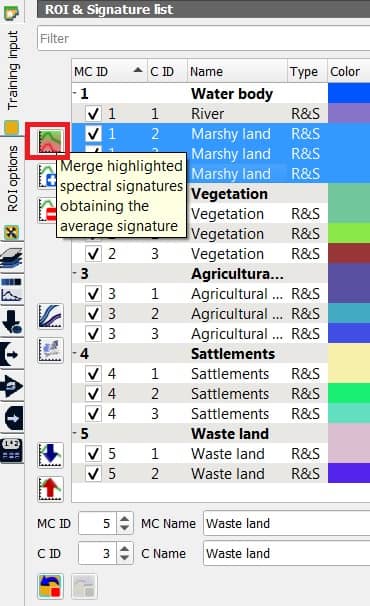
6. After merged classes, delete all the single classes. Click Delete highlighted items.
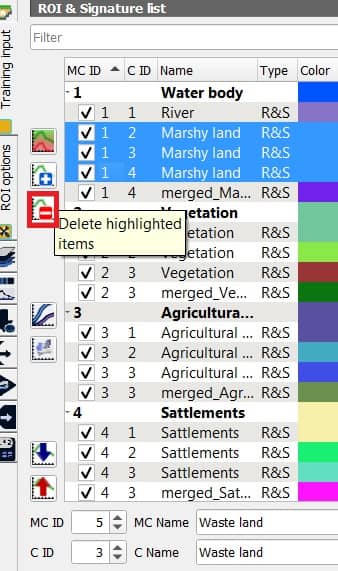
7. You can also change the color, class name and id.
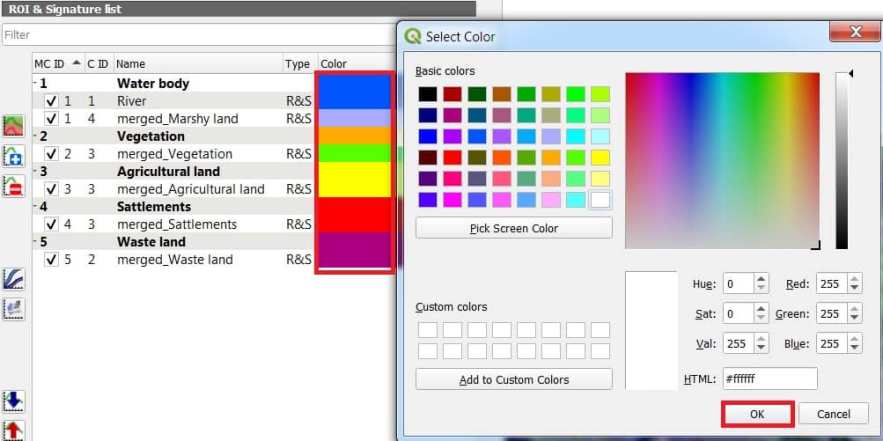
(Changes to ROIs, by right-clicking on a Macro Class or Class and select ‘Properties’ option)
Assessing the Classification
1. Finally perform the classification , Go to SCP > Band Processing > Classification.
- Use-MC ID
- Classification algorithm– Maximum Likelihood
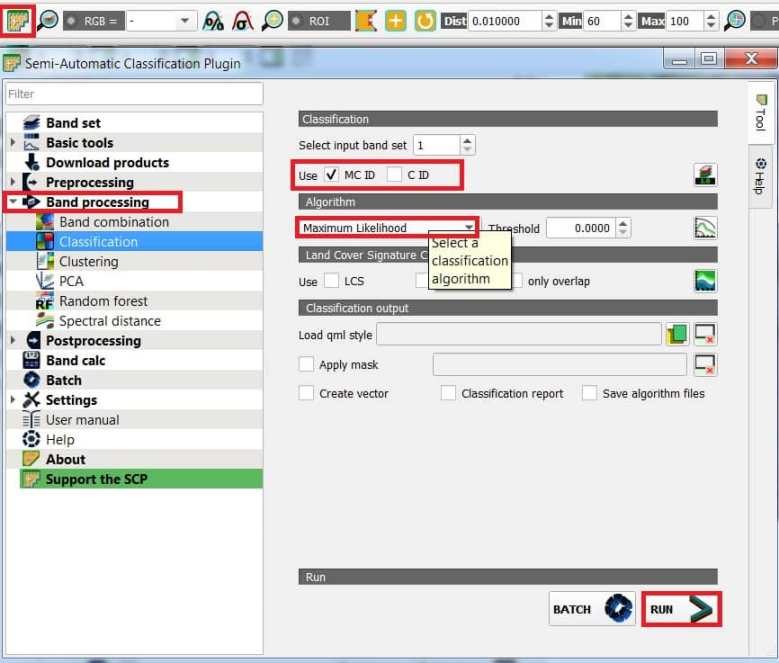
2. Click Run button, will be prompted to specify an output file for the classification. Perform classification for final classification.
This process will take time for classification. After the classification is done, click on post processing tool icon and generate classification report.
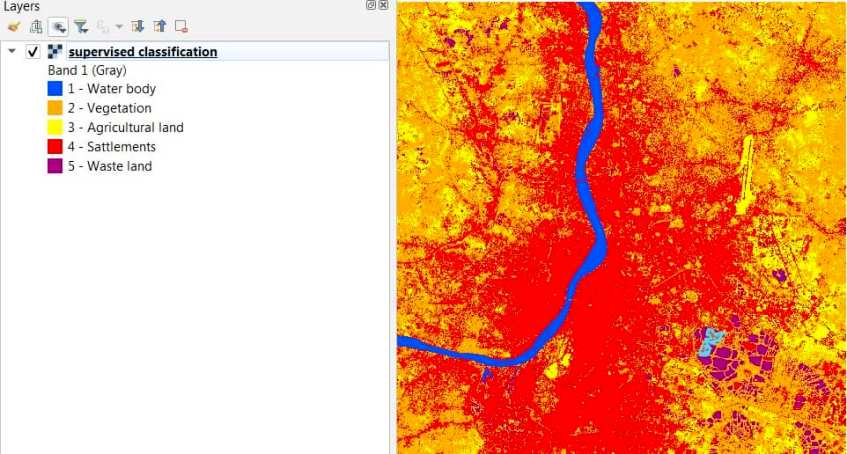
Once the classification is completed, the classified image will automatically be added to QGIS map view section.