Supervised Classification using Erdas Imagine Software
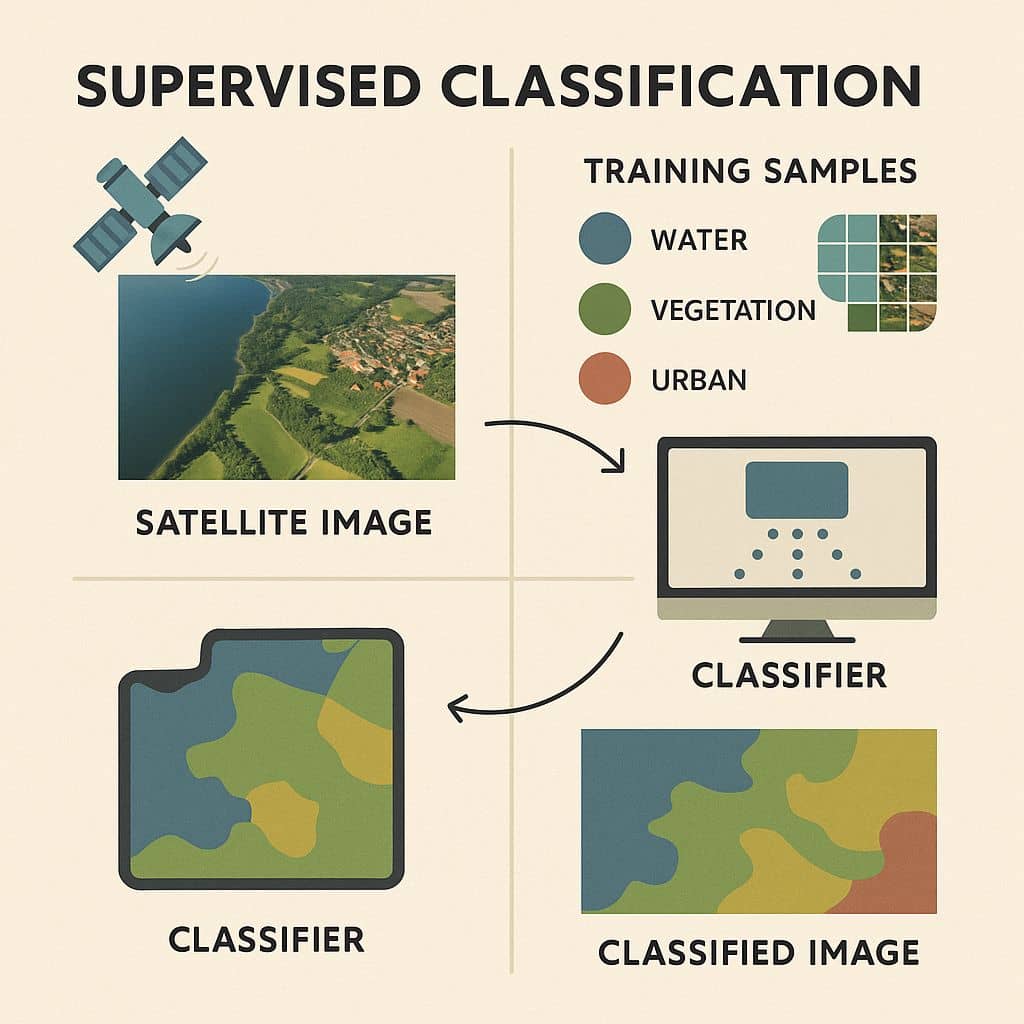
Supervised classification uses image pixels representing regions of known, homogenous surface composition ‘training areas’ to classify unknown pixels.
A Supervised Classification describes information about the data of land use as well as land cover for any region. Soil type, Vegetation, Water bodies, Cultivation, etc.
Supervised Training
Supervised training is closely controlled by the analyst. In this process, you select pixels that represent patterns or land cover features that you recognize, or that you can identify with help from other sources, such as aerial photos, ground truth data, or maps. Knowledge of the data, and of the classes desired, is required before classification.
By identifying patterns, you can instruct the computer system to identify pixels with similar characteristics. If the classification is accurate, the resulting classes represent the categories within the data that you originally identified.
Supervised Classification
In this Tutorial, perform Supervised Classification using Erdas Imagine software.
First, set Preferences to find out Input and Output Directory.
Launch Erdas Imagine software, Click File button > Preferences. Preferences pane appears, expend IMAGINE Preferences, then expand User Interface, and select User Interface & Session.
Now Reset Data Directory and Output Directory, click Save and close.

Add Layer or Data to perform Supervised Classification.

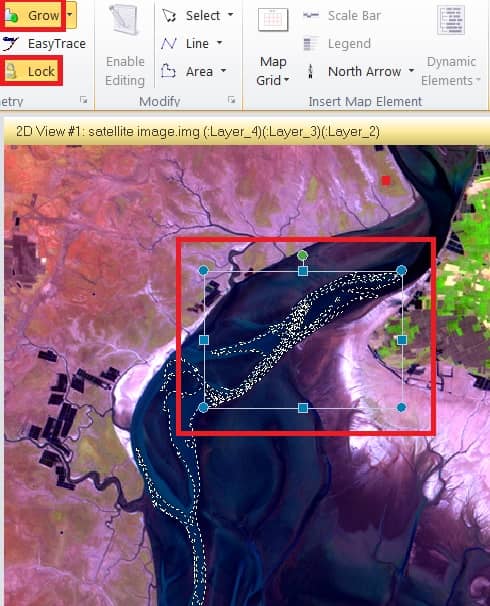
Follow the next step, select Drawing Tab > Insert Geometry group > select Grow, and also select Lock.
Now Identify any particular Land Feature for your Eye Estimation. Just click it and show the result.
The most important thing, open Growing Properties and select an area to cover up Feature Pixels’ value. You can also manually change this to better pixels Accuracy.
Expand Grow, and open Grow Properties.
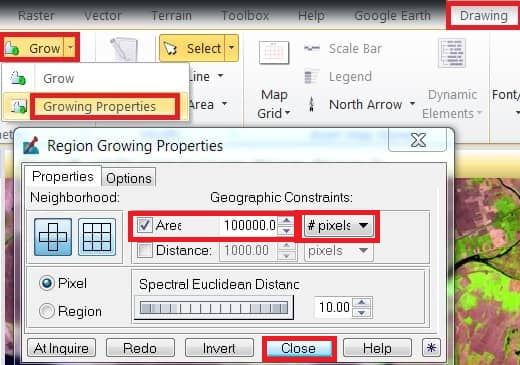
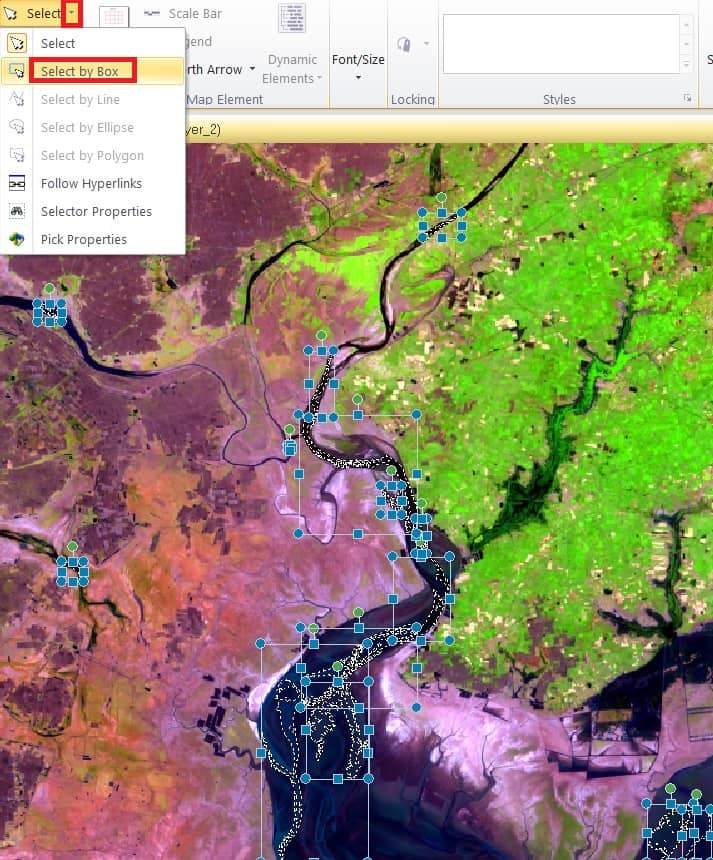
Complete needed all the pixels to value. In the Drawing Tab, expand Select, and choose Select by Box.
Just Drag it full of the Satellite image, and you can see all the pixels’ value selected.
Signature Editor
The next step is to open the Signature Editor.
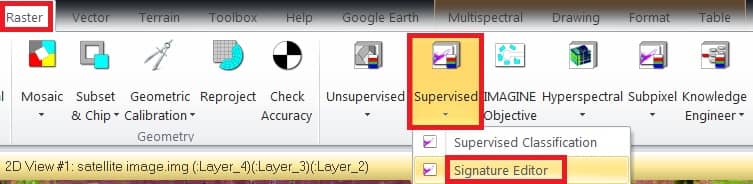
Select Raster menu, expand Supervised, and choose Signature Editor.
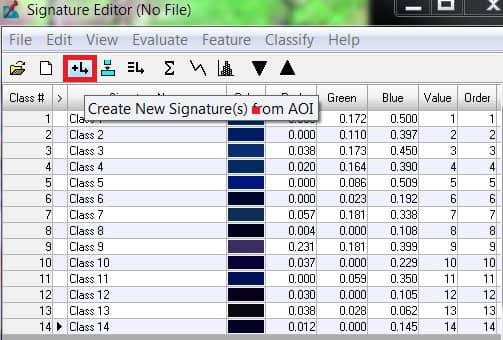
Signature Editor window appears, click Create New Signature.
Now you can see all the selected Pixels’ value listed on the Signature Editor.
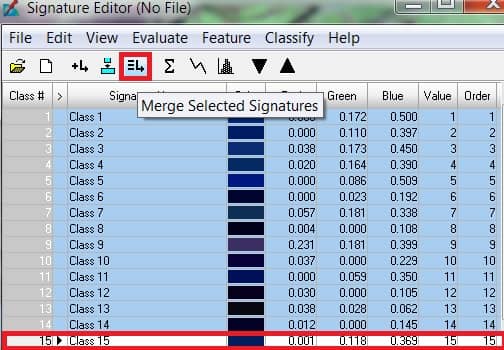
All of the Signatures are listed, marge all the pixels or signatures.
Select all Signatures or class and click Marge Selected Signatures. Follow the signatures list Table, New Class (class 15) is created.
Delete all selected Signatures or class(class 1—class 14), except the Marge Class (class 15).
Right-click all the selected class and click Delete Selection.
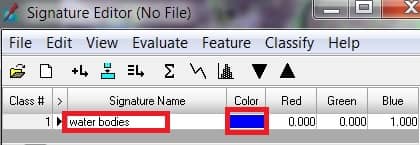
Now change the class Name and also Color.
Follow the same process for other Land use features class.
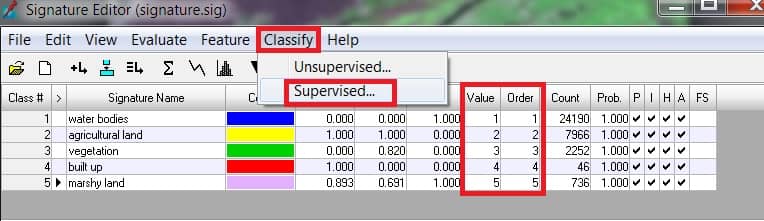
This Satellite image finds out 5 features- (i) Water bodies (ii) Agricultural land (iii) Vegetation (iv) Build up and (v) Marshy land
Change the Value and Order column serial wise.
Now Finally perform Supervised Classification. Expend Classify in the Signature Editor and select Supervised.
Supervised Classification window appears, select Output Destination and Name.
Also, you can check it in the Output Distance file checkbox to create error data. This error data helps us with the accuracy level of the supervised image.
Select Decision Rules one by one. (i) Non-parametric Rule – Parallelepiped (ii) Overlap Rule – Parametric Rule (iii) Unclassified Rule – Parametric Rule (iv) Parametric Rule – Maximum Likelihood.
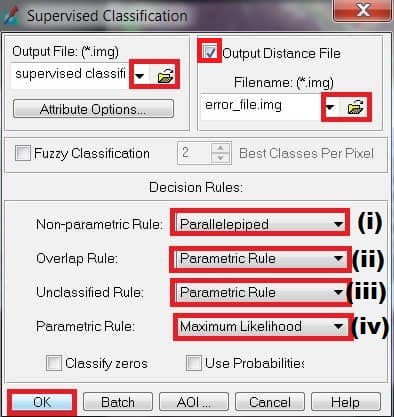
Complete all the step click OK button.
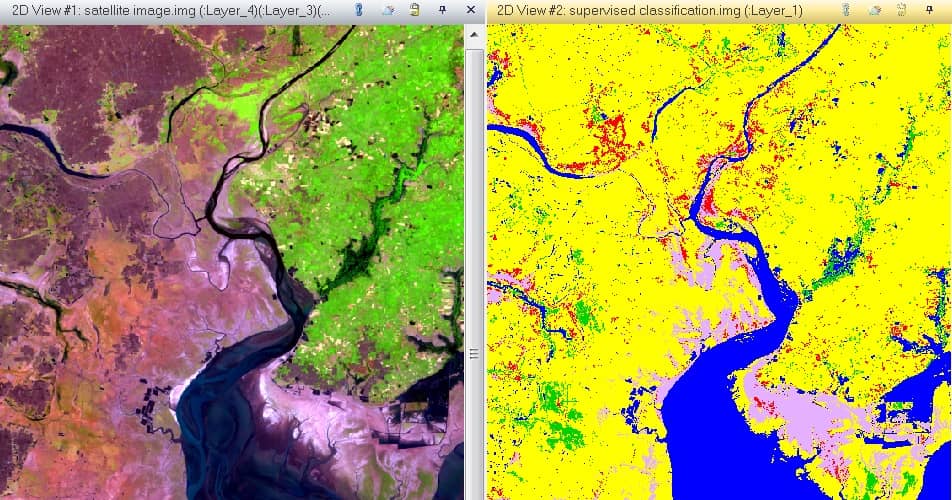
In Erdas Imagine open 2 window viewer (i) Raster Image (satellite image) (ii) Supervised Classification Image


Thanks so much for this! I have not been this moved by a post for quite some time! You have got it, whatever that means in blogging. Well, Youre certainly someone that has something to say that people need to hear. Keep up the good job. Keep on inspiring the people!
Thanks you so much TOM.
I have to admit that overall Im really impressed with this particular site.You can easily see that youre passionate about your writing. If perhaps Id your writing ability I look forward to more updates and you will be returning.
Thank you.
I am going to go ahead and bookmark this content for my sis for the research project for class. This is a pretty web page by the way. Where do you get a hold the design for this web page?
Thank you, please follow my website for better content in future.
I found your blog web site on yahoo and examine just a few of your early contents. Proceed to keep up the very good operate. I simply additional up your RSS feed to us RSS Bar News Reader. Searching for forward to reading super from you later on!?I am usually to blogging and i really respect your posts.
Thank you so much
I really enjoy this template youve got going on in your website. What is the name of the design by the way? I was thinking of using this style for the internet site I am going to build for my class room project.
Thanks, no use any Template, I can create an own design, help with Elementor.
OMG! Its like you read my mind! You seem to know so much about this, like you wrote the book in it or something. I think that you can do with some pics to drive the content home a bit, besides that, this is informative blog. A wonderful read. Ill certainly revisit again.
Thanks for your compliment