Post Classification Analysis in QGIS
In order to improve the image classification results, you can try Post Processing method in QGIS.
Perform Post Processing
In this tutorial we will apply four Post Processing method in our QGIS Supervised Classification image.
- Classification Report
- Classification to Vector
- Classification Sieve
- Edit Raster
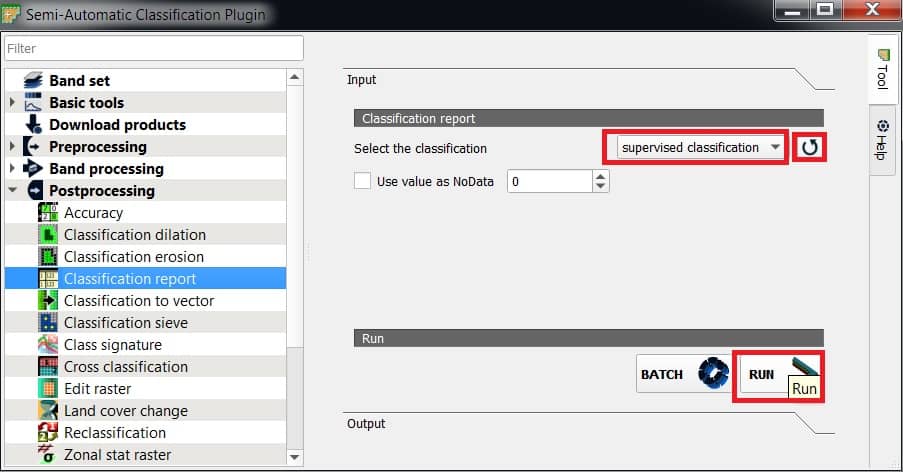
Classification Report
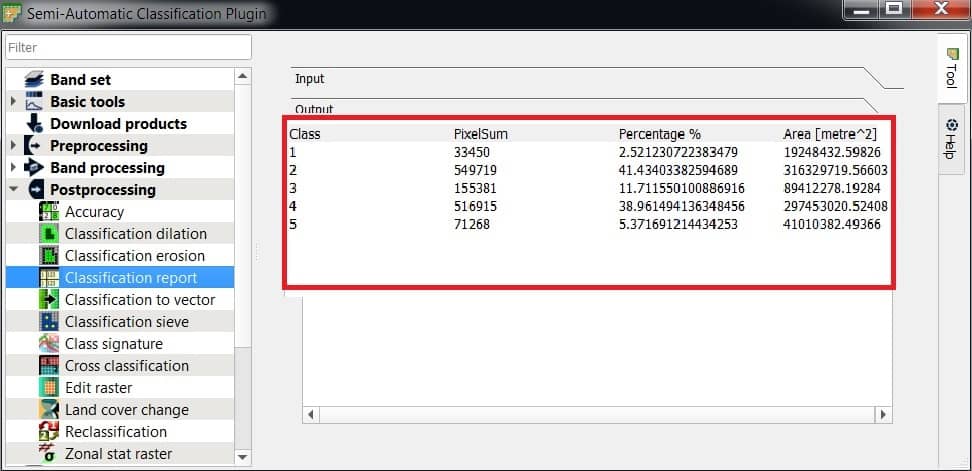
Classification report allows for the calculation of class statistics such as number of pixels, percentage and area.
Perform Classification Report
- Select the classification raster (supervised_classification), refresh layer list, and choose.
- Use value as NoData : if checked, NoData value will be excluded from the report.
- Click RUN button: choose the output destination and start the calculation; the report is saved in a text file and displayed in the tab Output.
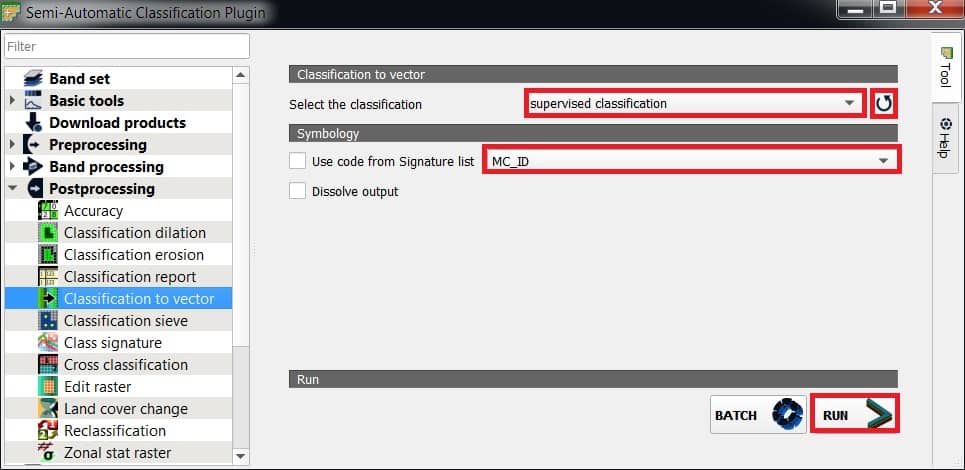
Classification to Vector
Classification to vector allows for the conversion of a classification raster to vector GeoPackage (.gpkg) .
Perform Classification to Vector
- Select the classification raster (supervised_classification), refresh layer list, and choose.
- Symbology : Use code from Signature list (MC_ID).
- MC ID: use the ID of macroclasses.
- C ID: use the ID of classes.
- Click RUN button: choose the output destination and start the conversion.
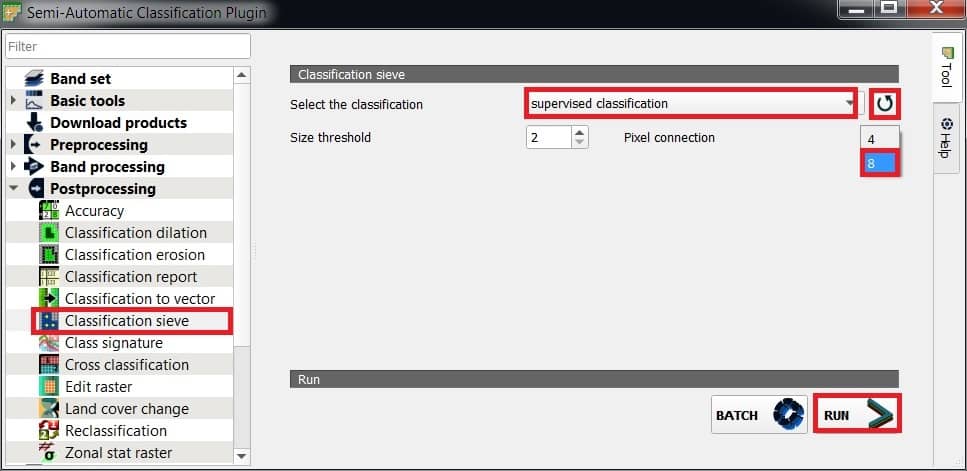
Classification Sieve
Classification sieve allows for the replacement of isolated pixel values with the value of the largest neighbour patch. It is useful for removing small patches from a classification.
Perform Classification Sieve
- Select the classification raster (supervised_classification), refresh layer list, and choose.
- Size threshold : size of the patch to be replaced (in pixel unit); all patches smaller than the selected number of pixels will be replaced by the value of the largest neighbor patch.
- Pixel connection : select the type of pixel connection:
- 4: in a 3×3 window, diagonal pixels are not considered connected.
- 8: in a 3×3 window, diagonal pixels are considered connected.
- Click RUN button: choose the output destination and start the calculation.
Edit Raster
Edit raster allows for the direct editing of pixel values in a raster. Only pixels beneath ROI polygons or vector polygons are edited.
Perform Edit Raster
- Select the classification raster (supervised_classification), refresh layer list, and choose.
- Edit raster values:
- Edit options:
- Use the value field of the vector : if checked, raster is edited using the selected vector (in Edit values using a vector) and the polygon values of selected vector field.
- Use constant value : if checked, raster is edited using the selected constant value (ex.- river- mc id-1)
- Use expression : if checked, raster is edited according to the entered expression; the expression must contain one or more where; accepted variable are raster representing the input raster value and vector representing the vector value if selected; the following example expression where(raster == 1, 2, raster) is already entered, which sets 2 where raster equals 1, and leaves unchanged the values where raster is not equal to 1.
- Click RUN button: edit the raster.

