Import Data in Google Earth
In this tutorial learn, How to Import GPS and GIS Data into Google Earth pro. You will need Google Earth Pro for Desktop installed on your computer. Download Google Earth Pro latest version.
How to Import GPS Data into Google Earth
Steps:
1. Open Google Earth Pro.
2. If you have data stored on your GPS device (Garmin or Magellan handheld GPS), connect your device to your computer using your USB or Serial port connector, and turn on the device.
[Note: If you are using a USB connection, you may need to first install a driver for your GPS device. Drivers can be found on the CD that came with your device, or downloaded from the device manufacturer’s website.]
3. In Google Earth desktop, Go to the Tools menu and select GPS.
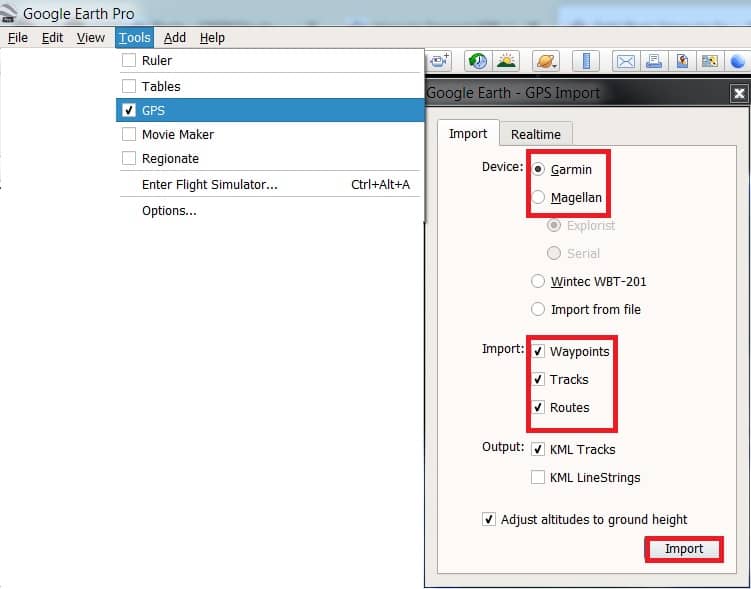
4. The GPS Import window appears, go to the Import tab and choose your device: Garmin or Magellan.
5. Check the boxes if you want to Import Waypoints, Tracks, and Routes.
6. Click Import button. Your data will be imported from your device directly into Google Earth.
Data imported from a GPS handheld device can be animated because it has time stamps of when it was collected by the GPS device. Select the GPS data in the Places panel, and click Play on the Time Controls.
7. Save your GPS data to a KML file by right-clicking on your GPS data folder in the Places panel, and selecting Save Place As.
How to Import GIS Data into Google Earth
Steps:
1. Open Google Earth Pro Desktop.
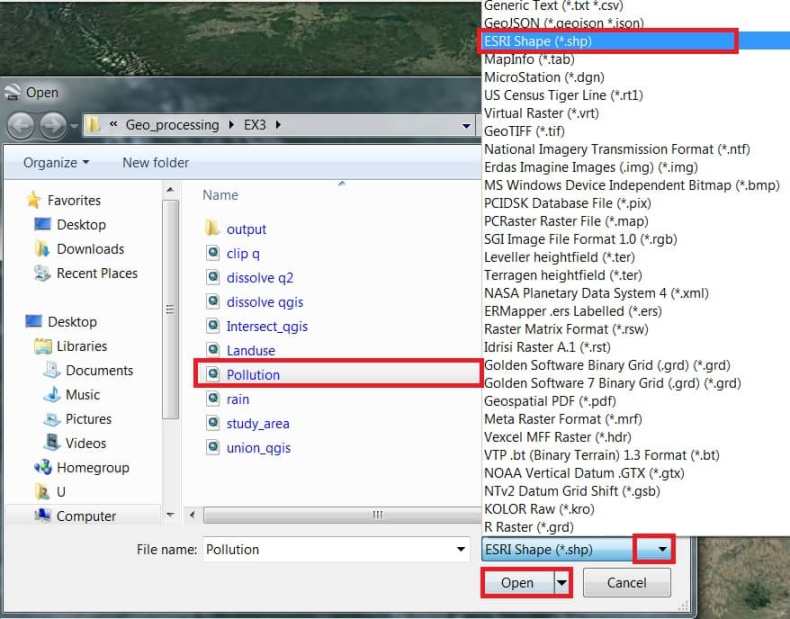
2. Select Import from the File menu.

3. Select your data file type from the Files of type menu. For example, choose _ESRI Shape (.shp).
A message will appear, stating that the file contains over 2500 features and could cause application performance degradation.
4. When you see this message, Click the Import all button.
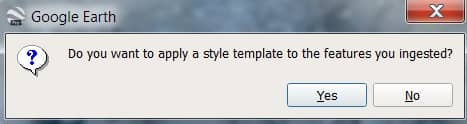
5. A message will appear, asking if you would like to create a Style Template. Click Yes.
6. In the next Style Template Settings dialog box, you will create a style template.
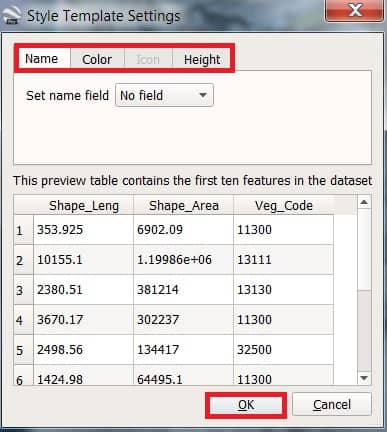
7. Click OK to finish your style.
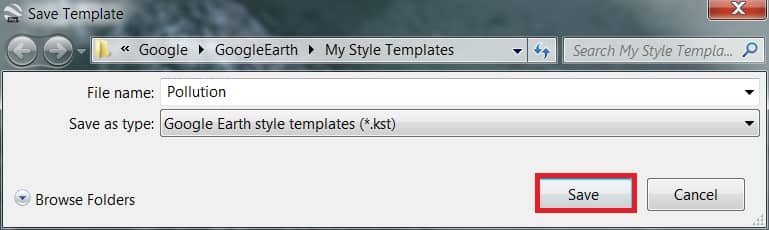
8. A dialog box will appear, asking if you would like to save the style template you just created. If you wish to save it for future use, click Save. Otherwise, click Cancel.
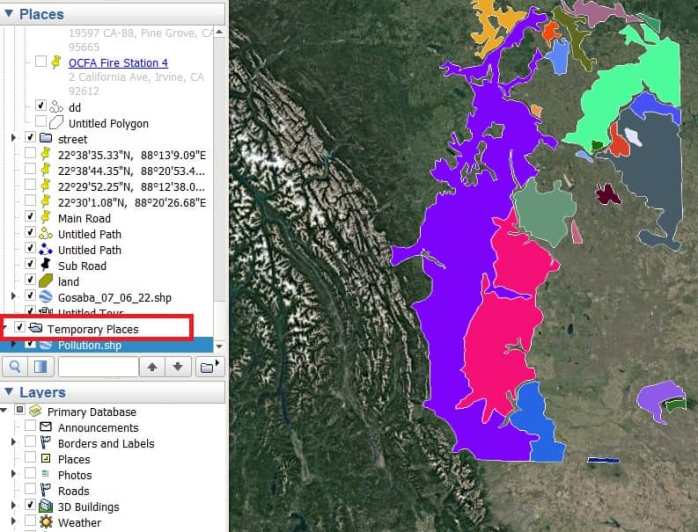
9. Your GIS data has been converted to KML, and the data now appears on Google Earth. Notice how the KML is also listed in the Places panel under your Temporary Places folder.
To save it in Google Earth for future sessions, select and drag this file to your My Places folder before closing Google Earth.