Flood Simulation Model
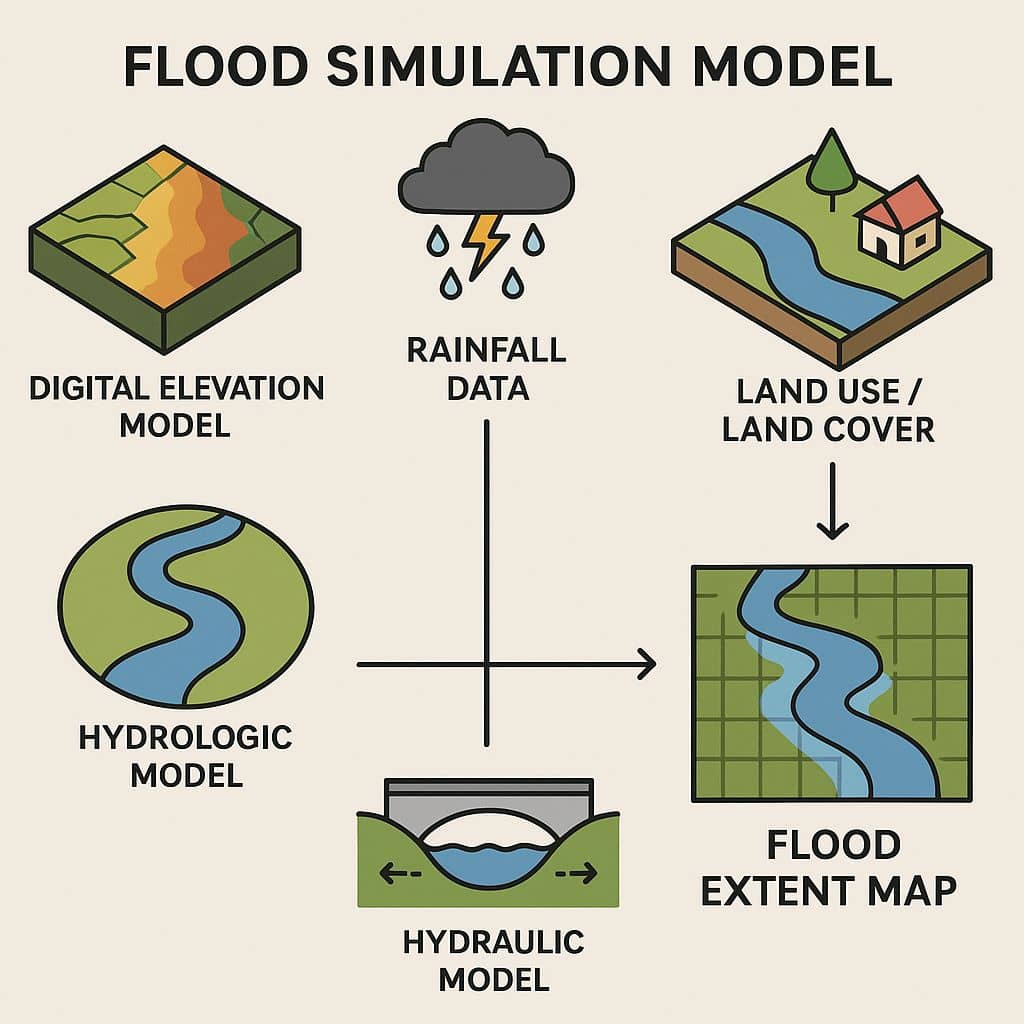
A Flood Simulation Model is a computational tool used to simulate, predict, and analyze flood behavior in a given area. It uses terrain, rainfall, hydrology, and hydraulic data to understand how water flows and accumulates, enabling informed decision-making for flood risk management.
Types of Flood Models:
| Model Type | Tools/Examples | Description |
|---|---|---|
| 1D Models | HEC-RAS (1D), InfoWorks | Simulates flow in a single dimension (along river channels) |
| 2D Models | HEC-RAS (2D), TUFLOW, LISFLOOD-FP | Simulates flow across terrain (floodplains, urban areas) |
| Coupled 1D/2D | HEC-RAS (1D+2D), MIKE FLOOD | Combines channel and surface flow |
| Rainfall-Runoff | HEC-HMS, SWMM | Converts rainfall to runoff, useful upstream input for hydraulic models |
Flood Simulation Model in ArcScene
In this Tutorial, learn Flood Simulation Model on ArcGIS software, using ArcScene.
Before analysis Flood Modelling Download DEM data.
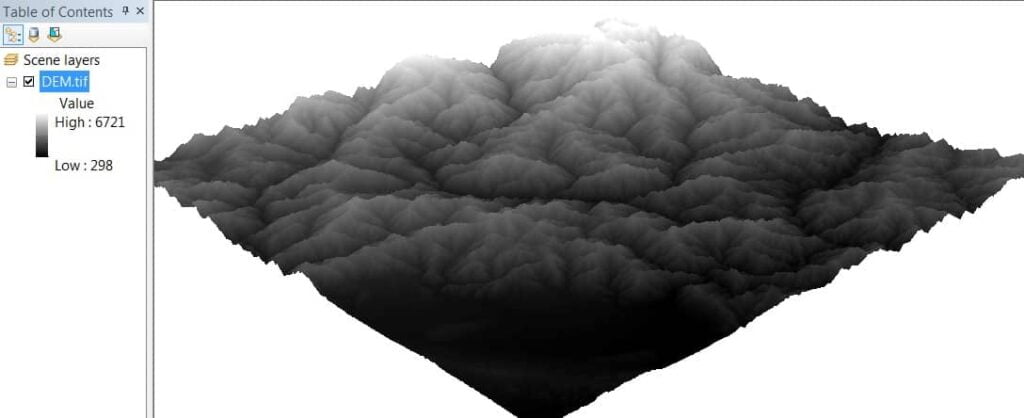
Open ArcMap and Add DEM (Digital Elevation Model) data.
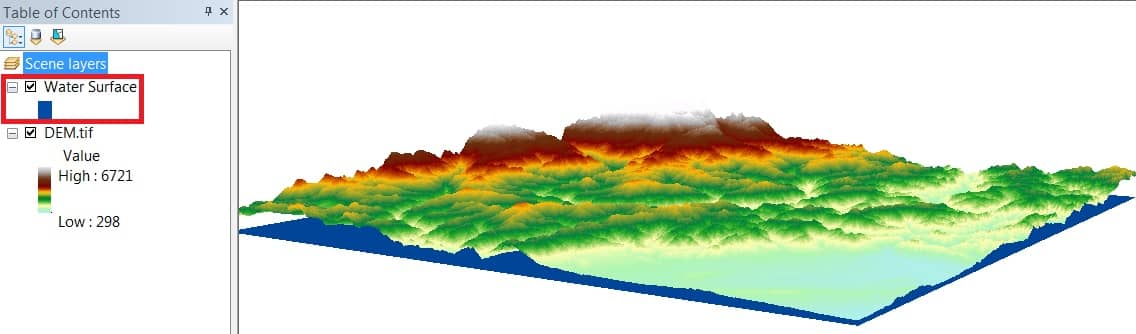
Create Polygon Shapefile feature to use Water Surface. Cover the full DEM Map.

Now open ArcScene, and Add DEM data. Using ArcScene to better view Flood Modelling and also create 3D Animation.
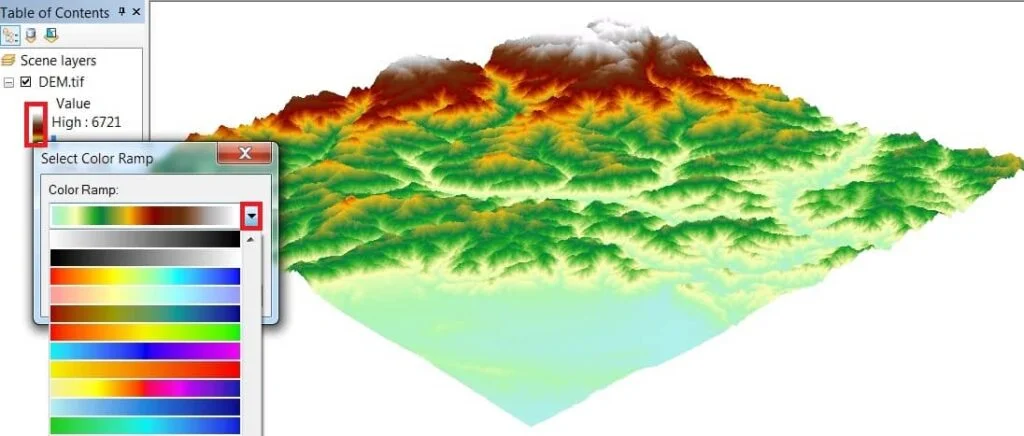
Change the color to better 3D visualize. Click color ramp and choose any type of color combination to view beautiful.
Add Water Surface Polygon Feature and see the result.
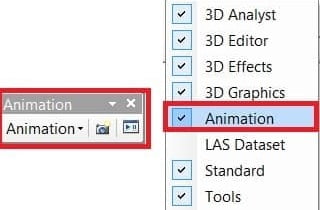
Now open Animation Tool. Right-click in the Toolbar blank area and select Animation.
Animation pane appears Dropdown Animation and opens Create Keyframe and Animation Manager one by one.
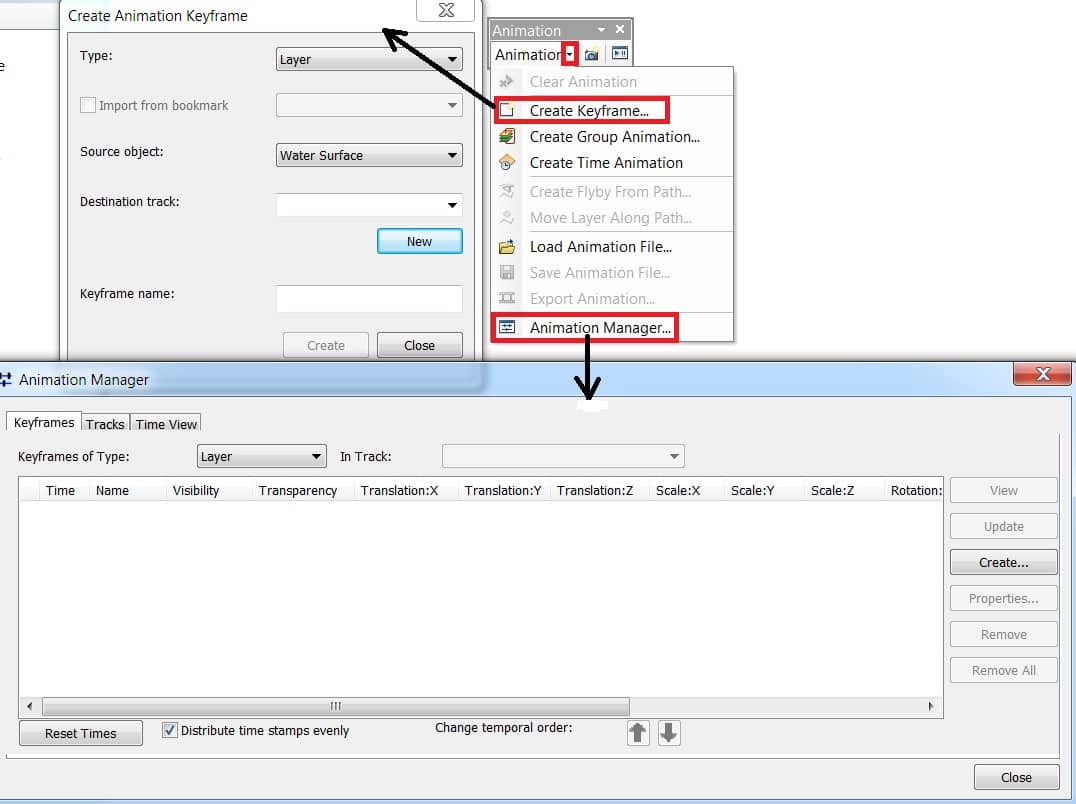
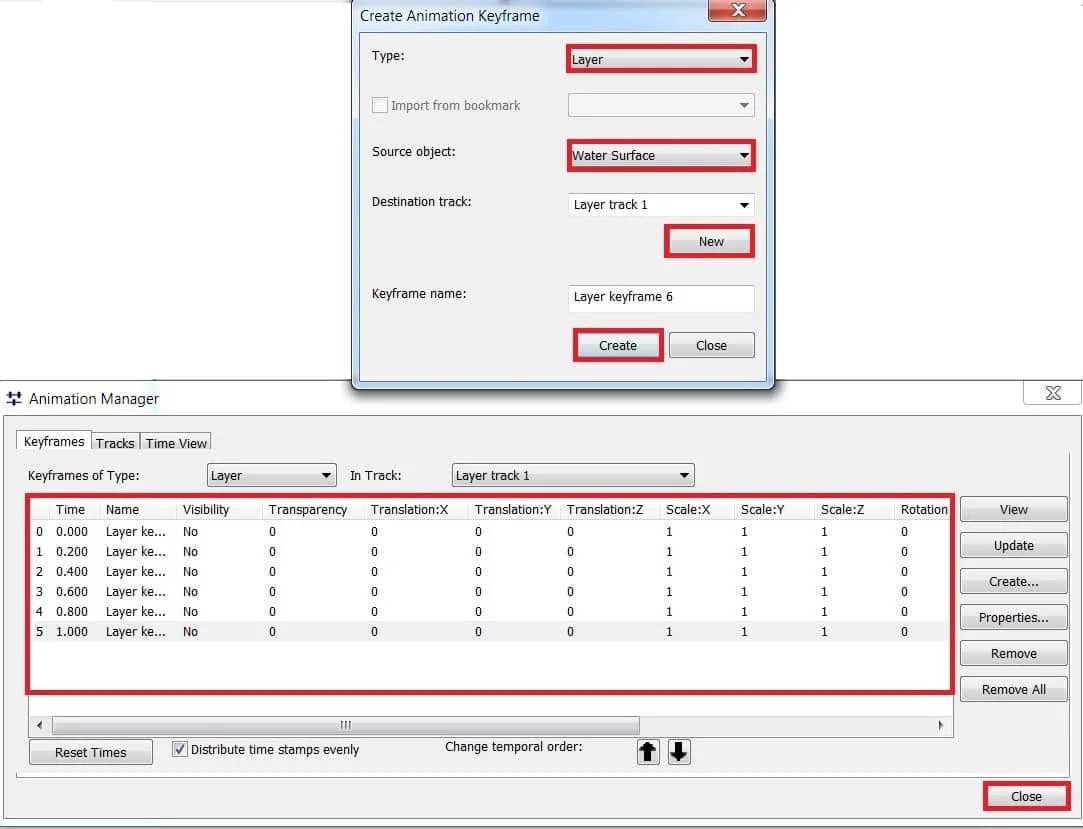
In the Create Animation Keyframe window, Type -Layer > Source object – Water Surface. Destination Track > click New – Layer track 1 is created. Now click the Create button and show the result in the Animation Manager window.
You can create many numbers of Layer Keyframes, just click the Create button again and again. Complete create Layer Keyframes, click Close button.
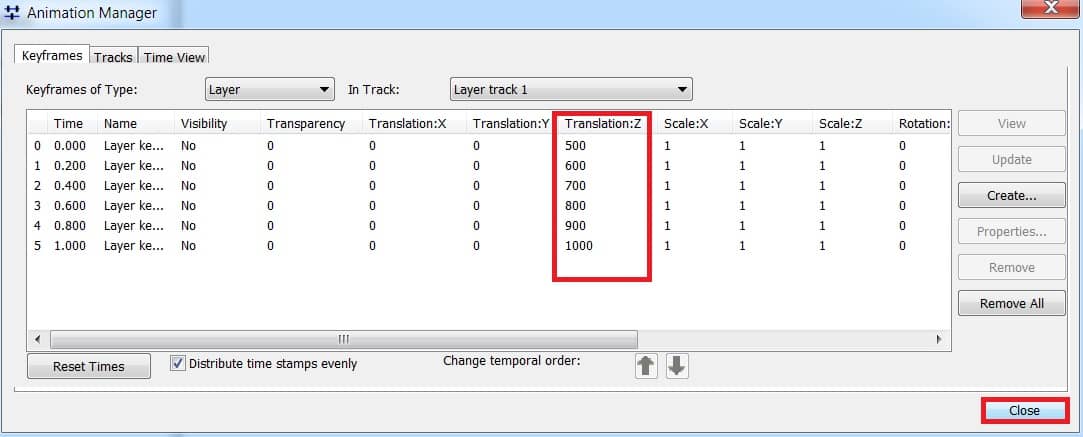
In the Animation Manager window, Input Elevation (Z) value in Translation Z column.
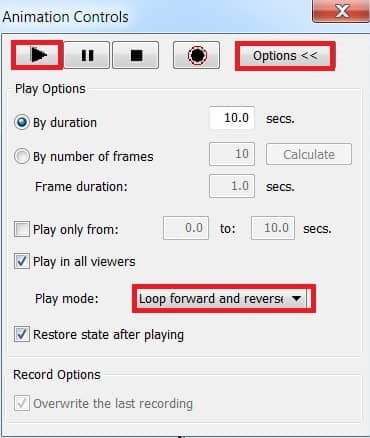
In the Animation Toolbar, open Animation Controls.
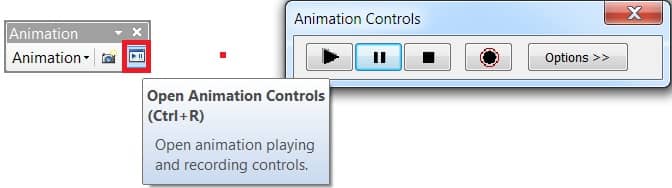
Animation Controls pane appears, click Options button, play mode > choose Loop forward and reverse.
Finally, click the Play button and see the Flood Simulation.