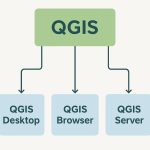
gvSIG GIS
gvSIG was initially developed for the Generalitat Valenciana (gv), an institution of the self-governed autonomous community of Valencia. This explains the abbreviation gvSIG for which the last three letters stands for Sistema d’informació geogràfica (SIG), or GIS in English.

What is the gvSIG?
gvSIG, is a powerful, open source Geographic Information System (GIS), desktop application, to edit, analyze and manage information from the point of view of spatial relations.
The gvSIG Desktop is an easily extensible solution, allowing thus continually improving the software application and developing tailor-made solutions.
gvSIG has tools to facilitate the analysis of the existent data,either cartographic or alphanumeric data. More than 300 geoporcessing tools are available in gvSIG.
gvSIG Download
Download gvSIG Desktop application for Windows and Linux.
Installation
The installation process is similar in Windows as well as in Linux.
Step 1: When running installation file, a window appears, where we can select installation language, then click OK.
Step 2: When the installation starts, a welcome message appears, press Next, Once it finishes, press Finish.
gvSIG Tutorial for Beginners
gvSIG allows to work with different documents. These documents allow to work with data from different points of view: data as a map, as an alphanumeric table, graphics, etc.
Interface
The gvSIG GUI (Graphical User Interface) is divided into five areas:
- Menu bar
- Toolbars
- Project manager
- Work area
- Status bar

In gvSIG application, four main tools in available on File menu:-
| Icon | Tool | Shortcut key | Description |
 | New project | Ctrl+N | Create a new project |
| Open project | Ctrl+O | Open an existing project | |
| Save project | Ctrl+S | Save the project work | |
| Save as.. | Ctrl+Shift+S | Save the project on a new file, with a new name |
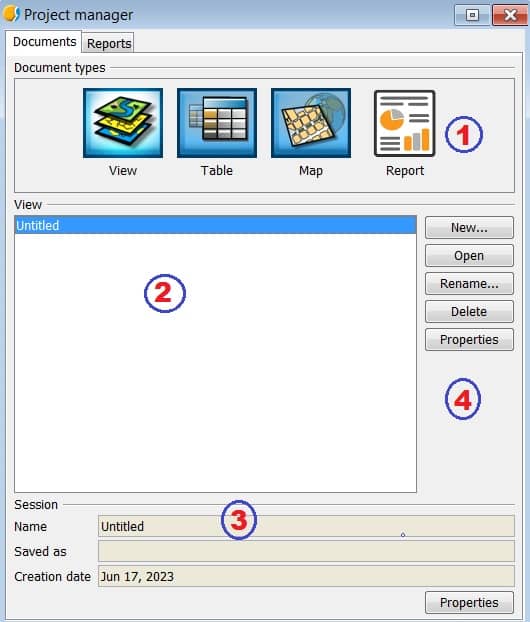
Project Manager
Project manager is the window where all documents that are part of a gvSIG project are organized.
Project manager window consists of four main areas:
- Documents Types: Show the four documents (View, Chart, Map and Graphic).
- Document list: Displays the list of existing documents on the selected document type.
- Session properties: It is reported the main session data (name, location and .gvsproj file creation date).
- Toolbars: It contains tools to create, open, rename, delete and access the properties of each type of document.
Create New Layer
1. Create a new Shapefile layer, in the Project manager, select View, then click New.
2. The new view window appears, go to View tab in menu, and choose New layer.
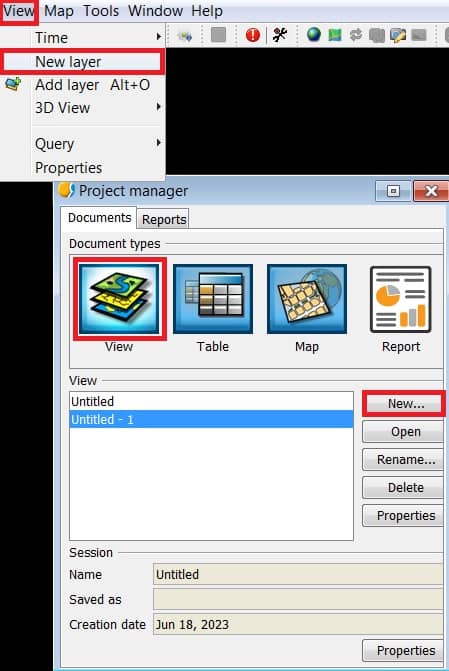
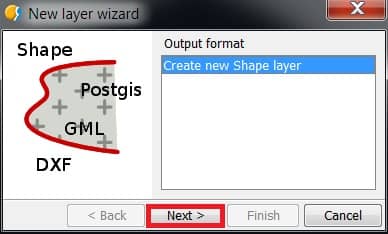
3. You must select “Create new Shape layer” and click on Next button.
4. Click three dot, and choose the file destination, write output file name (ex.- gvsig_layer1), and click on Next button.

5. Now define the type of layer (geometry) its allow four types of layer :
- Point: Point
- Curve: Line
- Surface: Polygon
- Multipoint: Multipoint

6. Also you can add a new field, to click “Add field” button for add attribute fields to the new layer. Once the geometry type and possible additional fields are set, click on the Next button.
7. At last, add the new layer to the View. Click on the Finish button to finish.
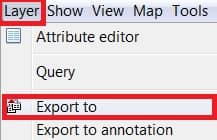
Layer Export
To export a Layer in .shp format (vector layer). All the elements of a layer or only a selection of them can be exported. Supported formats for export are kml, dxf, shp and PostGIS.
1. Go to Layer menu, and select ‘Export to‘.
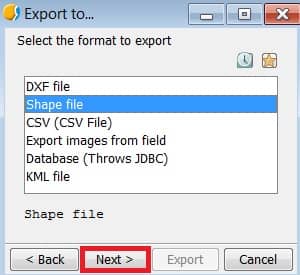
A new window allowing to select the export format opens.
2. Once the format (shape file) is selected, click the Next button.
3. Check on “Use simplified export”, click Next button.
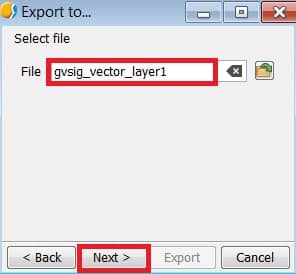
4. Choose the file destination, write output file name, and click on Next button.
5. Select target projection (coordinate), then click Next.

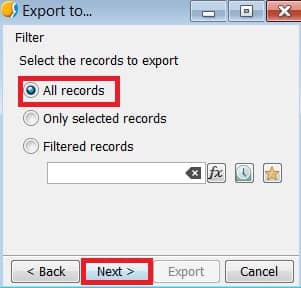
6. Choose “All records”, click Next.
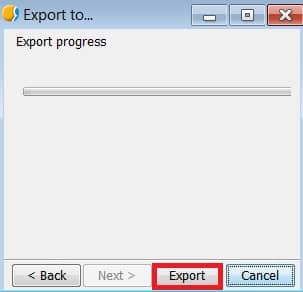
7. Now start the export progress to click Export button.
8. A new export prompt appear, click Yes, if you like to add this new layer in the current view.
9. Finally click OK button.