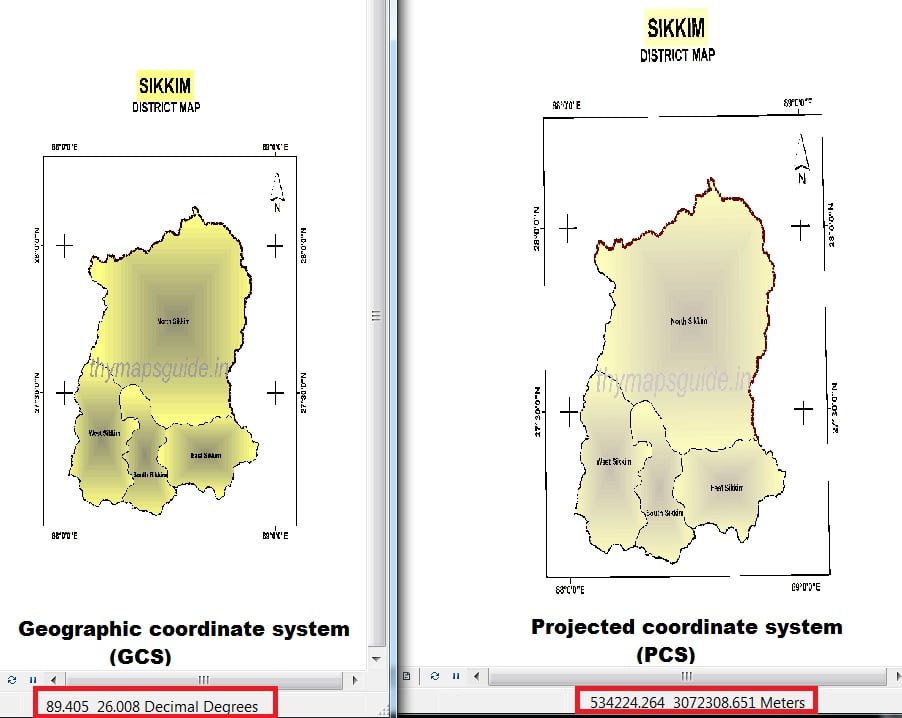
Summary: – In this tutorial we will learn, GCS vs. PCS, Change Data frame’s Coordinate System, Convert GCS to PCS (Raster and Shapefile layer).
How to Change Map Projection in ArcGIS
Geographic vs. Projected Coordinate Systems
What is the difference between a geographic coordinate system (GCS) and a projected coordinate system (PCS)?
| GCS | PCS |
|---|---|
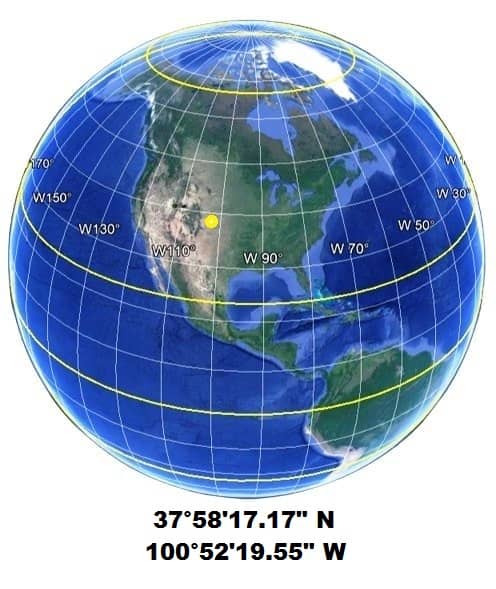
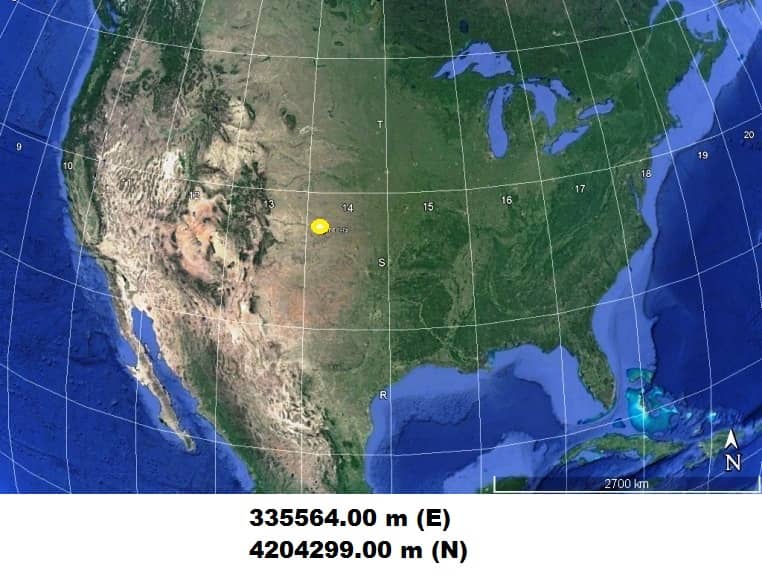
| GCS expressed locations as angles from an anchor point | PCS expressed as distances from a reference point on a plane |
| A GCS defines where the data is located on the earth’s surface | A PCS tells the data how to draw on a flat surface |
| GCS specifies a datum, spheroid, and prime meridian | PCS is the result of applying a map projection to data in a GCS to create a flat map |
| GCS is a three-dimensional spherical surface on the Earth | (PCS) is a flat, two-dimensional surface on the Earth |
| GCS uses coordinates in angular units (e.g. degrees or grads) | PCS uses coordinates in linear units (e.g. meters or feet) |
Specifying a Coordinate System in ArcMap
When you started new ArcMap, it’s empty map, the coordinate system for the default data frame is not defined.
The first layer added to an empty data frame sets the coordinate system for the data frame, but you can change it if necessary.
If you add layers (raster/ vector), they are automatically displayed using the data frame’s coordinate system as long as the data source’s coordinate system is defined.
Change Data frame’s Coordinate System
How to Changing the data frame’s coordinate system in ArcGIS?, following the Steps below:
Steps:
1. Open ArcMap.
2. On the View menu select Data Frame Properties.
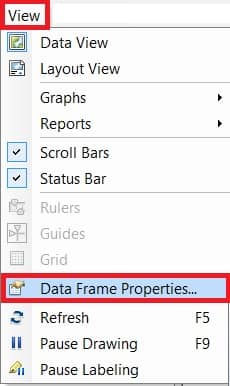
Optionally, you can also open Data Frame Properties window, Right-click in the ArcMap blank area, and select Data Frame Properties.
3. The Data Frame Properties dialog box appears, click the Coordinate System tab and navigate to the desired coordinate system for your map display.
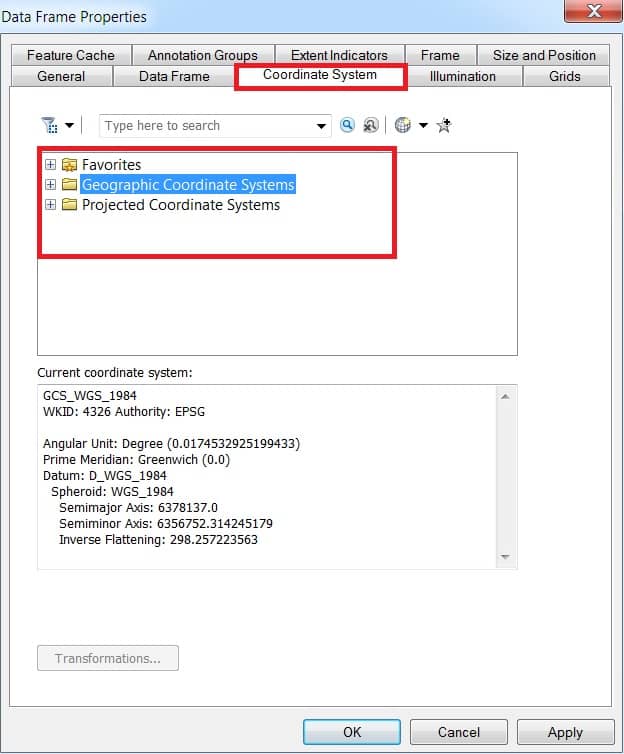
4. Choose a coordinate system to click the Import button and browse to a data source that is defined with the coordinate system you want to use.

5. Once you have chosen a coordinate system, its parameters are displayed in the current coordinate system box, click OK.
All layers in the data frame will now be displayed with that coordinate system.
Convert GCS to PCS Raster Layer
Now discuss, How to Convert Raster layer (georeferencing/ rectified image) Geographic coordinate system (GCS) to Projected coordinate system (PCS)? following the Steps below:
Steps:
1. Open ArcToolbox.
2. ArcToolbox window appears select Data Management Tools.
3. Expand Data Management Tools, then expend Projection and Transformation subgroup, expend Raster, select Project Raster, and double click.
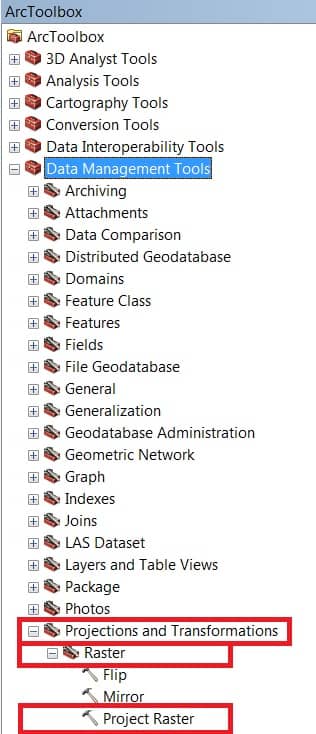
You also use the short cart method, open search window, search project raster in the box, the result is appear.
4. Project Raster pane is open, select input raster, select Input Raster, choose a folder to Output Dataset, then click the Output Coordinate System button.
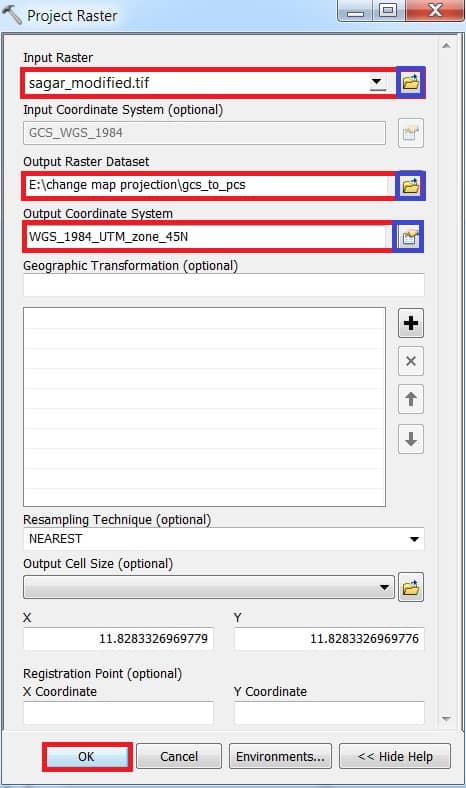
5. Expand the Projected Coordinate Systems folder and choose the required coordinate system, click OK and then press OK.
Once the projection is defined correctly, the projection can be changed.
Open a new projected coordinate system image and check it in the ArcGIS Status bar section.
Convert GCS to PCS Shapefiles (Vector Data)
How to Convert Shapefiles layer (Vector layer) coordinate system by specifying a new projected coordinate system? following the Steps below:
Steps:
1. In ArcCatalog, click the shapefile whose coordinate system you want to define.
2. Right click the shapefile, and select Properties, or double click.

3. In the Shapefile Properties window, Click the XY Coordinate System tab.
4. In the Add Coordinate System, click New and click Projected Coordinate System.
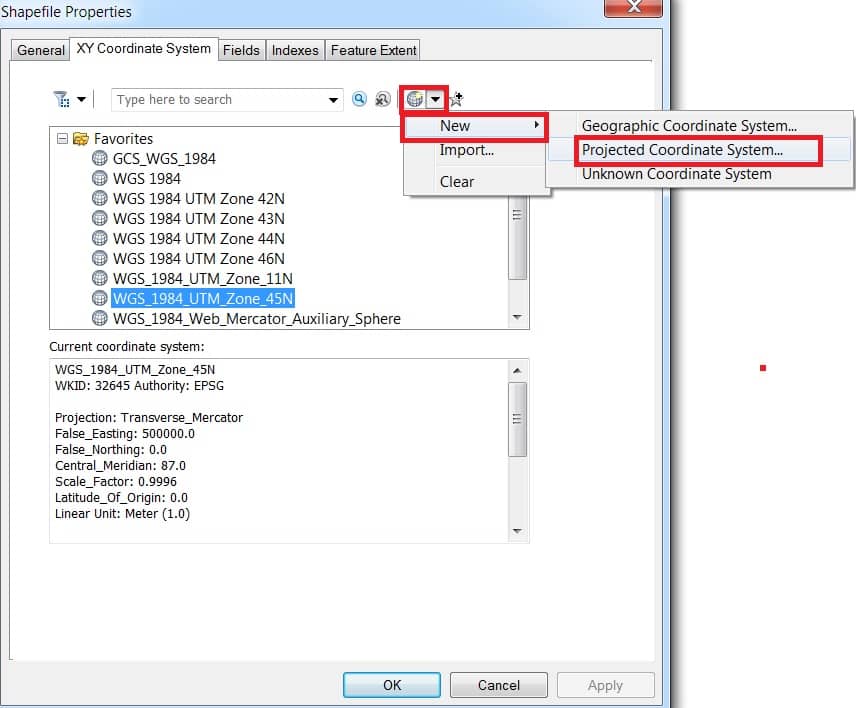
5. New Projected Coordinate System window appears, Type a Name for the custom coordinate system.
6. Click the Projection Name drop-down arrow and click one of the supported projections.
7. Type the appropriate parameter values for the projection.
8. Click the Linear Unit drop-down arrow, and click a predefined unit of measure.

[Alternatively, click <custom> in the drop-down list, type the appropriate meters per unit, then type a name for your custom units.]
You can also change datum by selecting a predefined geographic coordinate system or defining a new geographic coordinate system. Afterward, you can modify the geographic coordinate system’s parameters if you want.
9. Click Apply and OK.
10. Finally click OK on the Shapefile Properties dialog box.
