ArcGIS Maps for Adobe Creative Cloud
Introduction
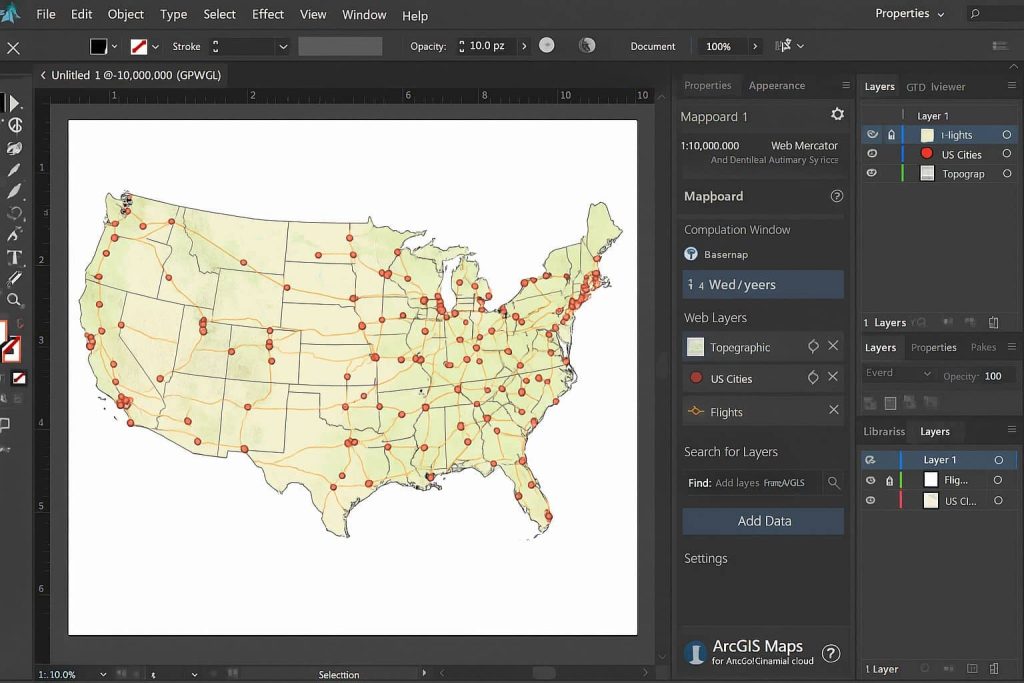
ArcGIS Maps for Adobe Creative Cloud access to design with data-driven maps inside Adobe Illustrator and Photoshop. It’s Quickly find and add geographic content to your work as editable vector layers and high-resolution images.
What It Does
- Lets designers import vector and raster GIS data into Adobe software.
- Maintain map scale, projection, and spatial accuracy while designing.
- Access basemaps, layers, and feature services from ArcGIS Online or Portal.
- Export maps as editable vector layers in Illustrator.
Key Features
| Feature | Description |
|---|---|
| 🔍 Search and Add Layers | Add data layers directly from ArcGIS Online |
| 🗺️ Add Web Maps | Access your own web maps or public maps |
| 🧭 Set Map Scale and Projection | Choose accurate spatial settings |
| 🖊️ Editable Vector Output | Every GIS layer becomes an Illustrator layer |
| 🎨 Graphic Design Flexibility | Use all Adobe design tools while keeping GIS accuracy |
How It’s Works?
- Design simply and efficiently: enhance your map-based projects in geographic data to Adobe Photoshop and Illustrator without needing to leave the application.
- Exceed expectations: Save time tracing maps to highlight specific points while also eliminating the margin of error with Adobe Creative Cloud.
- Tell stories with more impact: Import your data and designing a visually appealing story that enhances your company’s branding.
Download & Install Maps for Adobe Creative Cloud
Download the current version of ArcGIS Maps for Adobe Creative Cloud
To install the Maps for Adobe Creative Cloud extension for use with Adobe Illustrator and Photoshop, verify that you have the required software and complete the steps to install on a single machine or install silently for a large-scale deployment.
Create a Map
First, you’ll add data to a map
Sign in to the Extension
1. Open Adobe Illustrator.
2. From the Window menu, choose Extensions, and click ArcGIS Maps for Adobe Creative Cloud.

3. In the Sign In window, sign in with an ArcGIS Online account.
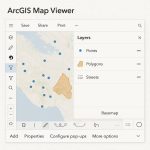
Now the Mapboards and Compilation windows open in Illustrator.
Create a Mapboard
You’ll define the study area by creating a mapboard.
1. In the search box, search your study area.
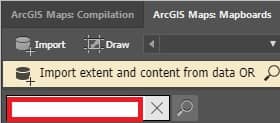
2.In the search box, click the Clear search button to remove the place marker from the map.
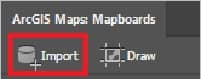
3. In the Mapboards window, click Import and choose from File.
4. In the Open File window, browse your Data folder and double-click to add the folder.
5. On the toolbar, click the Modify mapboard properties button ![]()
6. In the Mapboard Options window, you can change the name your Stores.
7. Also, Change the artboard size to a Print preset.
8. Click OK button.
Use Cases
- Designing infographics and reports
- Creating publication-ready maps
- Styling city plans, tourism maps, or scientific graphics
- Custom cartography and branding