Mergin Maps Tutorial
What is Mergin Maps?
Mergin Maps allows to Record Geo-spatial field data on your mobile device with ease. It is capturing Geodata easily with your mobile or tablet.
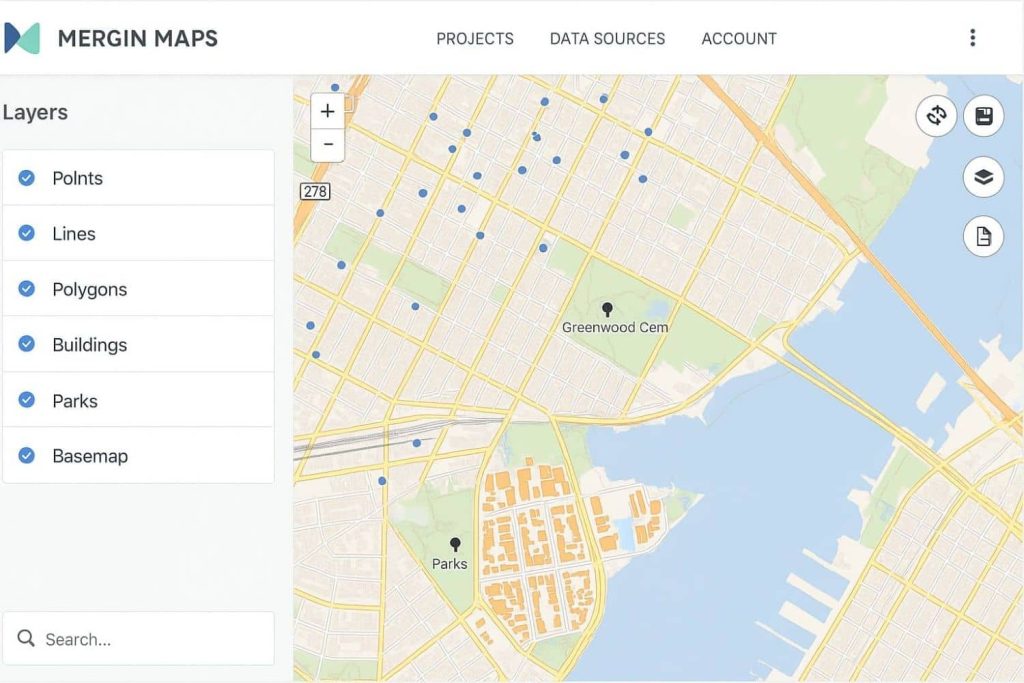
Mergin Map collaborate with your team using instant sync with QGIS. Take your QGIS projects into the field.
Features:
- Data collection is easy and custom forms
- Collect precise vector data in the field
- Manage your project in QGIS
- Achieve high accuracy with external GNSS
- Utilize APIs to sync with your PostGIS Database
Benefits:
- View your data and location on the map
- Capture points, lines, areas and photos
- Scan barcodes and QR codes
- Sync data with one click and no cables
- Automatically and safely merge edits from different surveyors
- Store and version your data safely in the cloud
- Create survey projects with just a few clicks
- Compatible with your existing QGIS projects
Download Mergin Maps
Download Mergin Map into your Android device, iPhone or iPad. and Windows. You can find it in the app store of your platform:
Mergin Maps Tutorial
Create an Account
However, if you sign up to Mergin Maps, you will be able to transfer your projects to other devices, share them, track changes and much more.
1. Navigate to merginmaps.com
2. Click on Start for free.
3. Create your account by filling up the form by your credentials details, and click on Sign Up button.
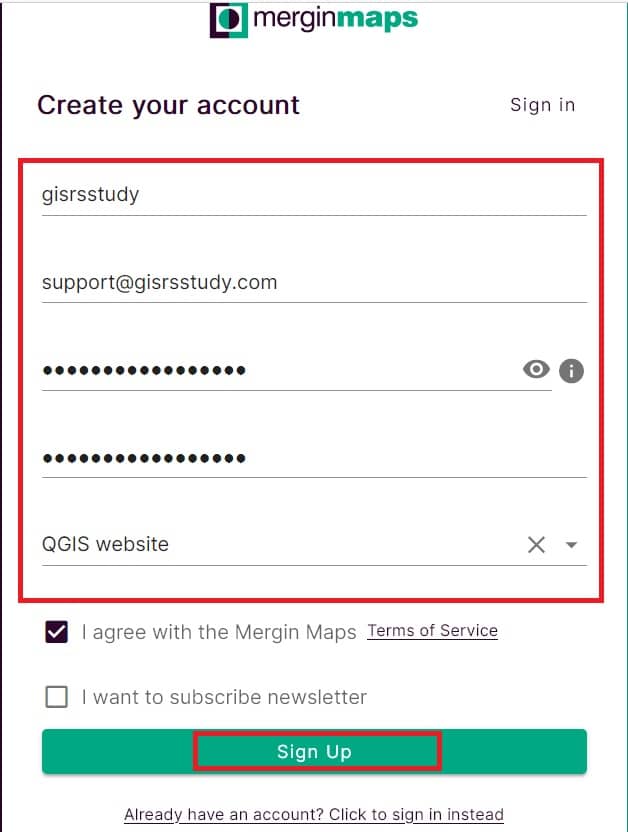
You will receive a confirmation email with a link to verify your email.
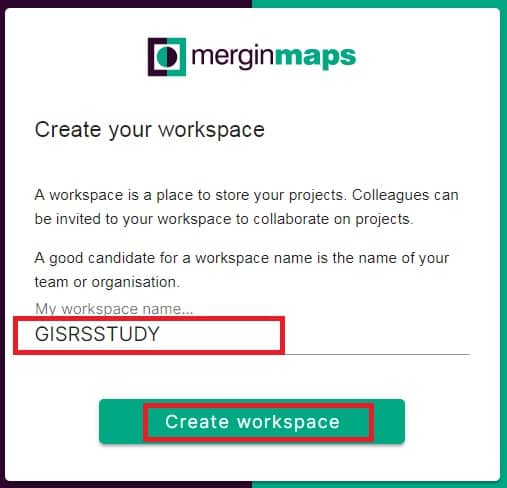
4. Now you enter the Mergin Map workspace. Choose an appropriate name and click on Create workspace.
Create a Project
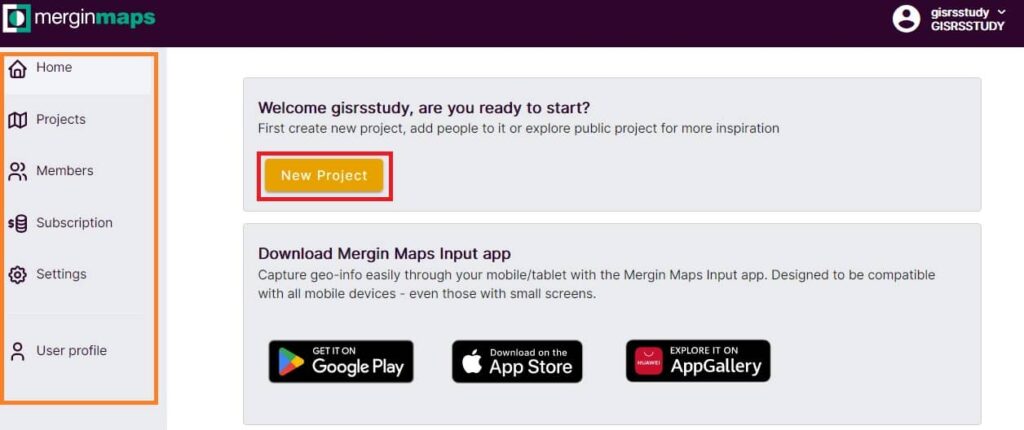
Now enter your dashboard, and click New Project button.
MerginMaps allow to Share, Download, and Clone your project.
Mergin Maps Input’s Project
If you want to use Mergin Map Input on Windows, you need to download the .exe installer from MerginMaps/Input repository and install it on your computer.
Once you have installed and opened Mergin Map Input you will see two projects that will guide you through the basics.
Install Mergin Maps Plugin in QGIS
1. Open QGIS on your computer.
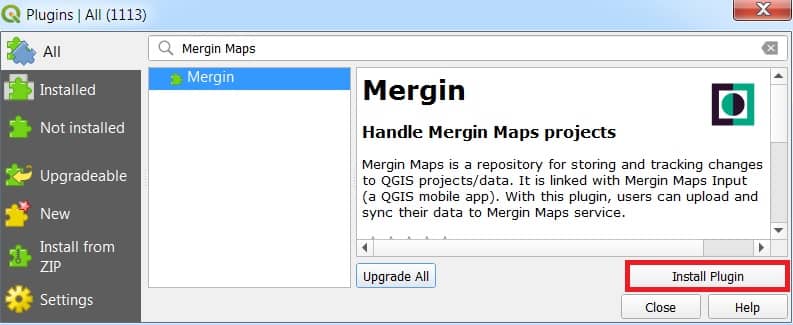
2. Going to the Plugins Tab in menu bar, and choose Manage and install Plugins.
3. Type Mergin Maps in Search bar and install the latest version by clicking the Install Plugin button.
After successful installation plugin, a new toolbar appears.
If you cannot see the toolbar, ensure Mergin Maps Toolbar is checked under View > Toolbars.
Plugin configuration
This plugin allows you to work with your Mergin Map projects in QGIS.
1. Click the Configure Mergin Maps Plugin icon on the Mergin Maps Toolbar:
2. Enter your login credentials if these are blank.
3. Click Test Connection to verify that everything works correctly. Finally click OK button.
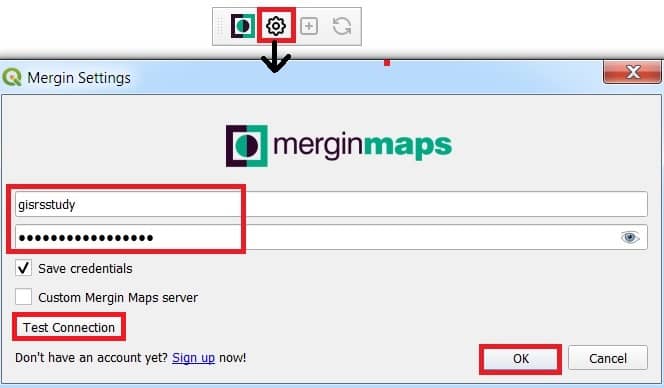
Mergin Map plugin for QGIS is now able to load projects from the Cloud in QGIS.
Downloading a Project in QGIS
Once you have installed the plugin and configured it with your Mergin Maps credentials, you should be able to see it in your QGIS Browser panel. The name of the current workspace is displayed in the square brackets (here: sarah) and available projects are listed underneath.
1. Right-click on the project and select Download.
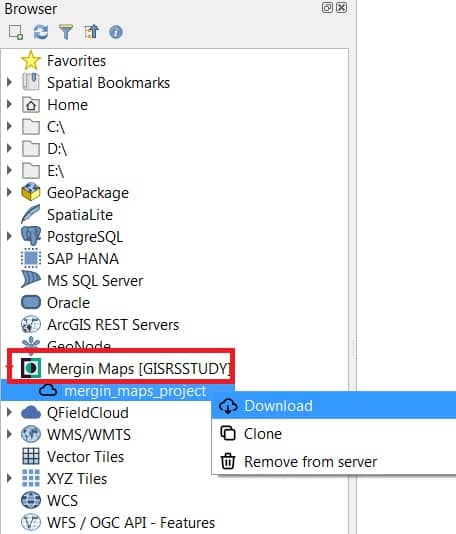
2. Browse to the folder, where you want to save the project and click Select folder. The project will be downloaded here.
Once the download is completed, you will have the option to open the project in QGIS.
Explore Public Projects
1. Right-click on the Mergin Map entry in the QGIS Browser and select the Explore public projects option.
2. Find the project you are interested in. Use the search bar to limit the choices.
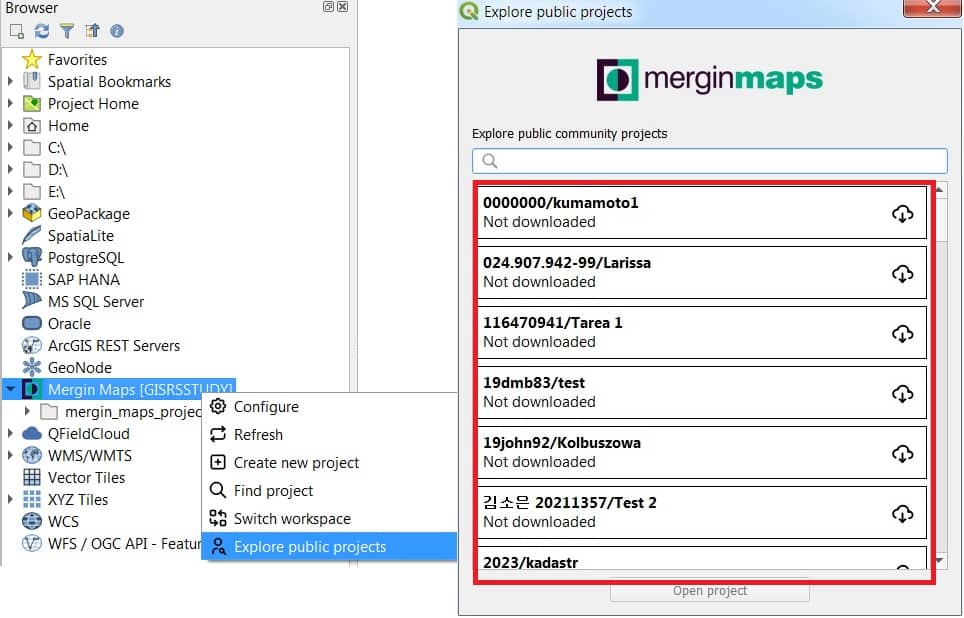
3. Select the project and click Open project. Browse to the folder where you want to save the project.

