Layout in ArcGIS Pro
Layout View in ArcGIS Pro is used to design map compositions for printing or exporting. It lets you combine your maps, legends, scale bars, north arrows, and text into a professional layout
In this tutorial, we will create a layout view using ArcGIS Pro application.
Create a Blank Layout
You can create a blank layout by selecting a page size, choosing a custom height and width.
Following the to create a layout:
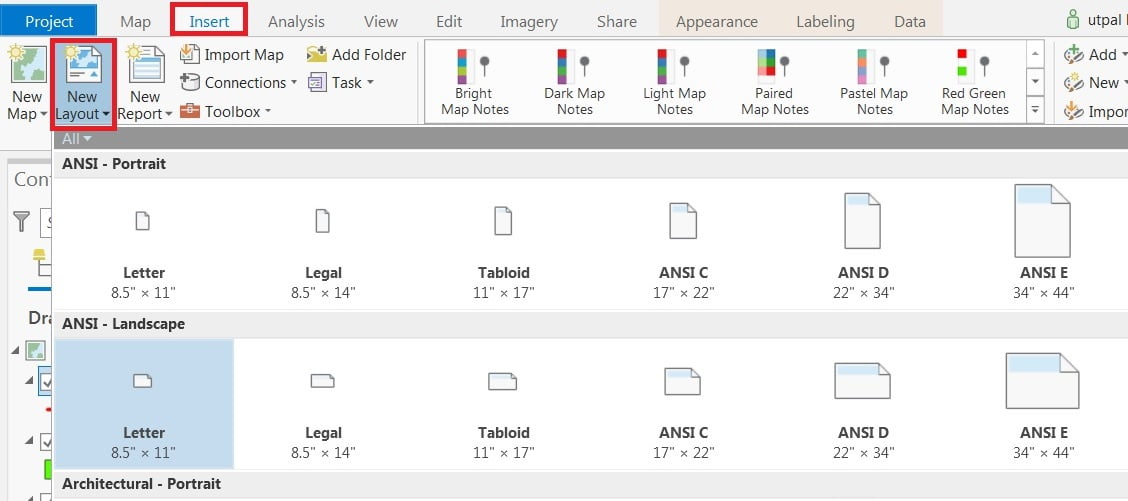
1. On the Insert tab, in the Project group, click New Layout  .
.
2. In the drop-down menu, choose one of the options to create a blank layout:
- A predefined page size from the gallery
- Custom page size
- Select page from printer
3. Now add elements such as map frames, legends, and table frames to finish your layout.
Create a Map Layout
1. On the Ribbon, click the Insert tab and click the New Layout button and choose the layout page dimension (8.5×11 in. landscape).
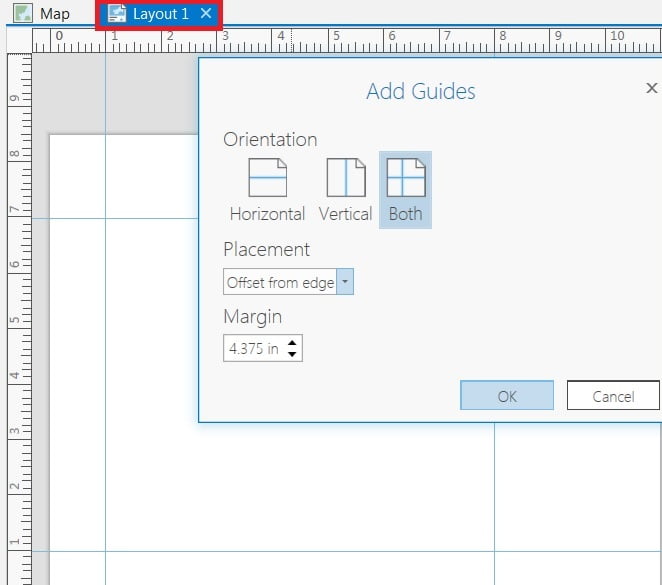
Now open a new layout tap, you can also set a guide to butter orientation of the map layout.
2. Right-click to Ruler bar (scale bar), add guides and set orientation, placement, and margin and then click ok.
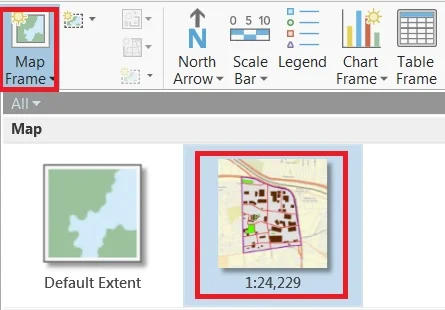
3. Now add to map, on the Insert tab click map frame button, select your map and drag and adjust it to your layout page.
If you already add a map, you can see the map frame layer is added on your contents page.
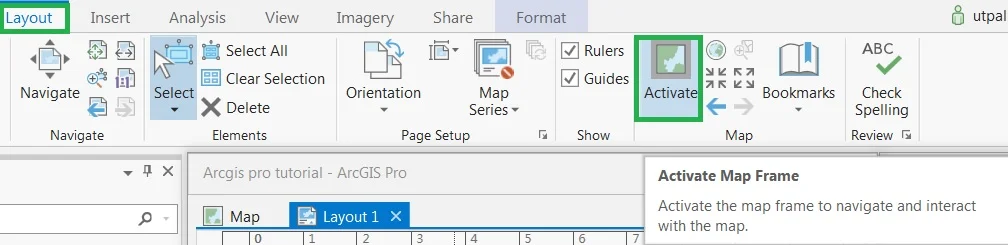
4. Add a map to frame, active to map help to zoom in and zoom out and scroll to map. On the Ribbon, click the Layout tab and select Active.
Anytime you can change this activation, select the Layout tab, and choose close Activation.

Add all the necessary elements, like Title, Scale bar Legend, North arrow, etc.
5. On the Insert tab, under map surrounds group creates Legend, Scale bar, North arrow, Chart, etc.
The Text group writes any text and Heading.
You can create any graphs or add a picture. It’s available on the Graphics group.

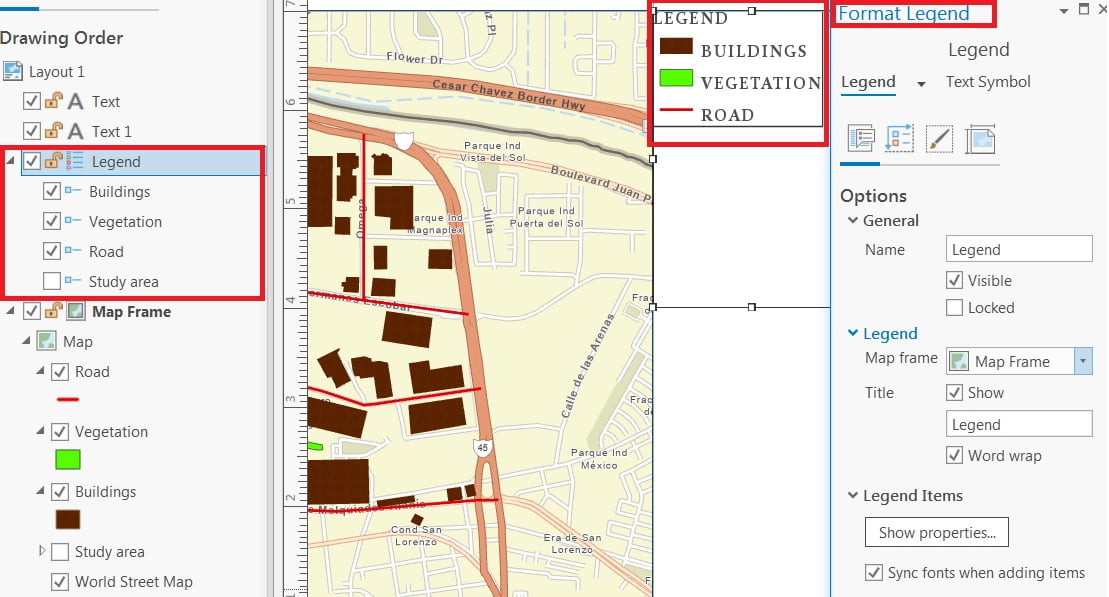
6. Add elements, like Legend, now customized it. Right-click legend box > properties> open a format legend window. Now you can format all the fields (change font color style etc).
All are customization is complete now Export Layout.
7. On the Ribbon, click the Share tab. In the Export group, click Layout.
The Export pane appears to choose an image File format. For Name, browse to your preferred output location and write the file name.
Click Export (you can also set Resolution and color mode).
Create a project Layout
Following the to create a project layout:
1. Start ArcGIS Pro and sign in.
2. On the start page, next to the list of recent projects, click Open another project.
(If you already have a project open, click the Project tab, and click Open.)
3. On the Open Project dialog box, under Portal  , click ArcGIS Online
  .
.
4. At the top of the dialog box, in the Search box, type Make a layout and press the Enter key.
5. In the list of search results, click Make a layout to select the project package.
6. Click OK.
7. On the View tab, Windows group, click Reset Panes  , and click Reset Panes for Mapping (Default).
8. Make the Region map view active by clicking its tab, located directly above the view.
9. Click the Layout Portrait view to make it the active view.
10. In the Insert tab, click New Layout to set page size and orientation.
11. Under ANSI -, choose page size.
12. A new, blank layout view opens, under Drawing Order, right-click Layout, and click Properties.
13. On the Layout Properties dialog box, change all necessary elements for your project.
14. On the Quick Access Toolbar, click Save  .
.