In this article, we will discuss ArcGIS Geoprocessing Tools and learn how to create them.
Geoprocessing: Tools (ArcGIS)
Geoprocessing refers to a set of Geographic Information Systems (GIS) operations used to analyze, manipulate, and transform spatial data. It is essential for solving spatial problems and making informed decisions based on geographic data.
Geoprocessing Tools are essential components in GIS used to manipulate spatial data and perform analysis using GIS software, like; ArcGIS, QGIS, and others.
Common Geoprocessing Tools in GIS:
| Tools | Description |
|---|---|
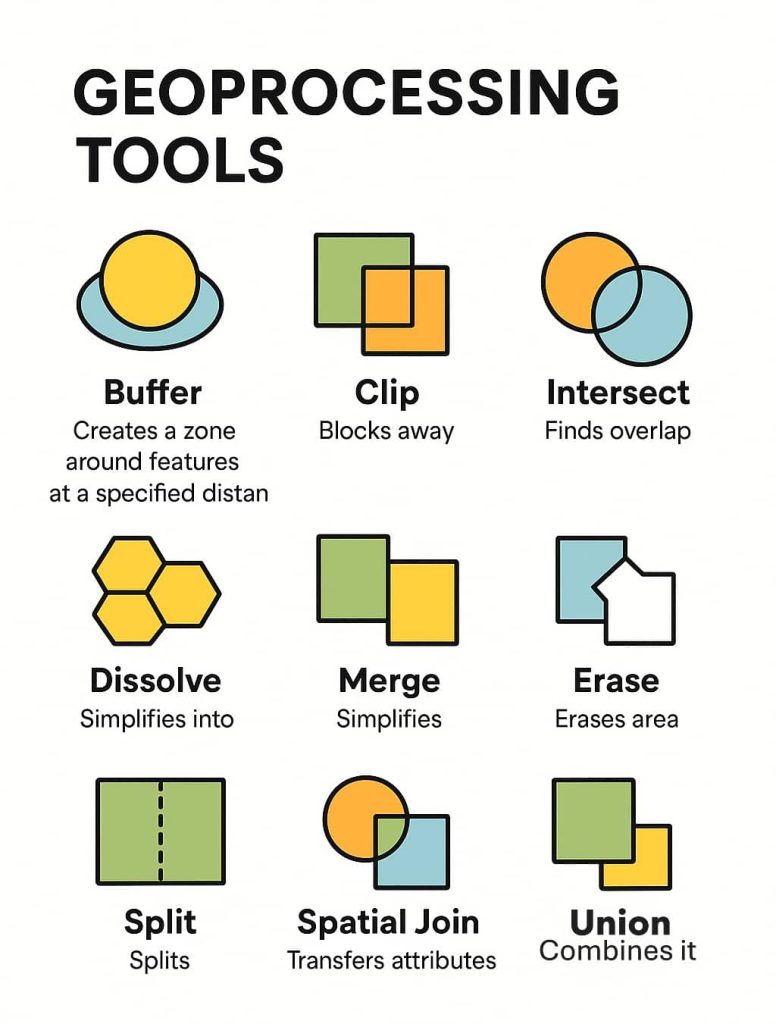
| Buffer | Creates a zone around a feature (point, line, or polygon) at a specified distance. |
| Clip | Extracts features from one layer based on the boundaries of another layer. |
| Intersect | Identifies overlapping areas between multiple layers and creates new features from those intersections. |
| Union | Merges multiple layers to include all features from all inputs. |
| Dissolve | Combines adjacent features based on a shared attribute to reduce complexity. |
| Merge | Combines features from two or more layers into a single layer. |
| Erase | Removes areas of one layer that overlap with another. |
| Spatial Join | Transfers attribute data from one layer to another based on spatial relationships. |
| Split | Divides input features into multiple outputs using another dataset. |
The Tools can improve your productivity because the tools apply edits in bulk, such as to all features or all selected features. Most times, a similar editing function applies to only one feature at a time.
Uses of Geoprocessing–
Geoprocessing Tools in a model to fix many of the spatial integrity issues, applying a Geodatabase topology with the must does not have Dangle’s rule to find additional lines. That does not connect, then using the ArcMap editing tools to address any remaining errors.
7 Major Geoprocessing Tools in ArcGIS
Perform this task, first set Environments, or connect dataset Folder. It helps to Input and Output data destination.
Environments Setting–
Open ArcToolbox, Arc Toolbox pane appears, select ArcToolbox right-click, and select Environments. Environments window are open, Expend Workspace and select current Workspace and scratch Workspace, then click OK.

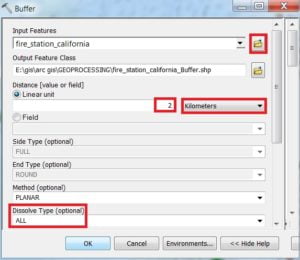
1. Buffer
Creates Buffer polygons around input features to a specified distance.

Open ArcToolbox Arc toolbox window appears to expand Analysis Tools. Then expend the Proximity subgroup. and select Buffer and double click it.

You can also use the shortcut method to open the Buffer tool. Select Geoprocessing Tab, dropdown, and choose Buffer.
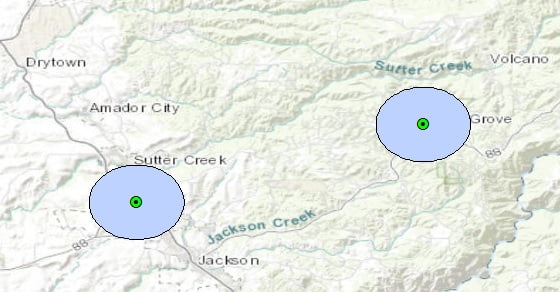
Buffer window appears, Browse Input file. Output files are automatically selected on your Folder Because you have already set up the Environments. Now input Distance value(2) and Unit(km), choose Dissolve Type- All, and click OK.
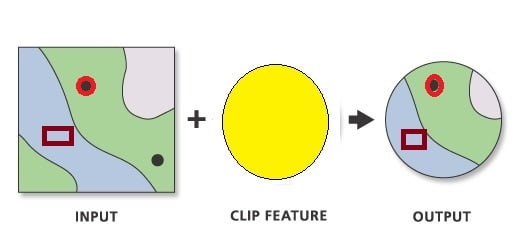
2. Clip
Use Clip tool to cut out a piece of one Feature class. This is particularly useful for creating a new feature class—also referred to as a study area or Area of Interest (AOI). That contains a Geographic subset of the features in another, larger feature class.
Open the ArcToolbox Arc toolbox window appears to expand Analysis Tools, then expend the Extract subgroup, select Clip, and double click it.
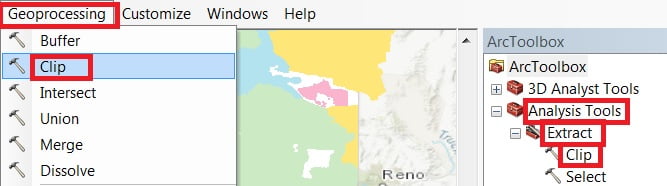
You can also use the shortcut method to open the Clip tool. select Geoprocessing Tab, dropdown, and choose Clip.
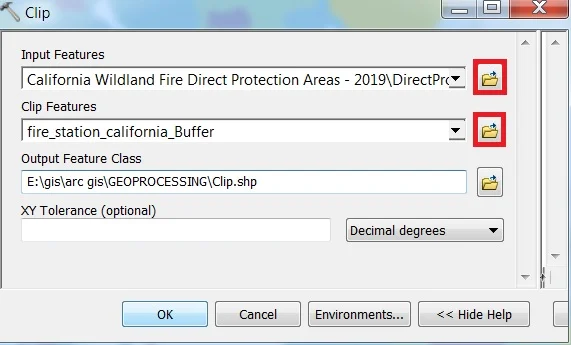
Clip window appears, browse Input file. Output files are automatically selected on your Folder because you have already set up the Environments, now just click OK.
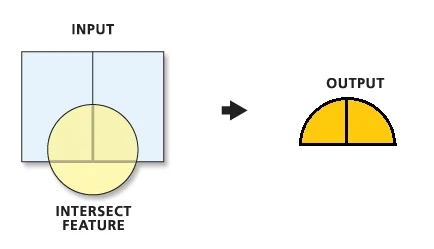
3. Intersection
The Intersect tool calculates the geometric intersection of any number of feature classes and feature layers. The features or portion of features that are common to all inputs will be written to the output feature class.
Open ArcToolbox Arc toolbox window appears to expend Analysis Tools, then expend the Overlay subgroup, select Intersect and double click it.
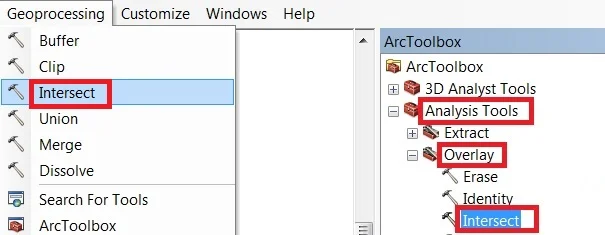
You can also use the shortcut method to open the Intersect tool. Select Geoprocessing Tab, dropdown, and choose Intersect.
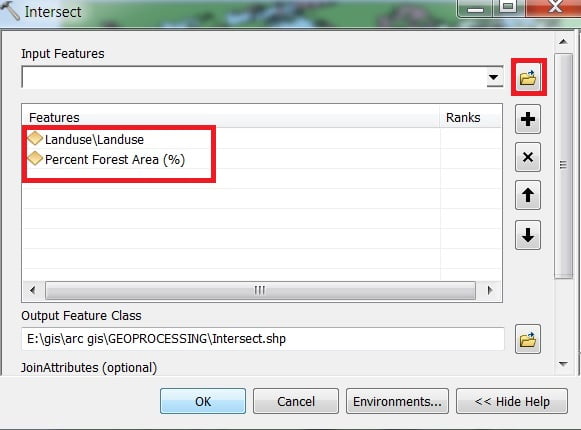
Intersect window appears, browse Input file. Output files are automatically selected on your Folder because you have already set up the Environments, just click OK.

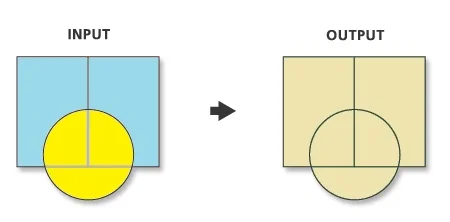
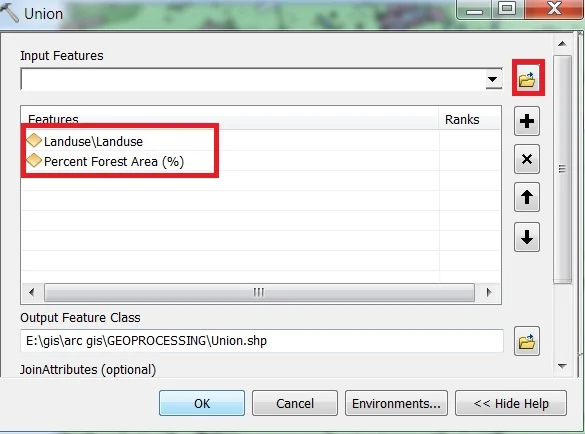
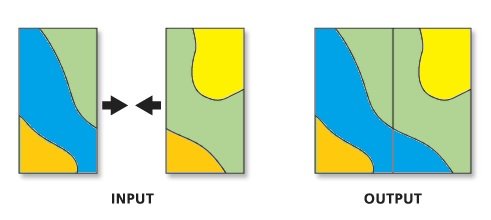
4. Union
Computes a geometric Union of the input features. All features and their attributes will be written to the output feature class. Input of all feature classes or feature layers must be polygons.
Open ArcToolbox Arc toolbox window appears to expend Analysis Tools, then expend the Overlay subgroup, select Union and double click it.
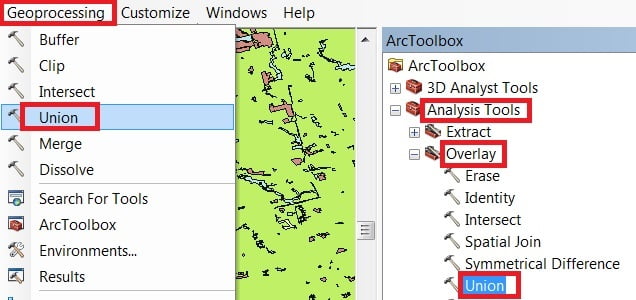
You can also use the shortcut method to open the Intersect tool. Select Geoprocessing Tab, dropdown, and choose Union.
Union window appears, browse Input files. Output files are automatically selected on your Folder because you have already set up the Environments. Now just click OK.

5. Marge
Use Marge tool to combine datasets from multiple sources into a new, single output dataset. All input datasets must be of the same type.
Open ArcToolbox Arc toolbox window appears to expand Data Management Tools, then expand the General subgroup, and select Marge and double click it.
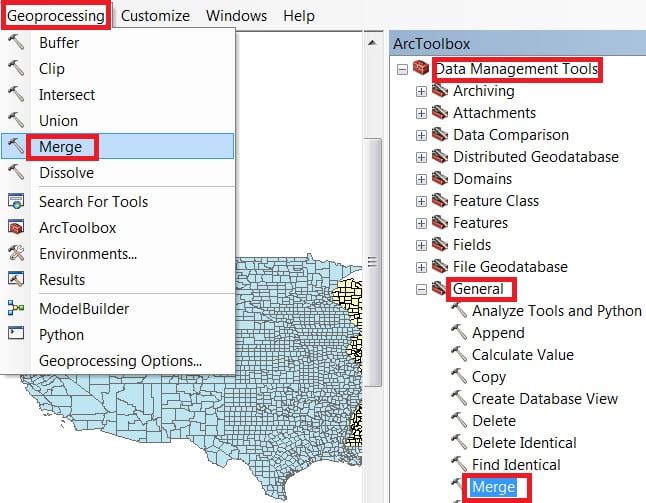
You can also use the shortcut method to open the Intersect tool. Select Geoprocessing Tab, dropdown, and choose Marge.
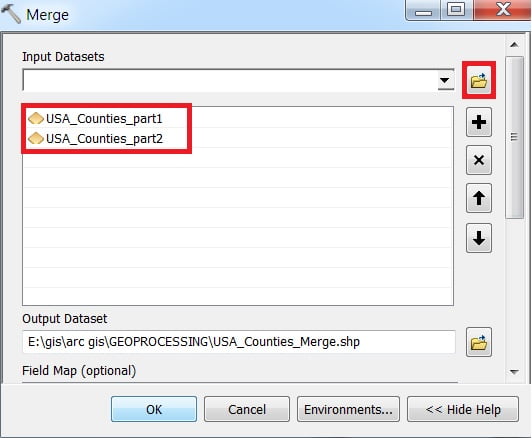
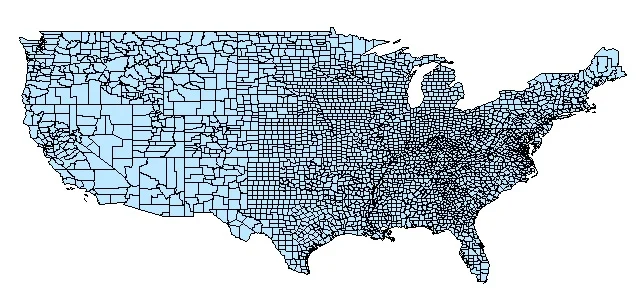
Marge window appears, browse Input files. Output files are automatically selected on your Folder because you have already set up the Environments. Now just click OK.
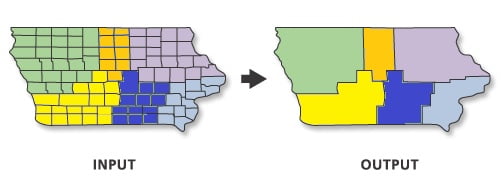
6. Dissolve
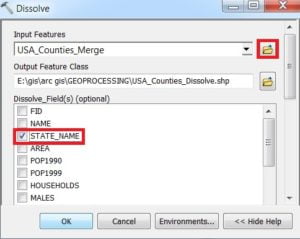
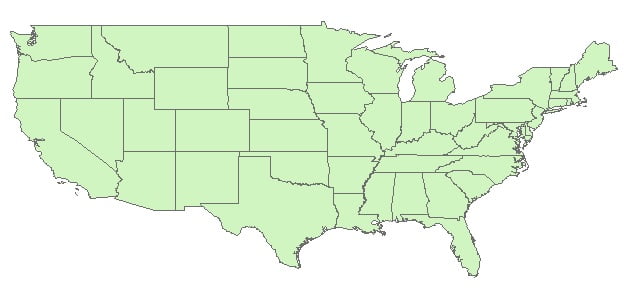
Use the Dissolve tool when you want to aggregate features based on a specified attribute or attributes. For example, you could take a feature class data collected on a county-by-county basis. Use Dissolve to create a feature class containing based on the name of each county.
Open ArcToolbox Arc toolbox window appears to expand Data Management Tools, then expend the Generalization subgroup, select Dissolve and double click it.
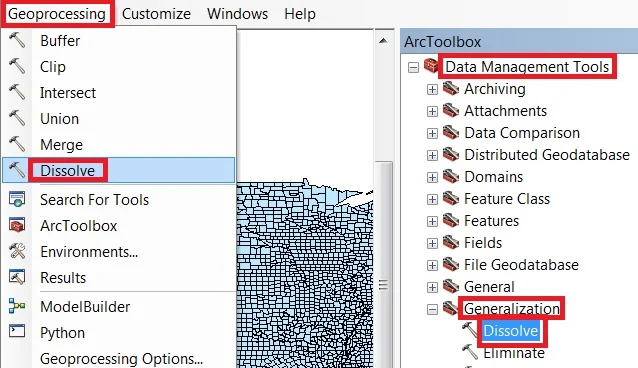
You can also use the shortcut method to open the Dissolve tool. Select Geoprocessing Tab, dropdown, and choose to Dissolve.
Dissolve window is appears, browse Input files. Output files are automatically selected on your Folder because you have already set up the Environments. The most important, select your Dissolve Field and click OK.
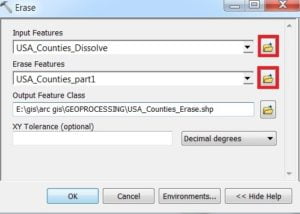
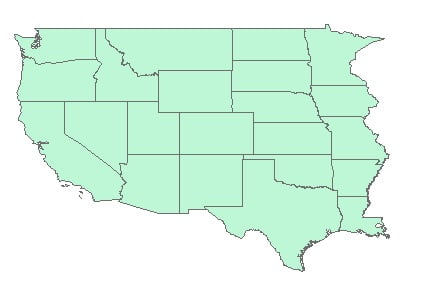
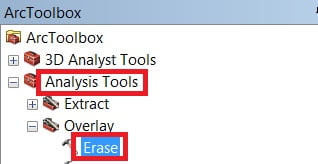
7. Erase
Creates a feature class by overlaying the Input Features with the polygons of the Erase Features. Only those portions of the input feature falling outside the erase features outside boundaries are copied to the output feature class.

Open ArcToolbox Arc toolbox window appears to expand Analysis Tools, then expend the Overlay subgroup, select Erase, and double click it.
Dissolve window is appears, browse Input file and select Erase Feature. Output files are automatically selected on your Folder because you have already set up the Environments. Now just click OK.