Workforce for ArcGIS
What is ArcGIS Workforce?
ArcGIS Workforce one type of mobile app that uses the power of location to coordinate your field workforce. It’s designed to help you reduce errors, boost productivity, and save money.
This latest release of Workforce is a major change and upgrade of the product. Workforce launch has many exciting new features;
- Downloading maps – you create web app, but you’ll need to download the project map to your device before you can use it.
- New user experience – inspired by a common design shared with Collector, Explorer, and the new Field Maps app, Workforce has a consistent look and feel with these apps. The overflow menu to access tools, the sliding panel to show/hide the map are common in all the apps now.
- Sync panel – now that projects are offline, you can decide to review your work and manually sync changes, Workforce automatically sync changes for you.
- Migrate Classic projects – When ready to migrate a Classic project, click the “Migrate Project” button that appears on Classic project cards.
How Workforce works
- Create assignments – use the Workforce web app to create assignments in your project.
- Work in the field – Using the Workforce mobile app, mobile workers complete assignments in the field and sync updates they’ve made while working offline.
- Download the map – While in a connected environment, download the map you’ll be working with for the day.
ArcGIS Workforce Tutorial
Sign In
Before create your project, first Sign Up/Sign In ArcGIS Workforce.
Create a Project
Steps:
1. The Projects page appears, Click Create Project.
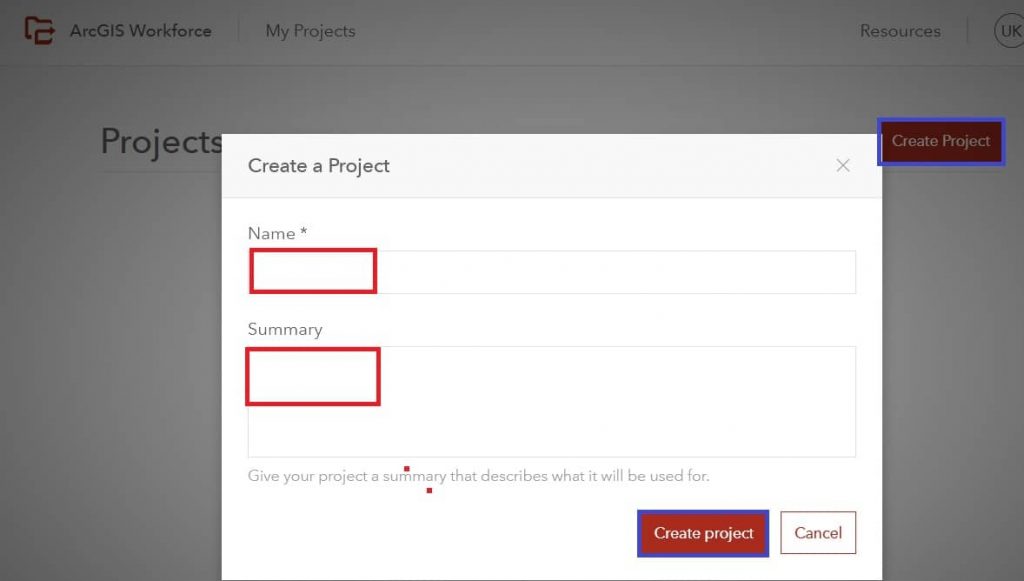
2. Provide a name and summary for your project and click Create project.
Assignment Type
On the Assignment Types tab, you’ll define the work that is being done in the project.
1. In the Add an Assignment Type box, type an assignment type you want to add and click + Type.
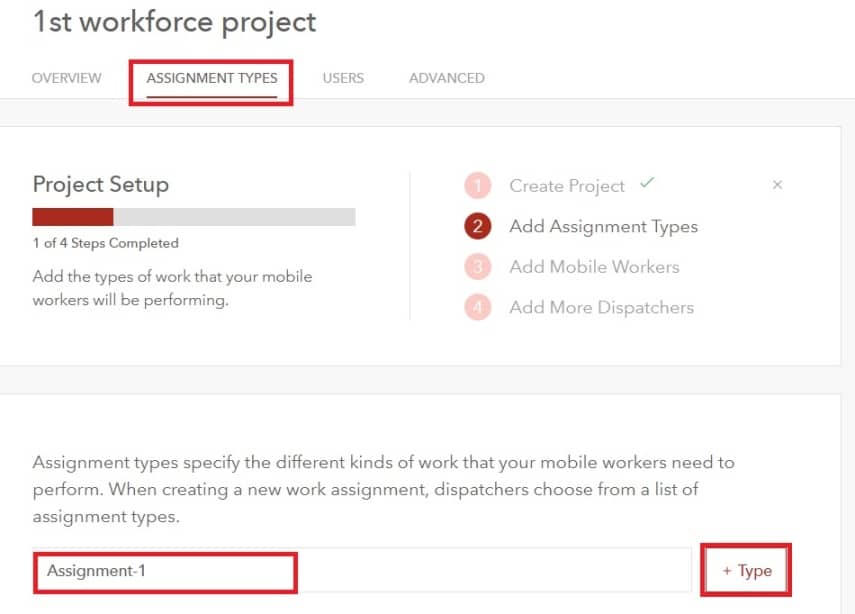
[Assignment types specify the different kinds of work that your mobile workers need to perform.]
Project User
On the Users tab, you’ll add the users who will participate in this project
1. Search for users to add to the project.
2. From the Organization User drop-down menu, select a user to add to the project.
3. From the Project Role menu, assign the user either the dispatcher or mobile worker role.
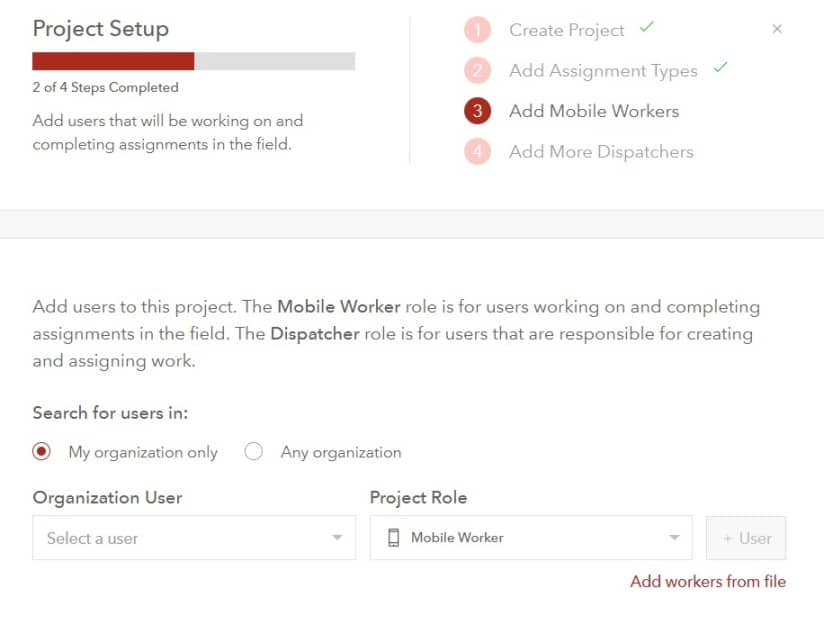
4. Click +User.
Customize the Maps
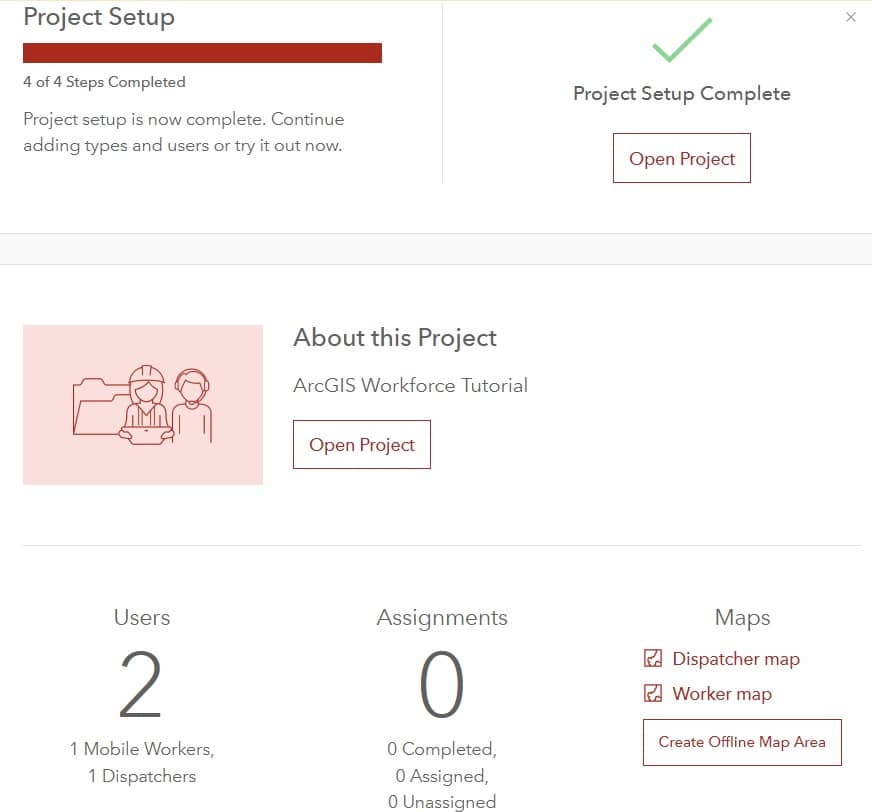
4. Click the Overview tab of the project.
4. Under the Maps list, click Dispatcher map or Worker map depending on which map you want to configure.
4. Click Add and add layers of interest.
The Worker map also includes the Assignment Integrations, Assignment Types, and Dispatchers tables.
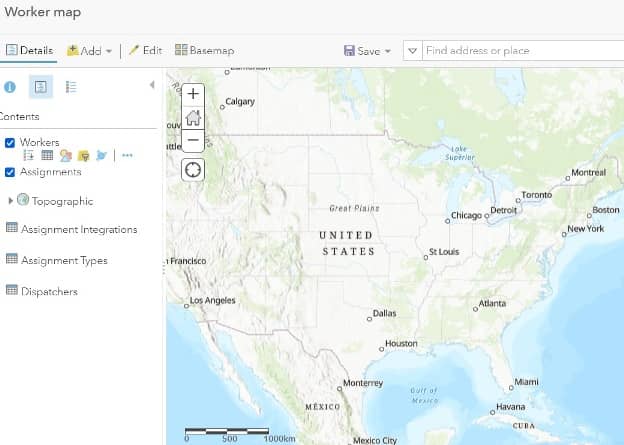
You can also add your organization’s asset layers to the maps.